


PRV-LX10
159
5
6
7
8
5
6
7
8
C
D
F
A
B
E
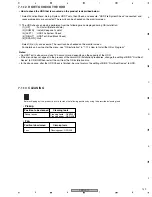
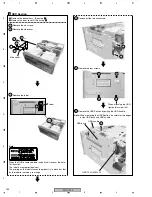
1
Remove the two filter covers.
~
Remove the bonnet Assy. (See step
¥
)
Ÿ
Remove the tray panel Section. (See step
ø
)
Filter cover
Filter cover
Air filter
Air filter
2
Remove the two air filters.
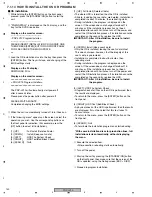
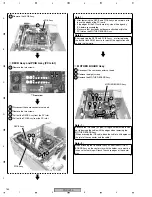
3
Remove the two screws.
4
Remove the three screws.
Front panel Section
3
5
Unhook the five hooks.
6
Remove the front panel Section.
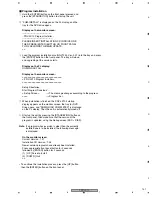
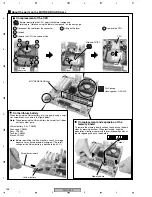
1
2
1
2
5
5
5
5
6
5
Front panel Section
FLKB Assy
HPVB Assy
Shield finger
3
3
4
4
4
KEYB Assy
DRV1B Assy
DRV2B Assy
Shield finger USBB Assy
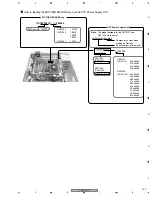
When reattaching the front panel Section to the main unit,
pull the wires shown in the figure below in the direction of the
arrow and adjust the length of the wires so as not to deform
the shield finger.
Note:


