3
En
English
such cases, free up sufficient memory. We recommend installing additional
memory for stable operation.
!
Depending on the computer’s power-saving settings, etc., the CPU and hard
disk may not provide sufficient processing capabilities. For notebook comput-
ers in particular, make sure the computer is in the proper conditions to provide
constant high performance (for example by keeping the AC power connected)
when using TRAKTOR LE 2.
!
Note that problems may arise with the functionality of TRAKTOR LE 2 depending
on other software running on your computer.
!
A separate contract with and payment to a provider offering Internet services is
required.
Installing the TRAKTOR LE 2 software
About the installation procedure (Windows)
1 Insert the included TRAKTOR LE 2 software CD-ROM
into the computer’s CD drive.
2 From the Windows [Start] menu, double-click the
[Computer (or My Computer)] > [Traktor 2] icon.
The contents of the CD-ROM are displayed.
3 Double-click [Traktor 2 Setup.exe].
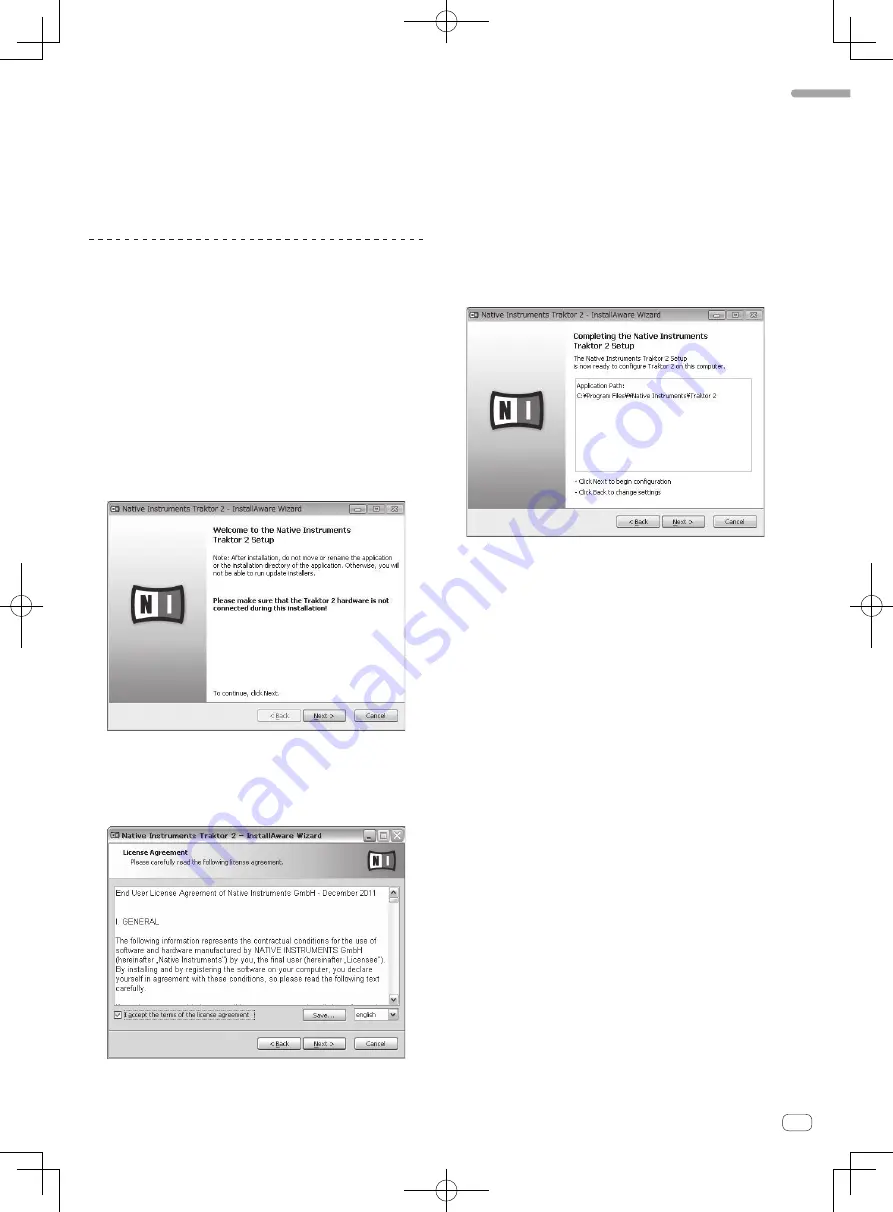
The TRAKTOR 2 installer is launched.
4 Once the TRAKTOR 2 installer is launched, click [Next].
—
To return to the previous screen: Click [
Back
].
—
To cancel installation: Click [
Cancel
].
5 Read the contents of the [License Agreement]
carefully, and if you agree, check [I accept the terms of
the license agreement], then click [Next].
If you do not agree to the terms of the [
License Agreement
], click
[
Cancel
] to cancel installation.
6 A screen for selecting the type of installation for
TRAKTOR 2 appears. Click [Next].
7 Choose where to install TRAKTOR 2, then click [Next].
To choose the normal place of installation, simply click [
Next
].
To install in a different location, click [
Change...
], choose the place of
installation, then click [
Next
].
8 Select the Native Instruments hardware driver, then
click [Next].
Check the check box for your hardware.
9 To install the Traktor Kontrol X1 or Traktor Kontrol S4
driver, check the check box, then click [Next].
10 When the following screen appears, click [Next].
Installation begins.
The installation completed screen appears once installation is
completed.
11 Click [Finish].
This completes the installation procedure.
About the installation procedure (Mac OS X)
1 Insert the included TRAKTOR LE 2 software CD-ROM
into the computer’s CD drive.
The [
Traktor 2
] icon appears on the screen.
2 Double-click the [Traktor 2] icon.
The contents of the CD-ROM are displayed.
3 Double-click [Traktor 2 Installer.mpkg].
The TRAKTOR 2 installer is launched.
4 Once the TRAKTOR 2 installer is launched, click
[Continue].
5 Read the contents of the license agreement carefully,
then click [Continue].
6 If you agree to the contents of the usage agreement,
click [Agree].
If you do not agree to the contents of the usage agreement, click
[
Disagree
] to cancel installation.
7 Select the Native Instruments hardware driver, then
click [Continue].
Check the check box for your hardware.
8 Choose where to install TRAKTOR 2, then click
[Install].
To choose the normal place of installation, simply click [
Install
].
To install in a different location, click [
Change Install Location...
],
choose the place of installation, then click [
Install
].
Installation begins.
The installation completed screen appears once installation is
completed.
9 Click [Restart].
This completes the installation procedure.


