


112
Chapter
8
Customi
sing
the Audio Source Setting
AV
❒
The adjustments of
BRIGHTNESS
and
CONTRAST
are stored separately for
light ambient (daytime) and dark ambient
(nighttime). A sun
or moon is dis-
played to the left of
BRIGHTNESS
and
CONTRAST
, respectively, as the ambient
light sensor determines brightness or
darkness.
❒
You cannot adjust
COLOR
and
HUE
for
the source without a video and navigation
map display.
❒
You can adjust the picture adjustment for
the rear view camera only when
CAMERA
in
SETUP
menu is turned on.
➲
Setting for rear view camera
➞
Operation
Manual
❒
The picture adjustment may not be able to
be used with some rear view cameras.
❒
The same setting is selected for the normal
background picture and the navigation
map display.
❒
Because of the LCD screen characteris-
tics, you may not be able to adjust the
screen at low temperatures.
2
Touch “+” or “–” to adjust the selected
item.
Each time you touch “
+
” or “
–
” increases or
decreases the level of selected item.
+24
to
–
24
is displayed as the level is increased or
decreased.
3
Touch “ESC” to return to the previous
screen.
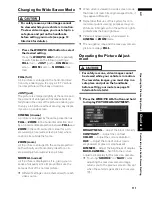
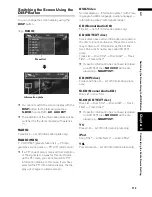
Adjusting the dimmer
The adjustment of
DIMMER
is stored separately
for each ambient light; daytime, evening and
nighttime. The brightness of the LCD screen
adjusts automatically to the optimum level in
accordance with the ambient light based on the
set values.
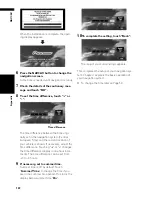
1
Press the WIDE/PIC ADJ button and hold
to display PICTURE ADJUSTMENT.
❒
The ambient light level icon used as the
standard for adjusting
DIMMER
appears
above the level bar.
❒
The icons indicating the current ambient
brightness used for adjusting
BRIGHTNESS
and
CONTRAST
may
differ from
DIMMER
slightly.
• Yellow sun
— bright ambient light (day-
time)
• Red sun
— intermediate brightness
(evening)
• Blue moon — dark ambient light (night-
time)
2
Touch
or
to adjust the brightness.
The level indicates the brightness of the
screen being adjusted. The further the level
indicator moves to the right, the brighter the
screen.
3
Touch “ESC” to hide the touch panel
keys.
❒
Because of the LCD screen characteris-
tics, you may not be able to adjust the
screen at low temperatures.
Op
erat
in
g the P
ict
ure
Ad
justment
Summary of Contents for AVIC-X1BT
Page 1: ...DVD AV NAVIGATION HEAD UNIT AVIC X1BT Operation Manual ...
Page 62: ...60 Chapter 5 Customising Your Navigation System NAVI ...
Page 102: ...100 Chapter 7 Using the AV Source Pioneer AV Equipment AV AUX AV ...
Page 122: ...120 Chapter 9 Operating Your Navigation System by Voice NAVI AV ...


