3. Recording
38
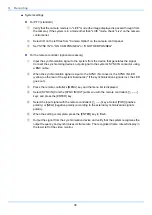
System settings
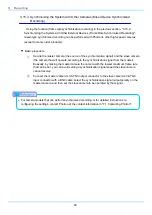
For PFV (standard)
①
Verify that the camera mode is in "LIVE" mode (the image displayed is passed through from
the camera). If the system is in a mode other than "LIVE "mode, check "Live" on the camera
control panel.
②
Select I/O on the left tree from "Camera Option" on the camera control panel.
③
Set "SYNC IN" to "ON CAM POS/NEG" or "ON OTHER POS/NEG".
For the remote controller (optional accessory)
①
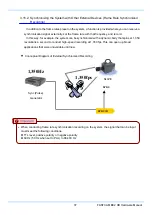
Input the synchronization signal to the system from the device that generates the signal.
Connect the synchronizing device’s output signal to the system’s SYNC IN connector using
a BNC cable.
②
When the synchronization signal is input to the SYNC IN connector, the SYNC IN LED
(yellow) on the rear of the system illuminates (* If the synchronization signal is lost, the LED
goes out).
③
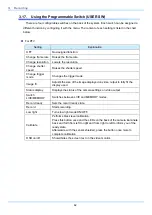
Press the remote controller's [MENU] key and the menu list is displayed.
④
Select [SYNC IN] from the [SYNC IN/OUT] submenu with the remote controller's [
↑↓←→
]
keys and press the [ENTER] key.
⑤
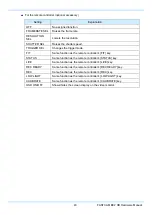
Select the input signal with the remote controller's [
↑↓←→
] keys. Select [POS] (positive
polarity) or [NEG] (negative polarity) according to the external synchronization signal's
polarity.
⑥
When the setting is complete, press the [ENTER] key to finish.
⑦
Output the signal from the synchronization device and verify that the system recognizes the
output frequency and synchronizes its frame rate. The recognized frame rate will display in
the lower left of the video monitor.
Summary of Contents for Fastcam BC2 HD
Page 1: ...F FA AS ST TC CA AM M B BC C2 2 H HD D...
Page 12: ......
Page 13: ...1 FASTCAM BC2 HD Hardware Manual 1 Overview 1 1 Product Overview and Features...
Page 19: ...7 FASTCAM BC2 HD Hardware Manual Top View Finder Relay Box Connector Focus Mark...
Page 56: ...3 Recording 44...
Page 65: ...53 FASTCAM BC2 HD Hardware Manual...
Page 79: ...67 FASTCAM BC2 HD Hardware Manual 6 Warranty 6 1 About the Warranty...
Page 81: ...69 FASTCAM BC2 HD Hardware Manual 7 Contacting Photron 7 1 Contacting Photron...


