Palette Properties
To edit the palette properties, select the palette as the object to be edited by clicking on an
empty area of the grid. In the first box of the property editor form, the word
frmRTForm:
TfrmRTForm
will appear. The properties listed on the form will only affect the palette. A
description of the basic and advanced palette properties is listed below.
Basic Properties
Color: Sets the color of the palette.
Height: Sets the total height of the palette
Left: Sets the screen position of the palette as measured from the left side of the
monitor.
Title: Text that appears at the top of the palette.
Top: Sets the screen position of the palette as measured from the top side of the
monitor.
Width: Sets the total width of the palette.
Advanced Properties
Font: Sets the default font for labels and text. Click in the font box and then click
the small button at the end of the box to select a font.
Color: Sets the color of the text.
Height: Sets the height of the font object in pixels. If you wish to use a specific
point size, you should set the Size property.
SeLeCTING SCADA UNITS
You may retrieve and display I/O information from one or more SCADA 3000 units on a single
Real-time screen. To do this, you must define which units will be opened when the screen is
run. To select SCADA units click on the
Data
tab. Next, click on the SCADA 3000 icon and
then click on the palette. The SCADA icon will appear on the palette. (It becomes invisible
in Run mode.) Use the Property Editor to assign the icon to a unit in your database. Click
on SCADA Unit in the Property Editor to assign the icon to a unit in your database. Click on
SCADAUnit
in the Property Editor and click on the button at the end of the box. This will
bring up a form to select a SCADA 3000 from your database.
Use the pulldown menu to the right to bring up the list of possible units. Select the unit you’re
configuring. Once you select a unit, the Active box should show a checkmark.
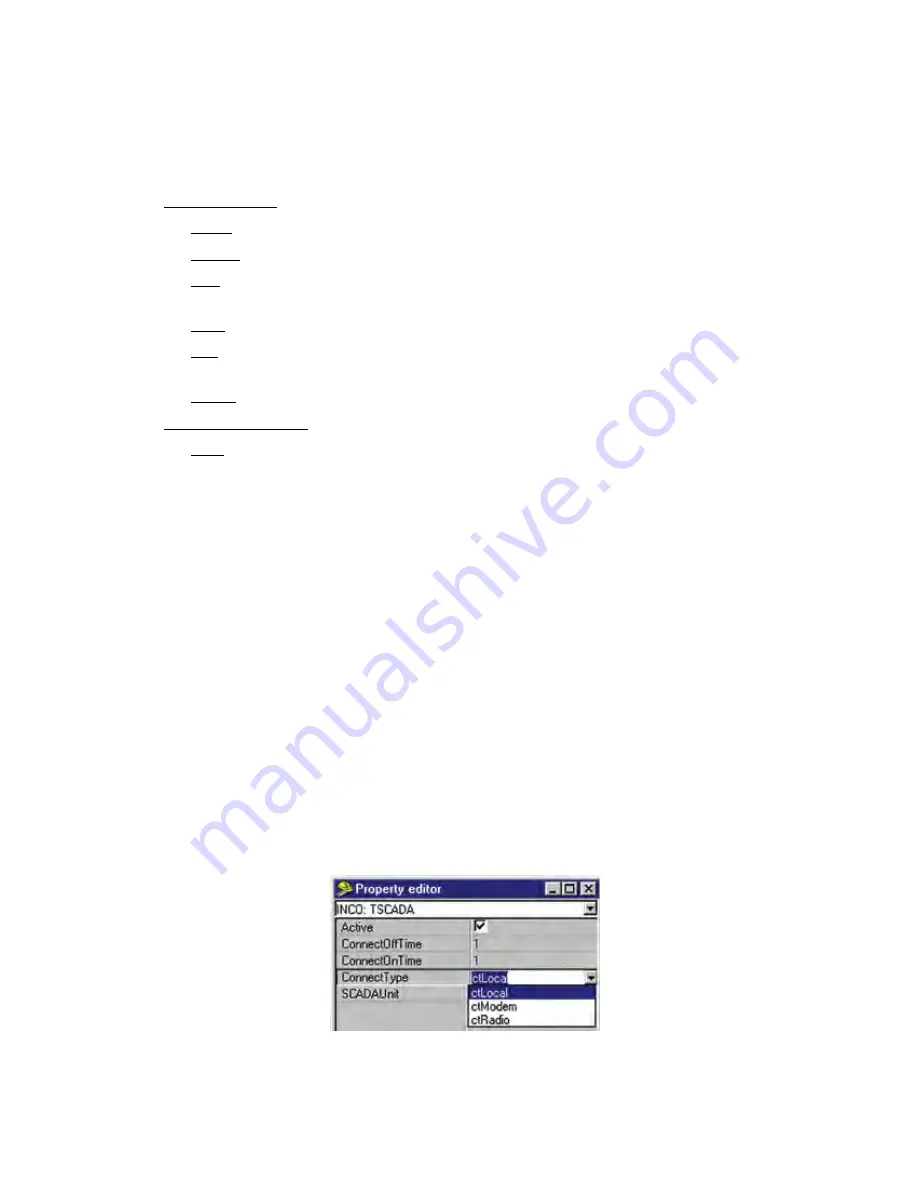
Click on the
ConnectType
box above SCADAUnit in the Property editor and select the type of
connection for the unit. (See figure below.) You have three choices:
Figure 5: Connect type menu
Local
: Means that the unit is connected directly to your computer via a serial port.
14-3
Chapter 14: Real-Time Screen Design
Summary of Contents for Sensaphone SCADA 3000
Page 1: ...Sensaphone SCADA 3000 User s Manual Version 2 34...
Page 6: ...vi SCADA 3000 User s Manual...
Page 10: ...x SCADA 3000 User s Manual...
Page 30: ...1 6 SCADA 3000 User s Manual...
Page 48: ...4 6 SCADA 3000 User s Manual...
Page 70: ...9 8 SCADA 3000 User s Manual...
Page 122: ...12 8 SCADA 3000 User s Manual...
Page 190: ...15 30 SCADA 3000 User s Manual...
Page 211: ...lead 1 lag 0 else lead 0 lag 1 16 21 Chapter 16 Programming in C...
Page 212: ...16 22 SCADA 3000 User s Manual...
Page 236: ...21 8 SCADA 3000 User s Manual...
Page 248: ...22 12 SCADA 3000 User s Manual...
Page 258: ...23 10 SCADA 3000 User s Manual...
Page 274: ...25 8 SCADA 3000 User s Manual...
Page 288: ...27 8 SCADA 3000 User s Manual...
Page 294: ...28 6 SCADA 3000 User s Manual...
Page 296: ...A 2 SCADA 3000 User s Manual...
Page 302: ...D 2 SCADA 3000 User s Manual...
Page 318: ...I 2 SCADA 3000 User s Manual...
Page 320: ...J 2 SCADA 3000 User s Manual...
Page 322: ...K 2 SCADA 3000 User s Manual...
Page 335: ...Test Log...
Page 336: ......


