


• To return from play to the event list press the ESC button [14].
• To delete a file, select it in the event list, press the REC/DEL button and then confirm with the Menu button.
Note:
If the volume was muted prior to playing a file there will no sound from the replay, it is necessary to leave the menu in order to
increase the volume and then replay the file.
[54]
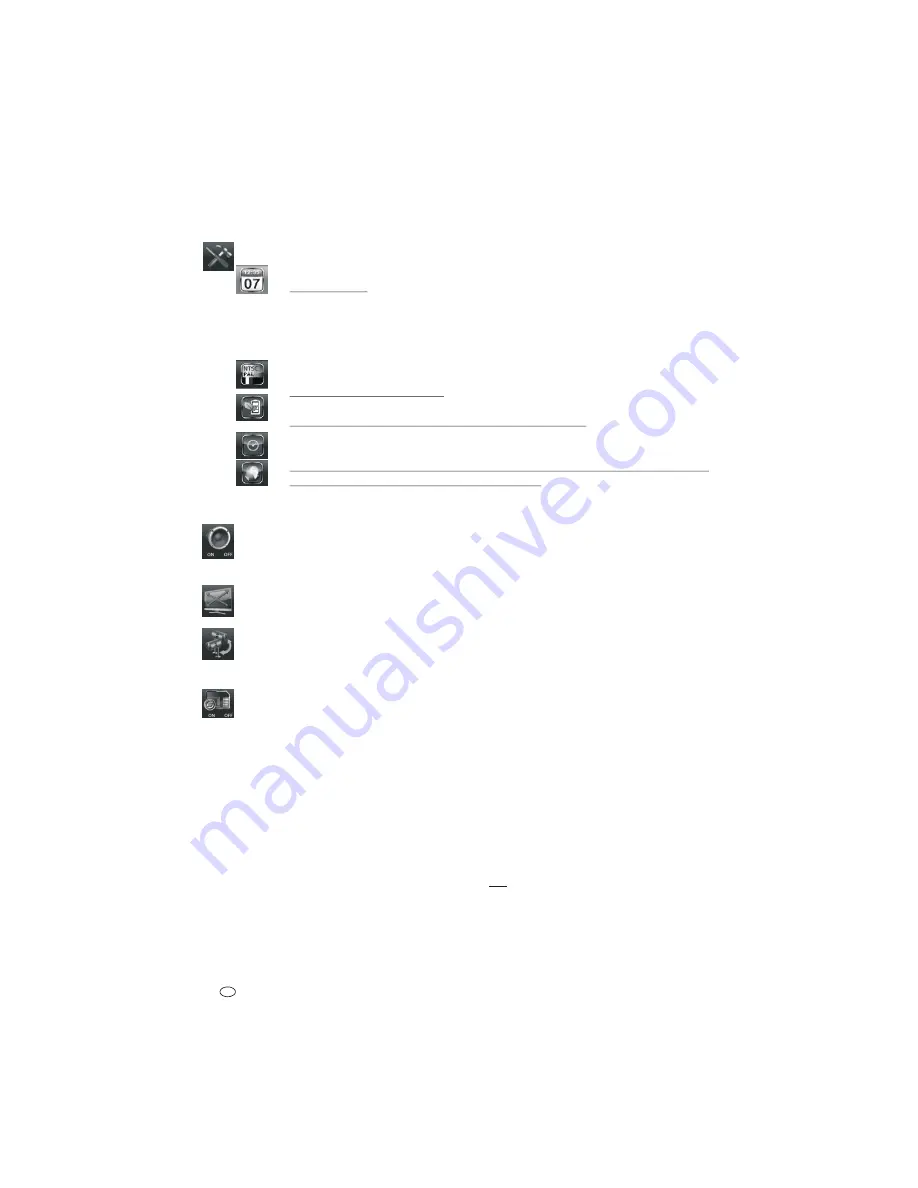
SYSTEM SETUP
[71] DATE AND TIME setting
YYYY year
MM
month
DD
date
AM /PM morning or afternoon
MM
minute
Default is not real time
[72] NTSC / PAL video format for the AV OUT output
For use in Europe this should be set as PAL.
[73] POWER SAVING mode enables the automatic deactivation of the screen after an idle time
Select between Screen off after 5 minutes idle, Screen off after 10 minutes idle or screen always on.
Default setting is screen always on.
[70] In MULTI CHANNELS IDLE DISPLAY select the desired display mode during idle between QUAD or 5, 10 or 15 second sequence
[74] Select DEFAULT to reset settings to default and to select the menu language
When the language is changed (english, german, french selectable) the settings are also reset to default, and the system version is
displayed. Confirm with the menu button [5].
Note:
By resetting to default the date will also be changed. Be sure to reset to correct date and time in order to avoid recordings being
listed non-chronologically.
[47]
ALARM BUZZER
Select ON or OFF for an alarm sound when a motion detection recording is triggered.
Note:
If it is set to On, the buzzer remains on also when the volume is muted.
Default setting: OFF
[49]
PAN TILT ZOOM
Press to enlarge the center of the image (2x zoom) on the display. Press the direction buttons [1] repeatedly to navigate within the image.
Note:
During a scheduled or motion activated recording this function is not available (see chapter 11.5 “Zoom”).
[51]
SCAN ACTIVATED CAMERAS
Select this function to activate the scan display. Each activated camera will be shown in full screen and in sequence, with the scan time interval as
set in “Multi channels idle display”. If “Display quad during idle time” has been set, then the scan time interval is 5 seconds.
Note:
During scheduled recording this function is not avaiable.
[53]
MEMORY CARD OVERWRITE
Select “ON” to enable this function. If the memory card is full the oldest files will be overwritten. If this function is “OFF”, then when the card is
full ”SD CARD FULL PLEASE FORMAT” will appear on the screen and no further recording can be made. In this case, either activate the memory
overwrite function in the menu, format the card (all data will be deleted) or insert a new card and format it as described in “Format Storage”.
Default setting: OFF
13. Notes about the recording function
#
Recording is only possible when a microSDHC card is inserted and
formatted.
#
If only one channel is activated, then the recording will be made in full
screen. If more than one channel is activated then the recording will be
made in quad mode.
#
The audio recording can only be made from one camera at any time.
During manual or schedule recording the sound will be recorded from the
camera with the lowest channel number, during motion activated
recording it will be from the camera which triggered the recording.
#
Recording in progress will be indicated by the flashing of the recording
indicator [46].
14. Viewing recordings on a PC
Alternative to viewing recorded data on the monitor the microSDHC card can be
removed and the the data viewed on a PC, after the included software has been
installed.
Note:
To secure against possible viewing from third parties, the data can be viewed
only using the included software.
14.1 Installing the software
!
Insert the included CD [21] into a running PC.
!
Select the exe file on the CD with a double click, this opens a window on the
38 -
GB


