21
5 - INSTALLATION - Mounting & gas and water connections
5.4 - Mounting the boiler
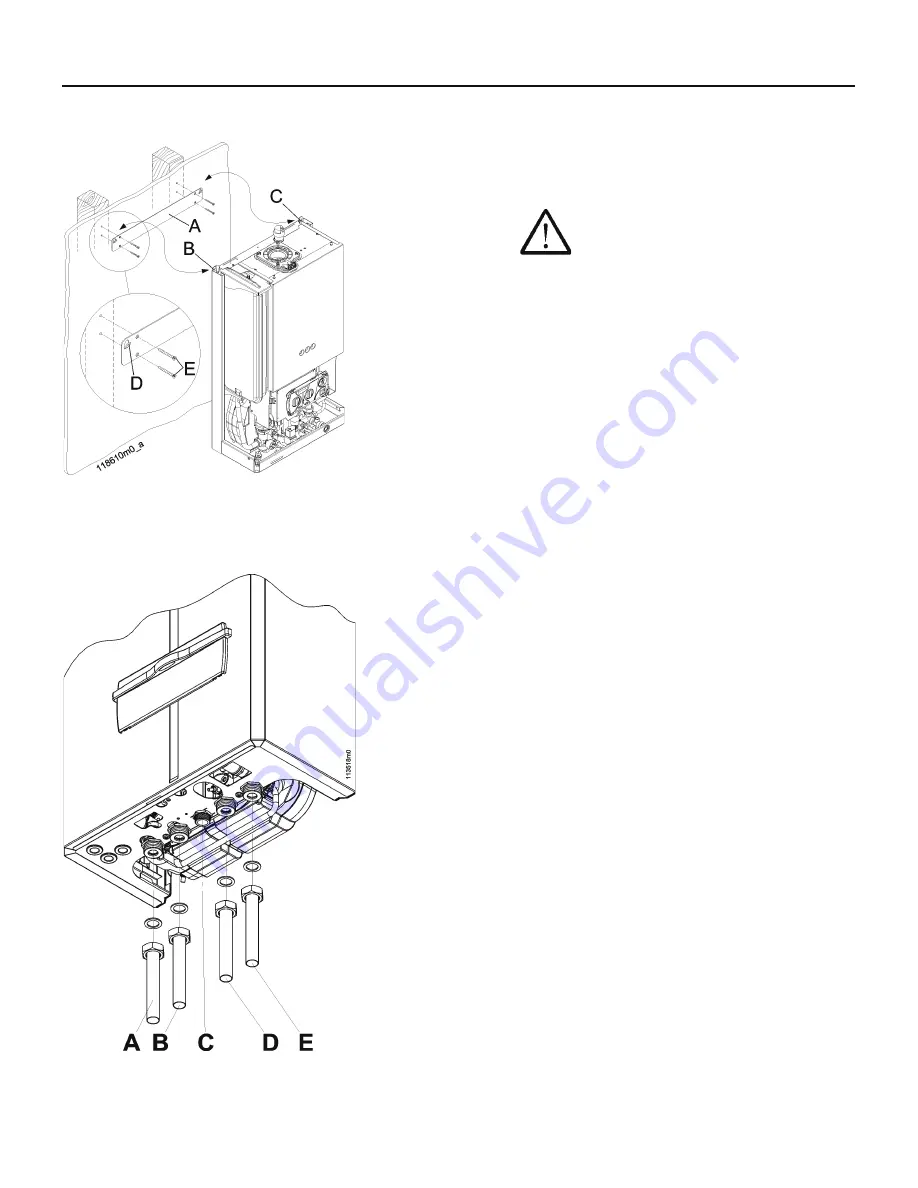
Refer to fi gure 8:
1. place the cardboard template, provided with the
boiler, against the wall;
2. ensure that the template is plumb and the
screw holes line up with the wall studs;
CAUTION!!! The wall bracket screws
must be screwed into the buildings framing
or other material capable of supporting the
weight of the boiler or the boiler and building
may be damaged.
3. mark the screw holes for the wall bracket, “A”;
4. remove the cardboard template;
5. install the wall bracket “A”, using the screws
“E”, provided;
6. hang the boiler on the wall bracket, “A”, by
hanging connections “B” and “C” on tabs “D”.
5.5 - Gas and water
connections
The boiler comes with the fi ttings shown in fi gure 9.
Figure
9 - Fittings supplied with the boiler
Figure
8 - Wall bracket installation
A = heating system supply (3/4”)
B = domestic hot water supply (3/4”)
C = Inlet gas connection (3/4”)
D = domestic cold water (3/4”)
E = heating system return (3/4”)
Summary of Contents for Peerless Combi 160
Page 3: ...3 SAFETY INSTRUCTIONS...
Page 97: ...97 13 MAINTENANCE...
Page 105: ...105 NOTES...
Page 106: ...106 NOTES...


