Using the Smart Relay System
5-7
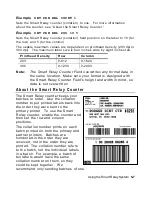
Example
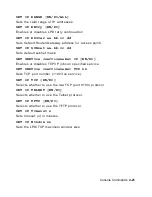
SET PRN REL COUNT 1
Sets the Smart Relay counter (collation) to one. For more information
about the counter, see “About the Smart Relay Counter.”
Example
SET PRN REL POS 10 5
Sets the Smart Relay counter (collation) field position on the label to 10 (for
the row) and 5 (for the column).
The usable maximum values are dependent on printhead density (203 dpi or
300 dpi). The maximum label size is four inches wide by eight inches tall.
Printhead Density
Row
Column
203 0-812
0-1624
300 0-1200
0-2400
Note:
The Smart Relay Counter Field overwrites any format data in
the same location.
Make sure your format is designed with
the Smart Relay Counter Field’s height and width in mind, so
data is not overwritten.
A b o u t t h e S m a r t R e l a y C o u n t e r
The Smart Relay counter keeps your
batches in order. Use the collation
number to put printed labels back into
the order they were sent to the
primary printer. To use the Smart
Relay counter, enable the counter and
then set the row and column
positions.
The collation number prints on each
batch printed on both the primary and
partner printers. Batches are
numbered in the order they are
received, not in the order they are
printed. The collation number refers
to the batch, not the individual labels
in a batch. For example, a batch of
ten labels would have the same
collation number on them, so they
could be kept together. We
recommend only sending batches of one.
Summary of Contents for Monarch 9860
Page 6: ...iv ...
Page 16: ...1 10 MonarchNet2 Operating Instructions ...
Page 34: ...2 18 MonarchNet2 Operating Instructions ...
Page 84: ...4 24 MonarchNet2 Operating Instructions ...
Page 100: ...6 8 MonarchNet2 Operating Instructions ...
Page 112: ...iv MonarchNet2 Operating Instructions ...
Page 113: ......
Page 114: ......

