10
O v e r v i e w o f t h e G L X
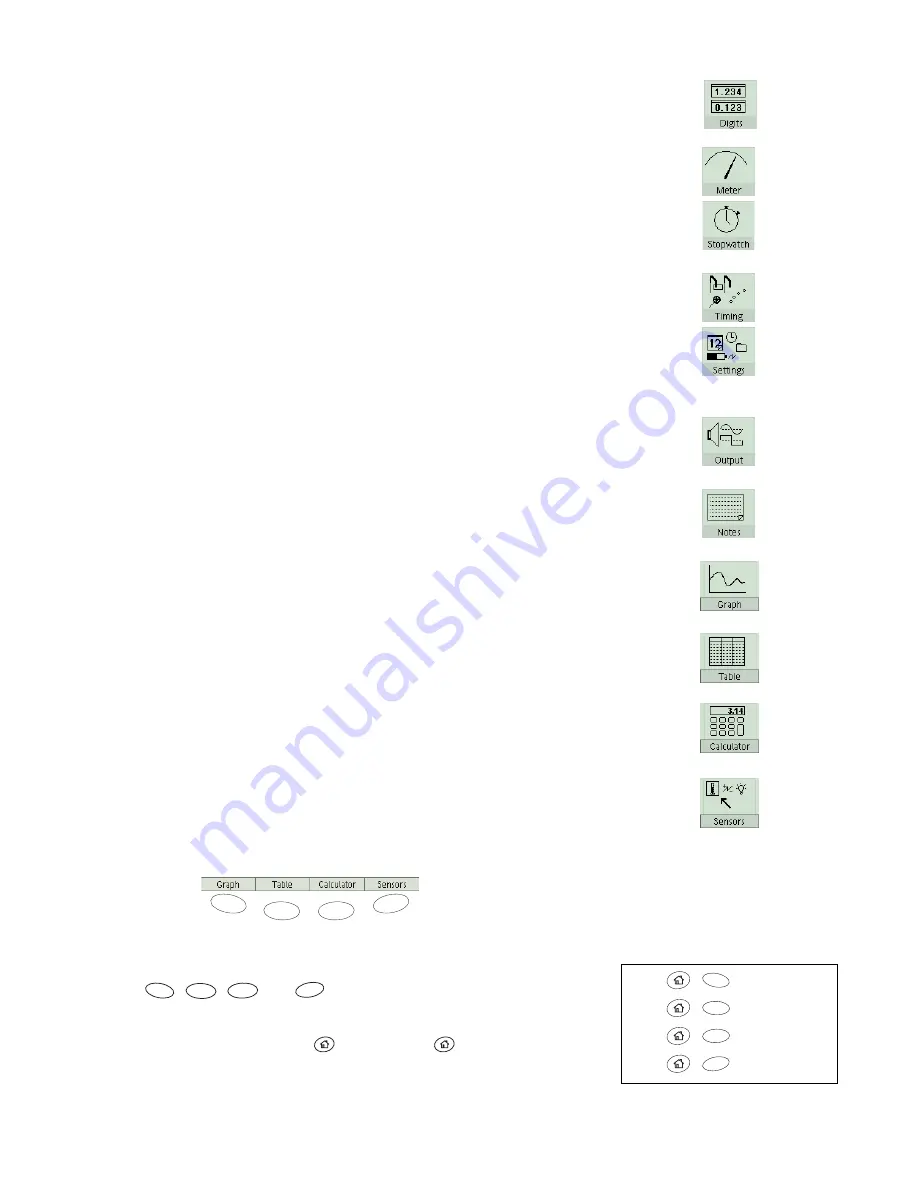
Digits
This screen is useful for displaying live data as they are collected from
sensors and calculations. Up to six data sources can be displayed simultaneously.
See page 37 for more information.
Meter
This display simulates an analog meter with a needle that deflects in pro-
portion to a measurement made by a sensor. See page 38 for more information.
Stopwatch
With this screen, the GLX can be used like a regular stopwatch to
time events. The stopwatch is started and stopped by the user through the GLX’s
keypad, so no sensors are necessary. See page 54 for more information.
Timing
Use the Timing screen to configure photogates, Super Pulleys, and other
switch-type or counting-type digital sensors. See page 62 for more information.
Settings
Go to the Settings screen to change the GLX’s name, time and date,
and screen settings, set how long the GLX waits before automatically turning off,
and control how the GLX behaves when you turn it on or connect a sensor. See
page 85 for more information.
Output
The Output screen contains the controls for the signal that the GLX gen-
erates and outputs through the built-in speaker, or through the signal output port
to headphones or amplified speakers. See page 39 for more information.
Notes
In the Notes screen, you can create, read, and edit pages of text notes to
be saved along with an experiment configuration or collected data. See page 53
for more information.
Graph
Use the Graph to plot and analyze data. In many cases, the Graph is the
best way to view data as they are being collected. See page 13 for more informa-
tion.
Table
The Table displays data numerically in columns. It can be used for editing
and entering data and for statistical analysis. See page 28 for more information.
Calculator
You can use the calculator like a regular calculator for finding the
result of a simple expression and like a graphing calculator for plotting equations.
The calculator can also perform operations on streams of data collected from sen-
sors and on sets of manually entered data. See page 41 for more information.
Sensors
Use the Sensors screen to customize the way sensors collect data. The
screen shows which sensors are connected to the GLX and contains controls for
how each sensor operates. See page 85 for more information.
Bottom Row
Bottom Row
The icons in the bottom row of the Home Screen are selectable via the four func-
tion keys:
,
,
, and
. Graph, Table, Calculator, and Sensors
are the most commonly used screens, and therefore the most easily accessible. To
make the bottom row of the Home Screen appear temporarily from anywhere in
the GLX environment, press and hold
; while holding
, press one of the
function keys to open the corresponding screen.
In other screens, you will usually see four choices at the bottom of the screen that
can be accessed with the function keys.
F4
F3
F2
F1
+
+
+
+
Graph
Table
Calculator
Sensors
F4
F3
F2
F1
Shortcuts from anywhere in the GLX
environment
F1
F2
F3
F4
Summary of Contents for Xplorer GLX
Page 4: ......
Page 6: ......
Page 7: ...Part 1 Users Guide...
Page 8: ......
Page 18: ...12 O v e r v i e w o f t h e G L X...
Page 94: ...88 S e t t i n g s S c r e e n...
Page 98: ...92 P r i n t i n g...
Page 104: ...98 O p e r a t i n g T e m p e r a t u r e...
Page 112: ......
Page 116: ...110 C a l o r i m e t r y...
Page 132: ...126 V o l t a g e v e r s u s R e s i s t a n c e...
Page 136: ...130 I n d u c e d E l e c t r o m o t i v e F o r c e...
Page 146: ...140 B e a t F r e q u e n c y...
Page 150: ......
Page 152: ......


