


58
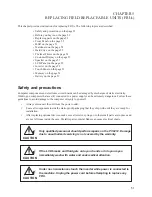
C H A P T E R 5 R E P L A C I N G F I E L D R E P L A C E A B L E U N I T S ( F R U s )
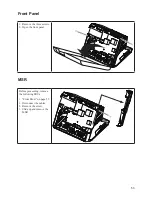
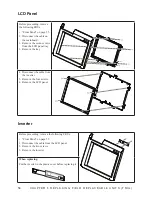
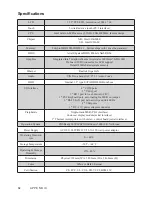
LCD Panel
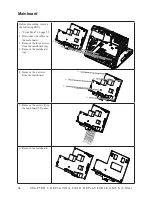
Before proceeding, remove
the following FRUs.
“Front Panel” on page 55.
•
Disconnect the cable on
1.
the mainboard.
Remove the seven screws
2.
from the LCD panel tray.
Remove the tray.
3.
Disconnect the cable from
4.
the inverter.
Remove the four screws.
5.
Remove the LCD panel.
6.
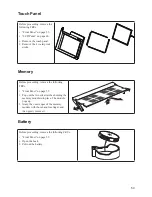
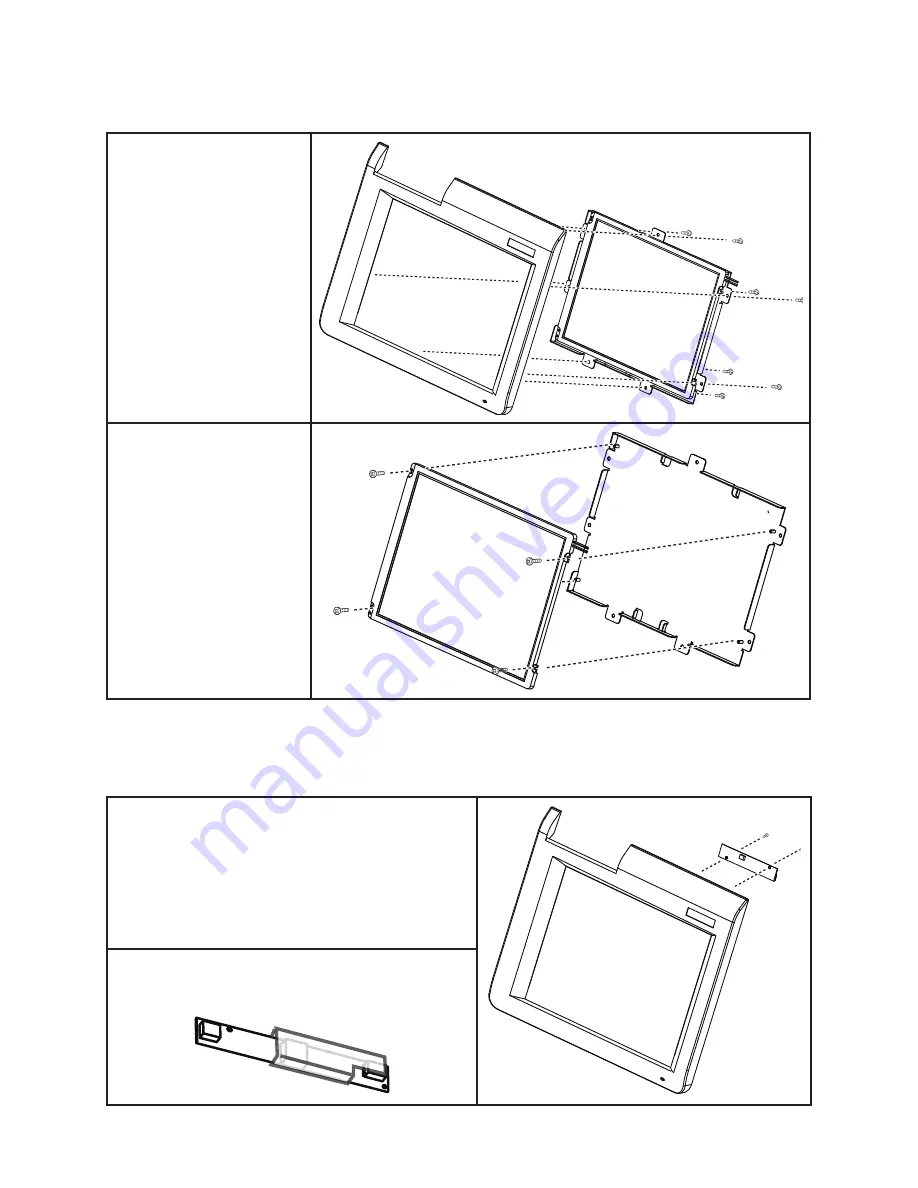
Inverter
Before proceeding, remove the following FRUs.
“Front Panel” on page 55.
•
Disconnect the cable from the LCD panel.
1.
Remove the two screws.
2.
Remove the inverter.
3.
When replacing:
Put the inverter in the plastic cover before replacing it.
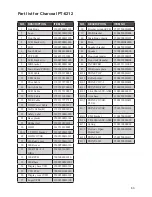
Summary of Contents for PT-6212
Page 1: ...All in one POS Terminal PT 6212 Service Manual...
Page 2: ......
Page 8: ...vi...
Page 43: ...35 Click 5 Next to continue Click 6 Next to continue...
Page 45: ...37 Click 3 Install to begin installation When installation is completed click 4 Finish...
Page 68: ...60 C H A P T E R 5 R E P L A C I N G F I E L D R E P L A C E A B L E U N I T S F R U s...
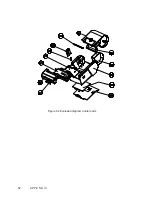
Page 69: ...61 APPENDIX PART LIST AND SPECIFICATION Exploded diagram main parts Figure 6 1...
Page 70: ...62 A P P E N D I X Exploded diagram printer parts Figure 6 2...


