11
4.2 Initial Settings
Before using the
RVM-045DVRHD
it is recommended that you enable the
DATE STAMP
and
PLATE NUMBER
.
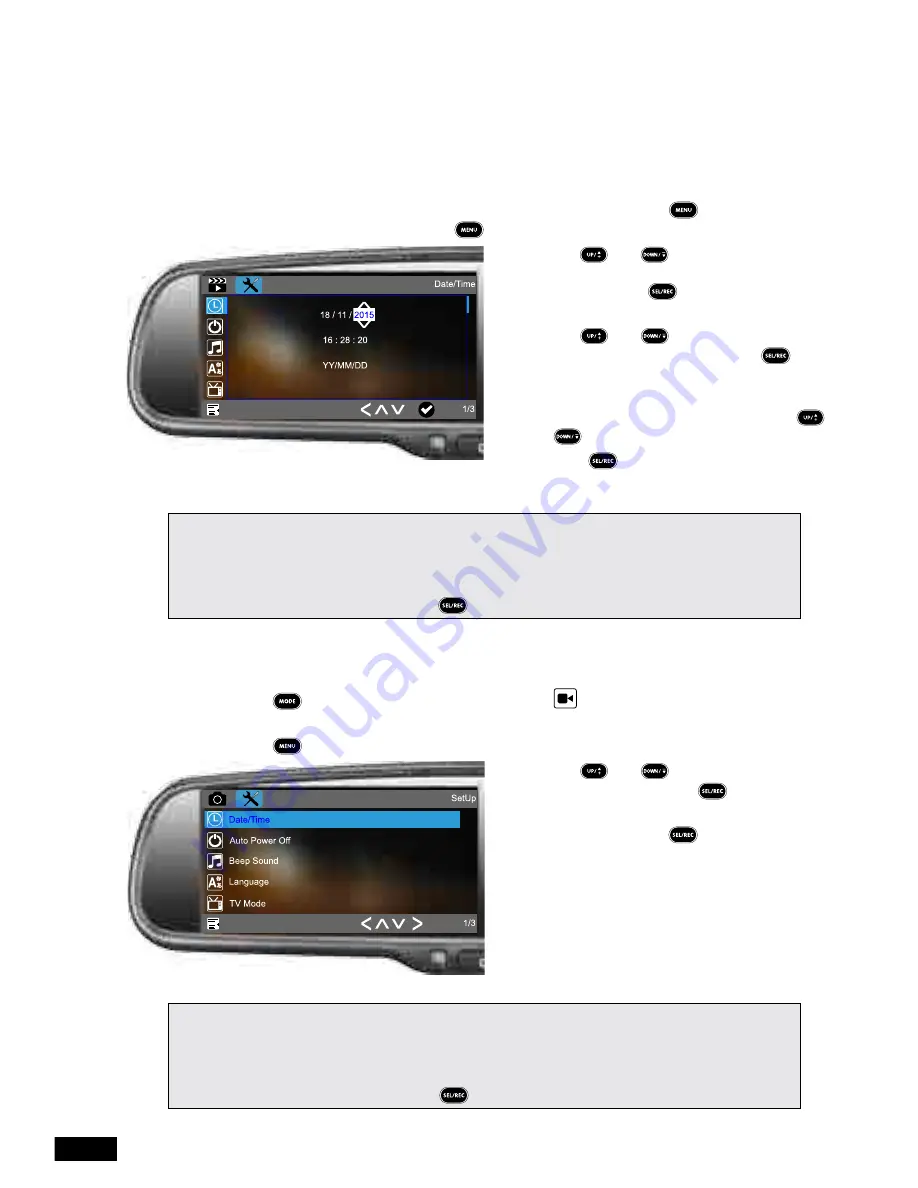
4.2.1 Setting the Time & Date
Once set, the time and date can then be stamped onto Videos and photos.
To set the internal clock on the
RVM-045DVRHD
please follow the instructions below.
1. Ensure that the Rear-view Mirror DVR is not recording and press the button to enter
the
VIDEO
menu and then press the button again to enter the
SETTING
menu.
2. Use the and buttons on the
remote control to highlight the
DATE/TIME
setting and press to enter the date
and time entry screen.
3. Use the and buttons to change
the highlighted number, and press to
confirm and proceed to the next number.
4. The final customisable field is the date
format which you can change using the
and buttons.
5. Pressing after selecting your
preferred date format will return you to the
setting menu.
Please Note:
• Setting the time will not automatically stamp the time on the footage. To stamp the time and date on
the footage please follow the instructions outlined in the
DATE STAMP
(
VIDEO
) section.
• The
RVM-045DVRHD
will not let you enter the menu while the device is recording. Please make
sure recording is stopped by pressing the button before attempting to enter the
VIDEO
menu.
4.2.2 Date Stamp
To stamp your recorded videos with the time and date please follow the instructions below.
1. Using the button select the
VIDEO
mode (the
VIDEO
icon will be displayed in
the top left corner) and make sure the
RVM-045DVRHD
is not currently recording.
2. Press the button to enter the
VIDEO
menu.
3. Use the and buttons to highlight
DATE STAMP
and press to enter the
date stamp menu
4. Select ON and press to confirm. You
will now be returned to the
VIDEO
menu.
Please Note:
• If you decide that you no longer want to have the date stamped onto your footage you can remove
this by entering the
DATE STAMP
menu and selecting OFF.
• The
RVM-045DVRHD
will not let you enter the menu while the device is recording. Please make
sure recording is stopped by pressing the button before attempting to enter the
VIDEO
menu.


