PF6000X
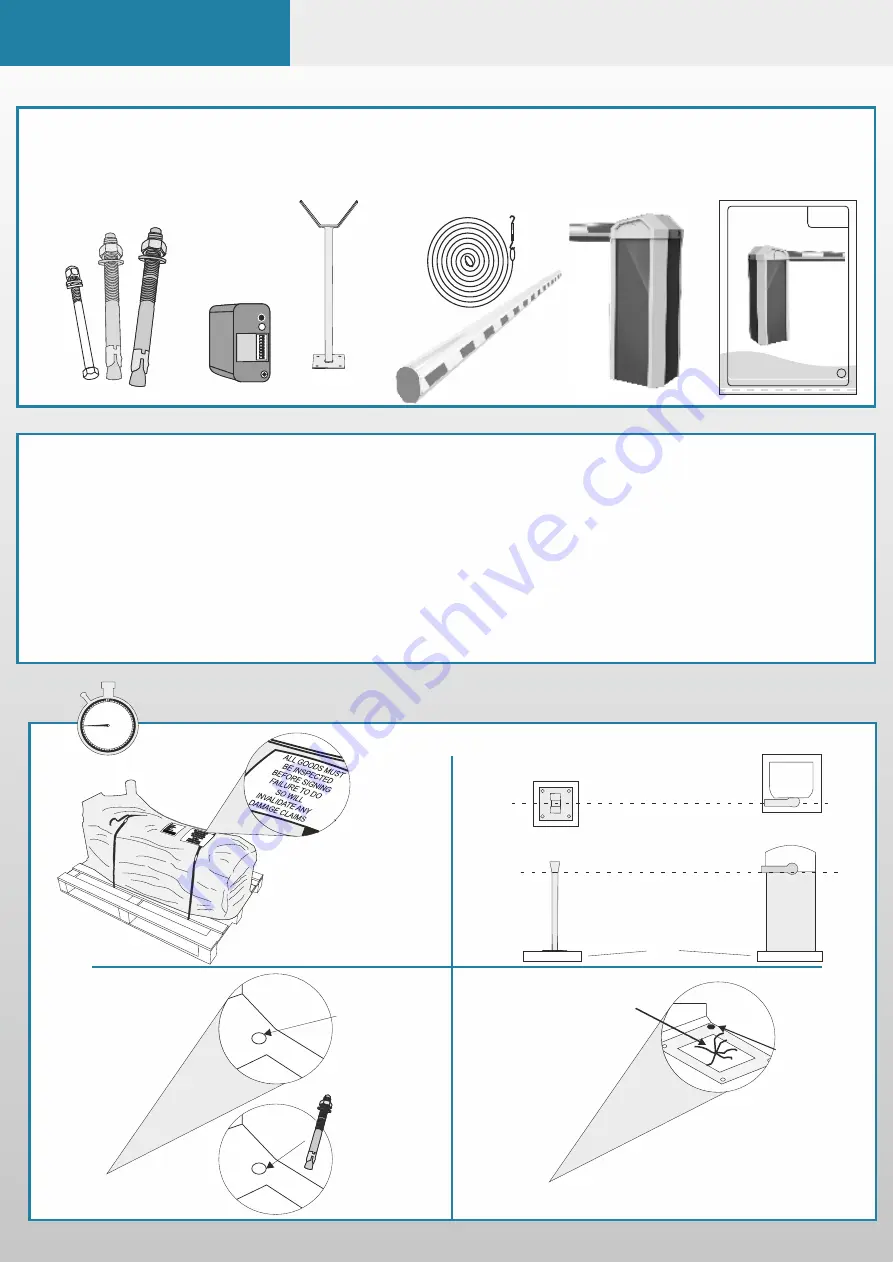
Component Identification
You should check that you have received the following in your order as they are referred to throughout this
manual (note this can change per barrier spec i.e. manual components are different from automatic):
M12 Bolt
4 No.
(S/Lux)
PF6000X
PF6000X
A
utomatic Sliding Gate
M
anual Sliding Gate
GB
O&M Manual
O&M Manual 1 No.
M16 Bolt
4 No.
(Cabinet HD)
M5 Bolt
2 No.
(Pole Arm)
Reset
OUTPUT
ON
ON
DIP
1 2 3 4 5 6 7 8
PRES
PULSE
FILT
ASB
SENS
FREQ
Loop Detector(Optional)
Barrier Cabinet
c/w Pole Arm Adaptor
Barrier Pole
End Rest (Optional)
Straining wire kit
for poles over 6-7 m
1.
When delivered, the barrier will be on a wooden pallet. the barrier pole will be delivered separately at
the time of print it might be delivered as two separate consignments. Check before you sign!
2.
Lower the barrier onto the plinth and visually align.
Make sure that you have pulled all cables
through the ducting before bolting down and that the duct is in the centre of the base plate!
3.
Using one M12/16 fixing, bolt down the main cabinet using one of the holes.
4.
Now make sure that the barrier is now aligned perfectly, continue to bolt down through the other holes
using the remaining M12/16 bolts see below.
Now move on to step 5
The numbers in the text document below relate to the drawings below.
3.
1.
2.
4.
45 mins
60 5
10
15
20
25
30
35
40
45
50
55
0121
8265
8985
6526
8665
2223
355
Drill using a 12/16mm
hole using a SDS
masonry drill bit.
Clean out the hole and
then insert one M12/16
bolt nut end uppermost
hammer home until the
washer meets the
surface then tighten
the nut just hand tight
Side View
of barrier bottom of
the pole arm is aligned with the
top of the catch post where the
pole comes to rest
Top View
of barrier perfectly
aligned with rest of end post
Level Line
Level Line
Plinth
Drill and clean out
the other holes and
insert the other bolts,
nut end uppermost
hammer home until the
washer meets the
surface then tighten
the nut fully
Picture showing
bolt once it has
been put in.
Ducting through base
with wiring coming
through centre of
duct
Summary of Contents for PF6000X
Page 1: ...PF6000X Automatic Barrier Rev 1 0 Installation Operation Maintenance Manual ...
Page 11: ...PF6000X Handing Change Procedure ...
Page 12: ...PF6000X Handing Change Procedure ...
Page 13: ...PF6000X Handing Change Procedure ...
Page 14: ...PF6000X Barrier Manual Release Procedure ...
Page 15: ...PF6000X Straining Wire Assembly ...
Page 23: ...PF6000X Loop Detector Guide Relay Functionality Diagnostics ...
Page 28: ...PF6000X Safety Edge Setup ...
Page 29: ...PF6000X Safety Edge Setup ...


