Motor Connections - R or T Series
Motor with C10 Option (or C10H)
The C10 (C10H) option for Compumotor's R or T series
motors includes a removable braided cable and all
necessary hardware for making an EMC compliant
installation. Instructions for attaching the cable follow.
The C10 (C10H) Motor cable is 10 feet (3 m) long.
Longer cable lengths are not available from
Compumotor. If you extend the motor cable, follow the
appropriate guidelines in the LVD regulations published
by the EEC.
CAUTION - At no time during the following procedure
should the motor cable be allowed to twist within the
gland assembly. This can damage the cable and greatly
reduce its life.
Procedure for attaching C10 (C10H) Cable to R or T
Series Motor and ZETA6xxx Indexer Drive.
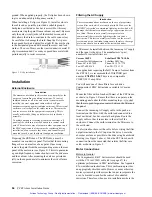
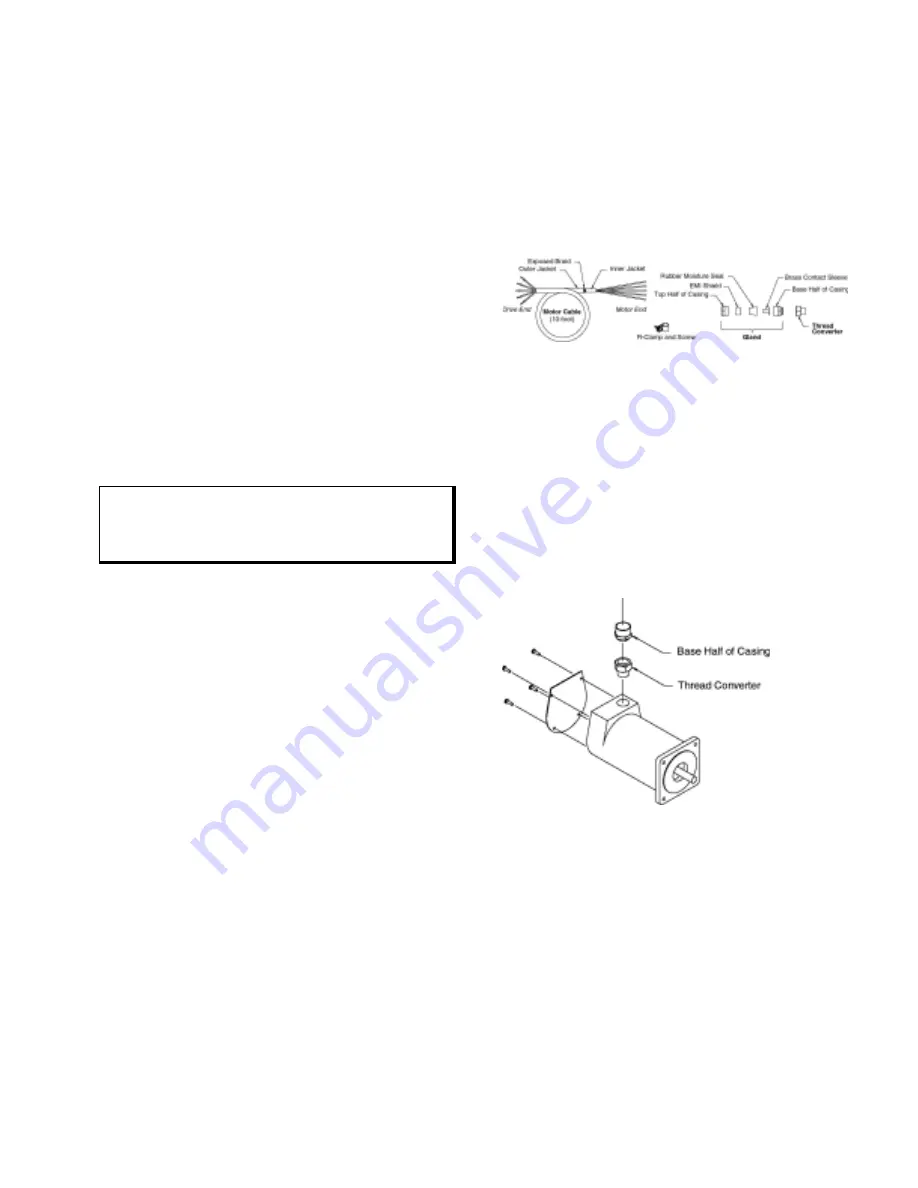
1. Inventory (ship kit contents are listed below in next
drawing).
•
Thread converter
•
Gland assembly (5 pieces)
•
Motor cable, 10 ft. (3 m)
•
R-Clamp with 6-32 x 1/2 inch screw
Required Assembly Hardware:
•
Phillips screwdriver #2
•
Wire strippers
•
Standard slotted screwdriver, approximately 0.25
in (6mm)
•
Crimp-on ring terminals sized for 18AWG* (0.75
mm
2
) wire:
9 required for series wiring
13 required for parallel wiring
•
18AWG* (0.75 mm
2
) wire jumpers 4 in (100
mm) long:
2 required for series wiring
4 required for parallel wiring
•
Crimp tool
•
Open end 15/16-inch wrench
*Note: 16 AWG (1.50 mm
2
) for motors operating
above 10 amperes.
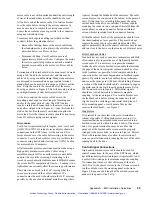
2. Install Thread Converter and Casing Base.
A. Remove and discard the motor's plastic thread
insert (CCW rotation).
B. Remove endbell cover plate from the rear of the
motor.
C. Insert the thread converter into the motor rear
endbell tighten. The NPT thread is designed for
compression fit into the motor body and therefore
will not bottom out.
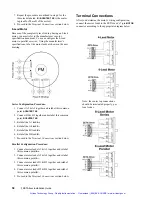
D. Insert the base half of the outer casing into the
thread converter and tighten securely.
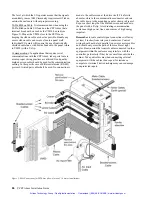
3. Arrange Components on Cable.
A. From the motor end of the cable, first slide on the
dome casing half, then the EMI shield, and
finally, the rubber moisture seal. The EMI shield
is installed blunt end first. The tapered end of the
EMI shield fits over the tapered end of the rubber
moisture seal.
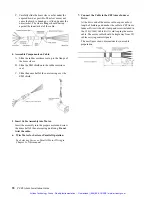
B. The next step is critical and if not done
properly will impair the EMC performance of
the system:
With a finger tip, flare the braid away from the
inner jacket of the cable (all the way around).
This will allow the braid to relax, and eases
insertion of the brass sleeve.
Appendix E
R o r T S e r i e s M o t o r w i t h C 1 0 ( C 1 0 H )
Artisan Technology Group - Quality Instrumentation ... Guaranteed | (888) 88-SOURCE | www.artisantg.com


