


-
-
75
6.3.2 Software configuration problem
If the software is configured incorrectly, the device will be unable to print data correctly:
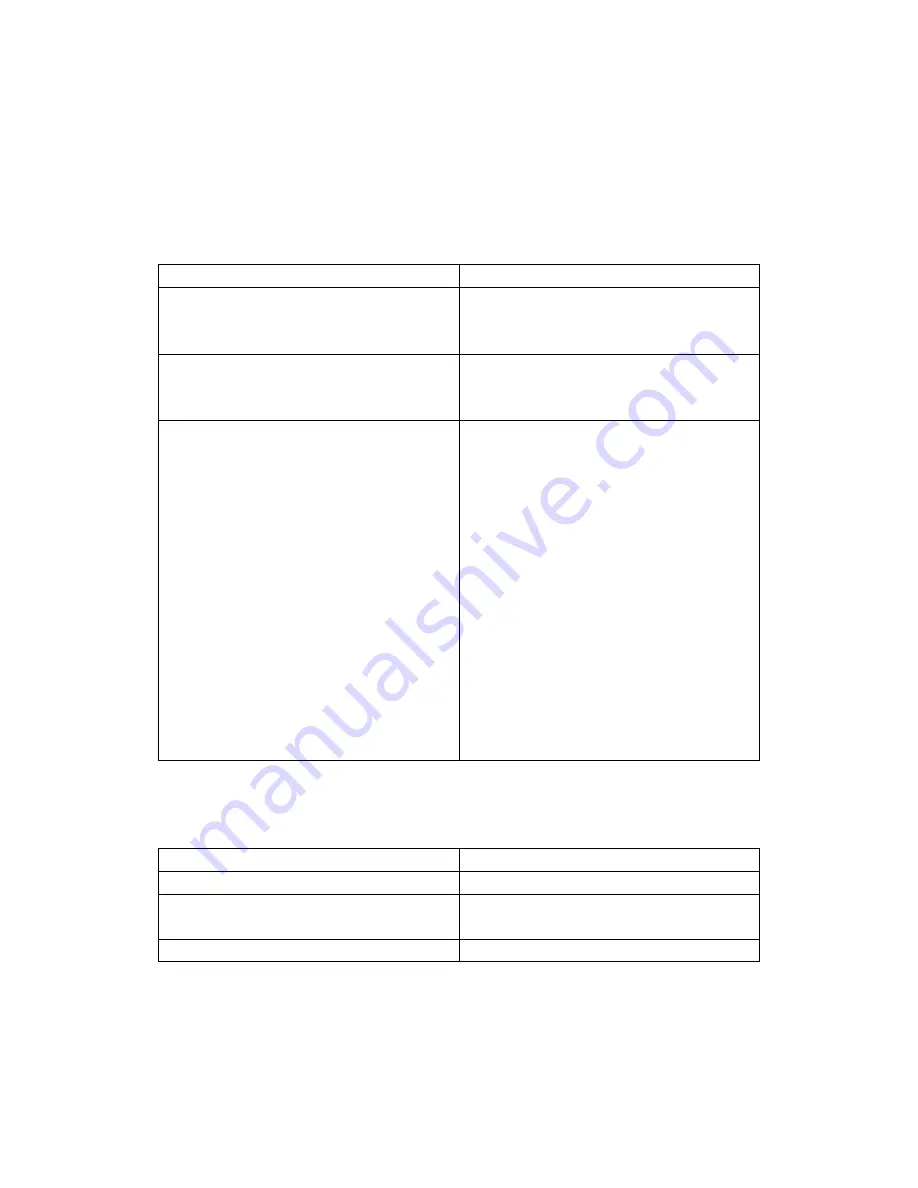
S1 After switching on the printer, it is not working in the printing mode.
Trouble causes
Solution
There is trouble in the printer hardware.
Perform the Self-Diagnostic before printing when
the printer is powered on; Make sure there is no
trouble in the printer itself.
The PC and the printer are connected improperly,
while the print cartridge is installed properly.
Check the printer cable; make sure it’s assembled
correctly. Check print cartridge, and make sure it
is installed into the printer properly.
Printer software error
Check whether the connection between PC and
printer port is proper or not. Check whether the
printer driver is installed or not. If using Windows
OS check the OS program causes printer not
working if the printer driver is installed properly.
Adjust the settings as the program requires if the
printer is not working for a certain program.
Sometimes the output is normal in the basic
programs of Windows OS but abnormal in a
particular program, then you should install driver
again. If it doesn’t work in the basic program of
Windows OS, please check whether the setting of
the printer port is proper or not. Open the port
setting in “printer properties”, check whether it’s
the USB port or not.
S2 Abnormal printing, strange character occurs repeatedly.
Trouble causes
Solution
USB cable is broken
Replace USB cable
Wrong settings in the printing port setting.
Open the port settings of “printer properties”
make sure it is set properly.
Printer driver error.
Reinstall the driver.
Summary of Contents for P1000 Series
Page 1: ...Pantum Monochrome Laser Printer Service Manual P1000 P2000 Series...
Page 8: ...vii 6 3 4 Paper jam 79 6 3 5 Image defects 83...
Page 9: ...1 Chapter 1 Product description 1 1 Features 1 2 Overview 1 3 Specification...
Page 39: ...31 Chapter 3 Operation Theory 3 1 Electronic Configuration 3 2 Structure...
Page 43: ...35 3 2 Construction 3 2 1 Print engine imaging system...
Page 52: ...44 4 2 Disassembly flow chart...
Page 56: ...48 then release them to remove the top cover...
Page 58: ...50 2 Release bottom screws 3 Loosen hooking tabs gently and then remove the right side cover...
Page 69: ...61 Chapter 5 Regular maintenance 5 1 Cleaning Inside Printer 5 2 Consumables Replacement...


