459
DP-C405/C305/C265
FEB 2008
Ver. 1.1
4.2.7.
FAX Service Mode 8 (Check & Call)
4.2.7.1.
Overview
This feature enables the Authorized Servicing Dealers to manage, and improve the machine maintenance
to their customers by alerting them of equipment problems. It also can be used as a Supply Sales Tool by
alerting the Dealer that the unit is running Low on Toner. The function overview is as follows:
1. The machine’s printer error information is stored in the Printer Report.
2. The printer report can be manually printed when required.
3. When printer errors occurs, the unit can automatically transmit the Service Alert Report to the pre-
registered Fax number, or Email address.
4. When the unit detects Low Toner, or a PM counter has reached the maintenance timing, it can
automatically transmit the Maintenance Alert Report to the pre-registered Fax number, or Email
address.
Set the machine to Service Mode, and press the
“9”
key on the Control Panel.
↓
Press the
“Start”
key to enter the F9 Service Mode on the Control Panel.
↓
Select
“00 Fax Service Mode”
on the Touch Panel display.
↓
Scroll the menu with the
“
”
button on the Touch Panel display, and select
“08 Check & Call”
.
↓
Select the desired Function number on the Touch Panel display.
(i.e. 01 Service Alert Fax #, input the Fax Telephone No., or to enter an Email Address, press the
“Fax”
Mode key and input the Email address, then select
“OK”
button to register the entry.)
Note:
Use the “Fax” Mode key to toggle between the Fax No. / Email Address entry field.
↓
Select the
“Close”
button three time on the Touch Panel display.
↓
Press the
“Function”
, and the
“C (Clear)”
keys simultaneously on the Control Panel to exit the Service
Mode.
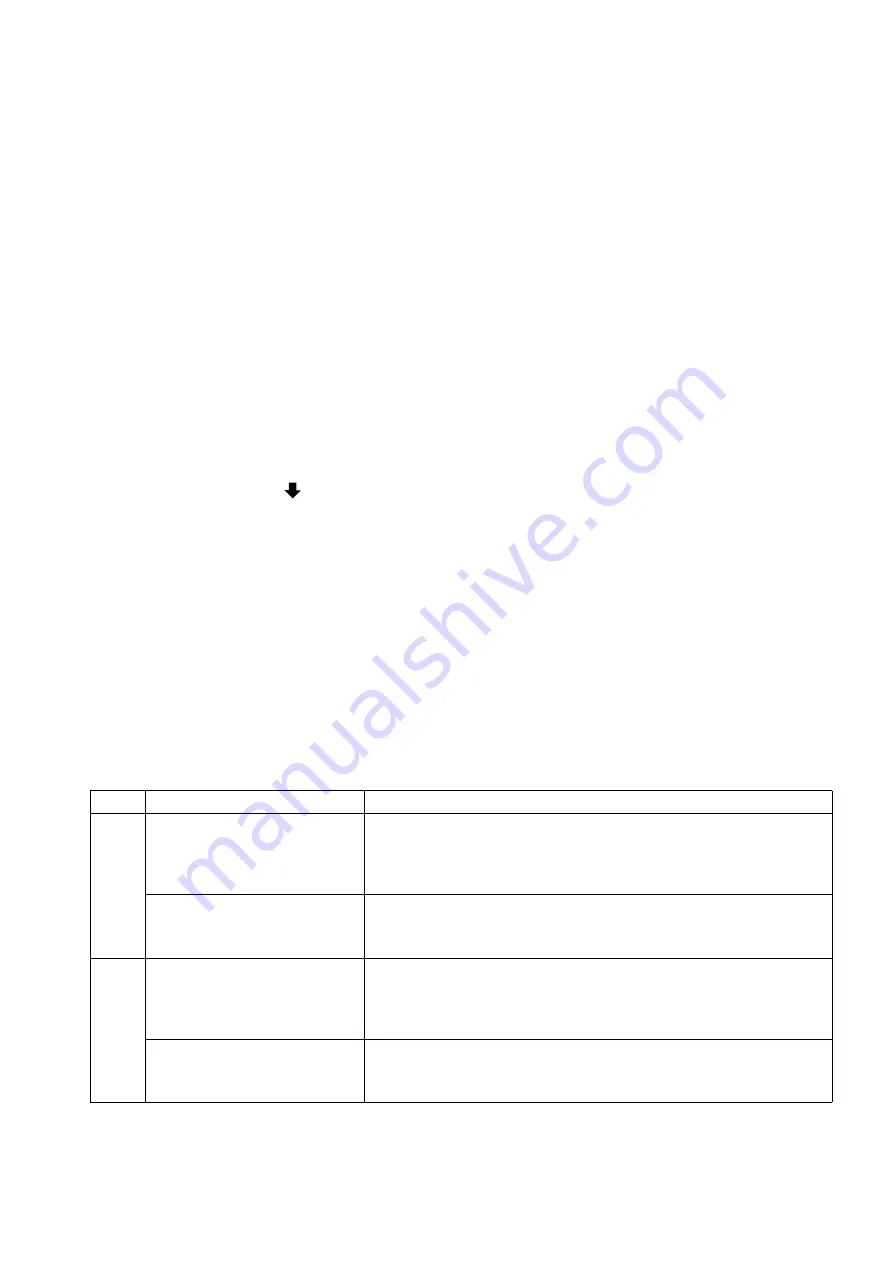
Check & Call Table
No.
Check & Call
Description
01
Service Alert Fax #
Enter a destination Fax number (max. 36 digits) or an Email
address (Max. 60 characters) for the Service Alert Report.
When the field is populated, the automatic transmission of the
Service Alert Report is established.
Service Alert Mail #
To change the input field from a Fax # to an Email address,
press the
“
Fax
”
Mode key before entering the destination Fax #
or an Email address.
02
Maint Alert Fax #
Enter a destination Fax number (max. 36 digits) or an Email
address (Max. 60 characters) for the Maint Alert Report.
When the field is populated, the automatic transmission of the
Maint Alert Report is established.
Maint Alert Mail #
To change the input from a Fax # to an/Email address, press
the
“
Fax
”
Mode key entering enter the destination Fax # or an
Email address.
Summary of Contents for Workio DP-C405
Page 2: ...2 ...
Page 3: ...3 ...
Page 5: ...5 ...
Page 6: ...6 For PB and Other destinations not for PU USA Canada ...
Page 11: ...11 ...
Page 12: ...12 ...
Page 13: ...13 ...
Page 14: ...14 memo ...
Page 94: ...94 FEB 2008 Ver 1 1 DP C405 C305 C265 Color Test Chart 101 P N PJQRC0119Z LDR PJQRC0120Z A3 ...
Page 106: ...106 FEB 2008 Ver 1 1 DP C405 C305 C265 2 20 720K PM Kit DQ M35S72 DQ M32N72 ...
Page 274: ...274 FEB 2008 Ver 1 1 DP C405 C305 C265 LVPS CN6 LVPS CN7 Refer to SCN PC Board ...
Page 275: ...275 FEB 2008 Ver 1 1 DP C405 C305 C265 LVPS CN8 Europe Specification Only ...
Page 278: ...278 FEB 2008 Ver 1 1 DP C405 C305 C265 CST PCB CN603 CST PCB CN604 ...
Page 279: ...279 FEB 2008 Ver 1 1 DP C405 C305 C265 CST PCB CN605 ...
Page 280: ...280 FEB 2008 Ver 1 1 DP C405 C305 C265 ...
Page 281: ...281 FEB 2008 Ver 1 1 DP C405 C305 C265 CST PCB CN606 ...
Page 282: ...282 FEB 2008 Ver 1 1 DP C405 C305 C265 ...
Page 283: ...283 FEB 2008 Ver 1 1 DP C405 C305 C265 CST PCB CN607 ...
Page 284: ...284 FEB 2008 Ver 1 1 DP C405 C305 C265 CST PCB CN608 ...
Page 286: ...286 FEB 2008 Ver 1 1 DP C405 C305 C265 TRU PCB CN613 ...
Page 288: ...288 FEB 2008 Ver 1 1 DP C405 C305 C265 RLB PCB CN176 ...
Page 682: ...682 FEB 2008 Ver 1 1 DP C405 C305 C265 memo ...
Page 738: ...738 FEB 2008 Ver 1 1 DP C405 C305 C265 memo ...
Page 808: ...519 E ...


