58
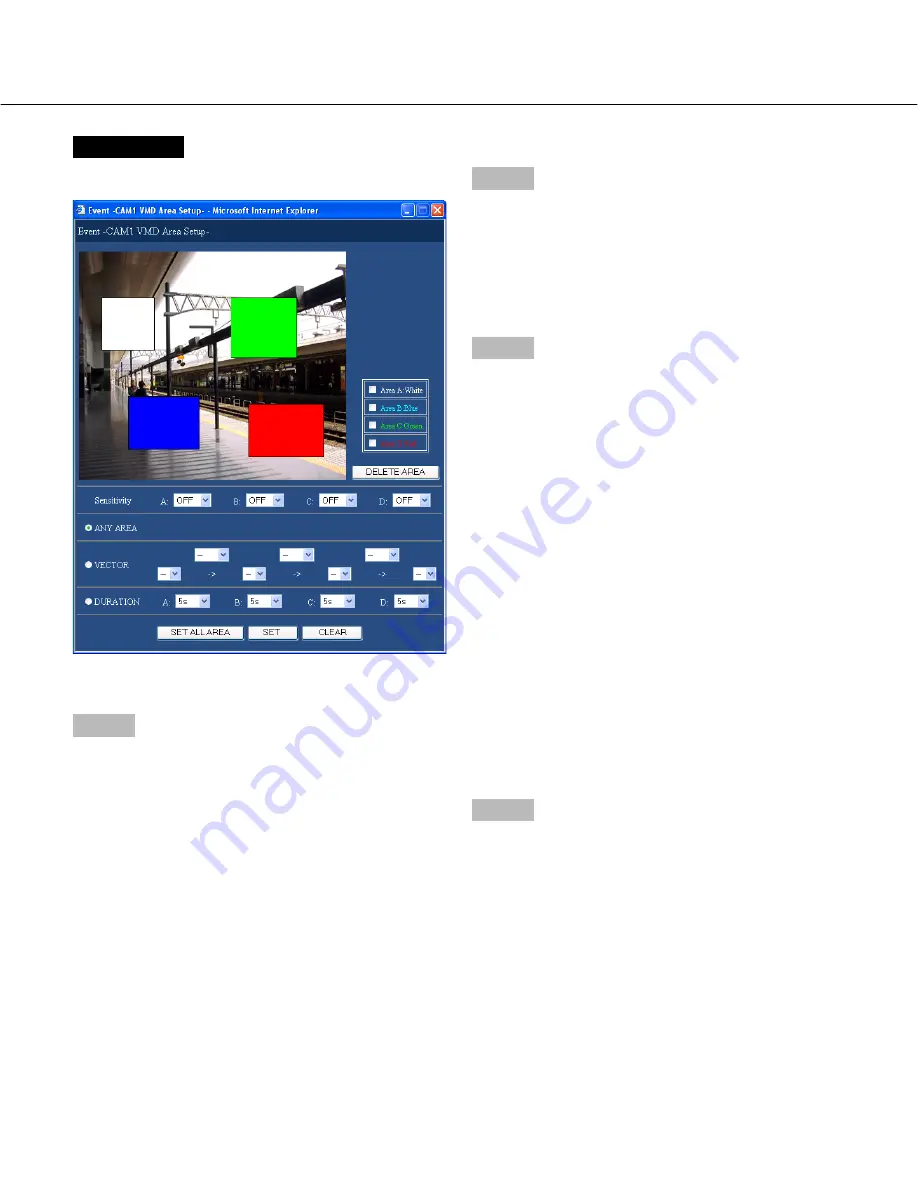
Screenshot 3
The "VMD Area Setup" menu will be displayed.
Step 4
Set the motion detection areas by dragging the mouse.
Up to 4 areas (A, B, C, D) can be set for the detection
areas.
A:
White
B:
Blue
C:
Green
D:
Red
Click the [SET ALL AREA] button to set all areas on the
monitor as the motion detection area.
To delete a detection area, click the [DELETE AREA]
button after selecting a detection area by checking the
check box of the desired area to be deleted.
Step 5
Click the [
i
] button to select sensitivity for the selected
area from the following.
HIGH:
High sensitivity
MID:
Intermediate sensitivity
LOW:
Low sensitivity
OFF:
Ignores motion in the selected area
Step 6
Perform the settings of the detection mode (method of
detection) in the set detection area. Specifying a
method of detection in a detection area is available by
setting the detection mode.
Refer to page 59 for further information about each
detection mode.
<ANY AREA>
An event action will be performed according to the
settings when "motion" is detected in any of the set
motion detection areas.
<VECTOR>
Click the [
i
] button to select an interval time for an
object moving between each area from the following.
--/5 s/10 s/20 s/30 s/40 s/50 s/1 min
<DURATION>
Click the [
i
] button to select a moving duration for
an object from the following.
0 s/5 s/10 s/20 s/30 s/40 s/50 s/1 min
Step 7
Click the [SET] button after completing the settings, and
close the "VMD Area Setup" window by clicking the [
×
]
button at the top right of the window.
Summary of Contents for WJHD309A - DIGITAL DISK RECORDER
Page 2: ...2...


