27
■
Power ON Manual REC
Select ON or OFF to determine whether or not to start
recording when the power is turned on by the connected
external timer (or the switch).
ON:
Manual recording will start automatically after com-
pleting the system check.
OFF:
Manual recording will not start automatically after
completing the system check.
Important:
When ON is selected, manual recording will start
automatically after completing the system check.
■
VMD Setup
Select ON or OFF to determine whether to enable or
disable the motion detection function for each camera
channel.
When ON is selected, perform the settings for the
motion detection area for each camera channel. Up to 4
areas can be set for a camera channel for the detection
area. Refer to the Network Operating Instructions (PDF)
for further information about the motion detection func-
tion.
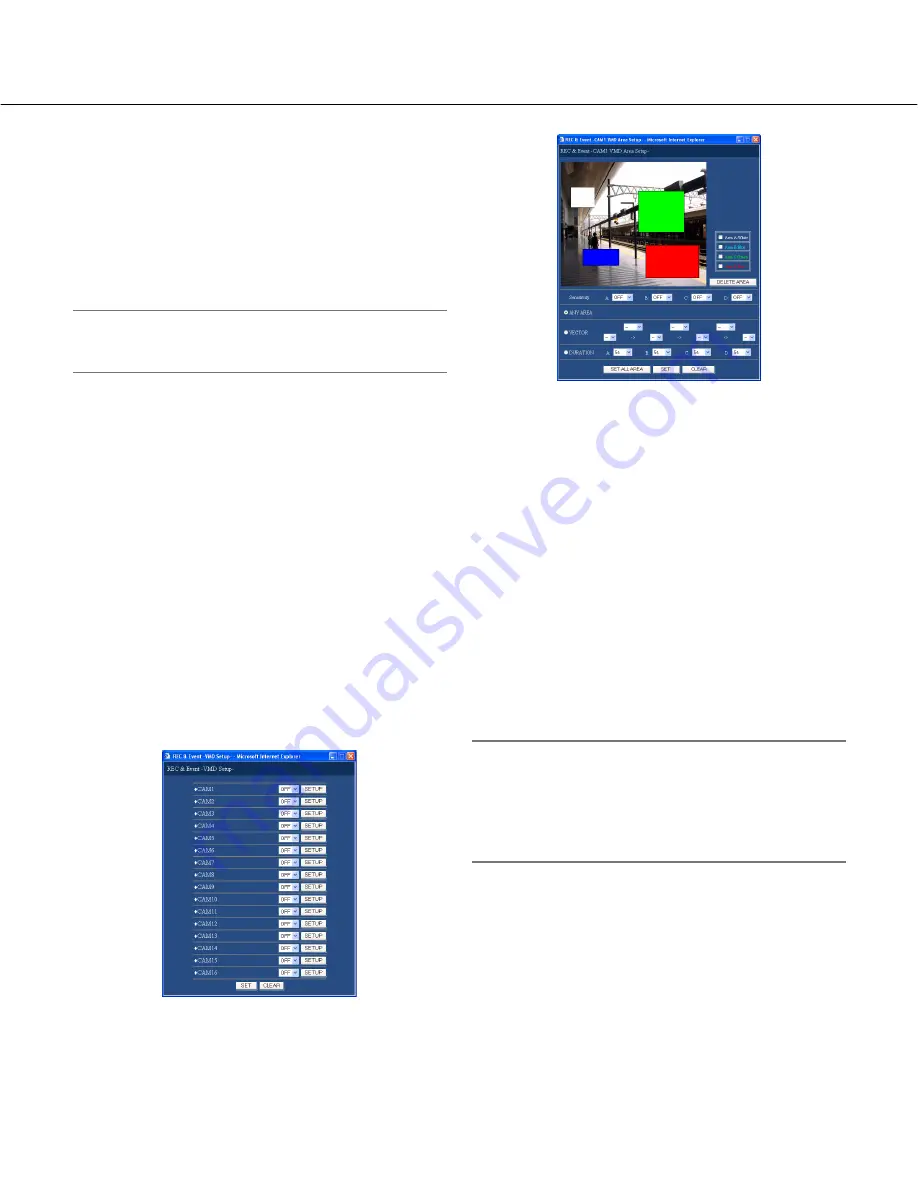
The following window will be displayed when the
[SETUP] button is clicked. Perform the settings for each
item.
Click the [SET] button after completing the settings, and
close the window by clicking the [
×
] button at the top
right of the window.
Select ON for the desired camera channel and press
the SET button. Then, click the respective [SETUP] but-
ton for the desired camera channel to be set. The fol-
lowing window will be displayed.
Set the motion detection areas by dragging the mouse.
Up to 4 areas (A, B, C, D) can be set for the detection
areas.
A:
White
B:
Blue
C:
Green
D:
Red
Click the [SET ALL AREA] button to set all areas on the
monitor as the motion detection area.
To delete a detection area, click the [DELETE AREA]
button after selecting a detection area by checking the
check box of the desired area to be deleted.
Click the [SET] button after completing the settings, and
close the window by clicking the [
×
] button at the top
right of the window.
Notes:
• Refer to page 58 for descriptions of how to delete
the motion detection area.
• It is possible to set the sensitivity and the detection
mode (method of detection) for each detection area.
Refer to page 58 for further information.
Summary of Contents for WJHD309A - DIGITAL DISK RECORDER
Page 2: ...2...


