


53
Coolant Check, Replenishment, and Replacement Procedure
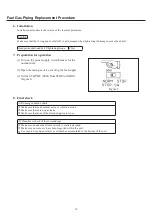
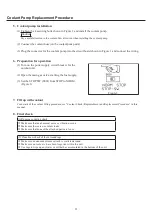
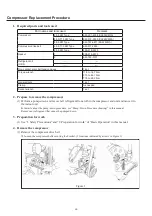
1. Required parts and tools used
Part names and tools used
Remarks
Part names and tools used
Remarks
Genuine Panasonic coolant
------
Nippers
1 set
Pinch pliers (clip pliers)
1 set
Jug
5 litres
Plastic container
20 - 25 litre capacity
Rags
As needed
Brine tester
For ethyl glycol
Hose
Inner diameter 16 mm
Coolant replenishment container 1 set
Hose nipple
Diameter 3/8 x 16 mm
Air-purge improvement device
1 set
Hose band
Inner diameter for 16 mm hose Clamp
As needed
Screwdriver
No. 3 (+) and No.2 (+)
Transparent air-purge hose
Inner diam. 8 mm
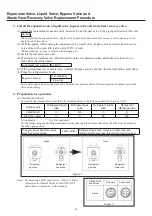
2. Preparation for work
(1) See “1. Safety Precautions” and “2. Preparation for work” of “Basic Operation” in this manual.
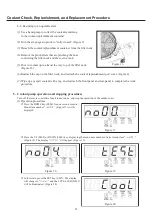
3. Check and replenish coolant
(1) Check and replenish coolant
c
Check the coolant level inside the reserve tank from
the cutout of the side panel on the
¿
ller neck side of
the unit. (Figure 1)
<Suitable Levels>
Between the L and H levels.
d
If the level within the reserve tank is low, replenish
the coolant with the speci
¿
ed concentration of
genuine Panasonic coolant (50 ±5%) up until the H
level position.
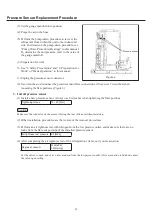
1) Remove the coolant replenishment port cover on
the top panel, and then remove the rubber cap from
the reserve tank. (Figure 2)
2) Use the jug to replenish the coolant until the H
level in the reserve tank.
3) Reattach and tighten the rubber cap on the reserve
tank.
e
Wipe up any spilt coolant with a rag or the like.
f
Reattach the coolant replenishment port cover on the
top panel.
Figure 1
H Level
L Level
Figure 2
Cap
Coolant refill hole cover
Coolant refill hole
GHP̲Main̲Parts̲Replacement.indd 53
2012/07/31 17:54:34


