


T
Q
BJ09
97
8
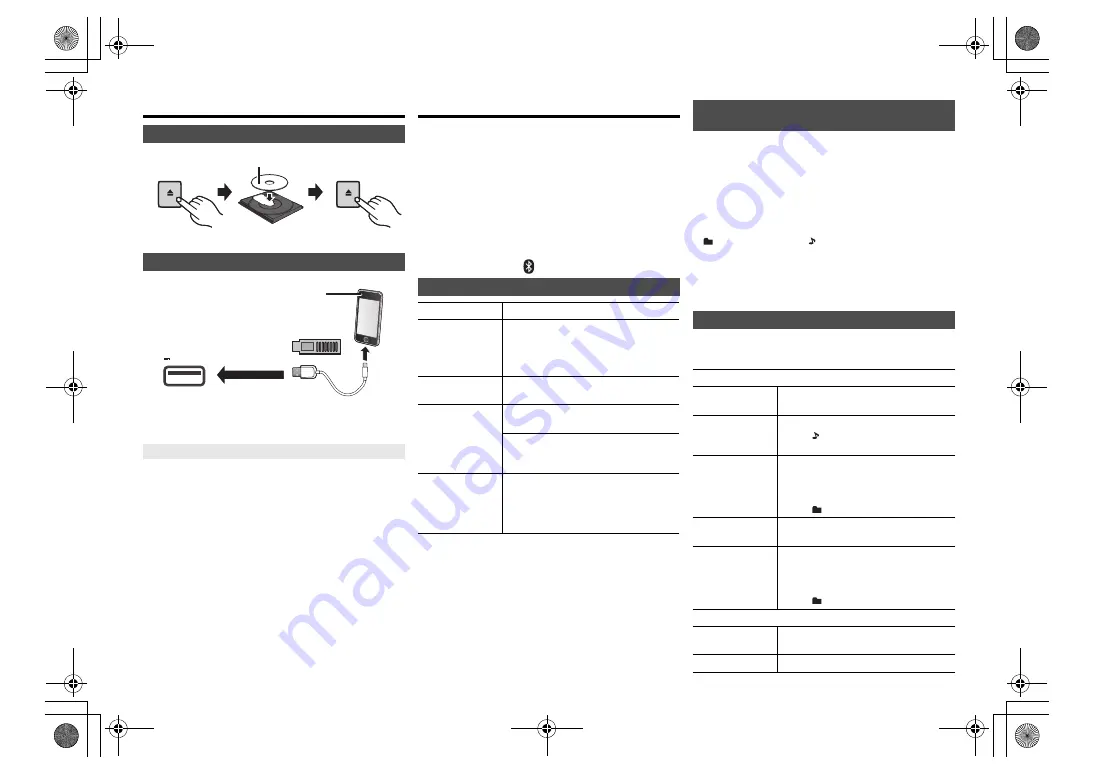
Inserting media
Press [CD/USB] repeatedly to select “CD”.
Press [CD/USB] repeatedly to select “USB”.
The display will automatically change to “IPOD” when a
compatible iPhone/iPad/iPod is connected to the port.
During unit on, charging starts when an iPhone/iPad/
iPod is connected to this unit.
• After the iPhone/iPad/iPod has started charging, you
can turn the unit to standby mode.
• Check the iPhone/iPad/iPod to see if the battery is fully
charged. (Once fully charged, remove the iPhone/iPad/
iPod.)
Note:
• Remove the CD only after it stops rotating.
• When connecting an iPhone/iPad/iPod, use the dedicated
USB cable (not supplied).
• Insert the USB device directly. Do not use any USB
extension cable.
• Please disconnect the USB device if you finish using.
• Before removing the USB device, select a source other
than “USB”.
Media playback controls
The following marks indicate the availability of the feature.
Preparation
• Turn the unit on.
• Insert the media or connect the Bluetooth
®
device.
• Press [CD/USB] or [
] to select the audio source.
Note:
• There will be no sound in search operation when playing
DSD files at USB selector.
• To use this unit’s remote control with a Bluetooth
®
device,
the Bluetooth
®
device must support AVRCP (Audio Video
Remote Control Profile).
Depending on the status of the device, some controls may
not work.
• Operation results may vary depending on the iPhone/iPad/
iPod models.
•
[CD]
[USB]
:Tracks can be selected by pressing the numeric
buttons.
You can display the track, artist, album name, file type,
bit rate, and other information. (The information varies
depending on the audio source.)
Press [DISPLAY] repeatedly.
e.g.
[USB]
(MP3)
Note:
• Maximum characters that can be shown:
approximately 32
• This system supports ver. 1 and 2 ID3 tags.
• Text data that the system does not support can show differently.
1
Press [PLAY MENU] to select “PLAYMODE” or “REPEAT”.
2
Press [
2
,
1
] to select the setting and then press [OK].
CD
iPhone/iPad/iPod or USB device
Charging an iPhone/iPad/iPod
OPEN/CLOSE
OPEN/CLOSE
Label facing up
5V 2.1A
• Connect only compatible iPhone/
iPad/iPod models (
7).
Failure to do so may result in
unexpected behaviour.
[CD]
:
CD audio in CD-DA format or a CD that
contains MP3 files
[iPod]
:
Compatible iPhone/iPad/iPod connected to
the USB port.
[USB]
:
USB devices containing MP3/AIFF/FLAC/
WAV/AAC/DSD files
[Bluetooth]
: Connected Bluetooth
®
device
Basic controls
[CD]
[iPod]
[USB]
[Bluetooth]
Play
Press [
1
/
;
].
Stop
Press [
∫
].
•
[USB]
: The position is memorised and
“RESUME” is displayed.
•
[USB]
: Press [
∫
] twice to stop the
playback fully.
Pause
Press [
1
/
;
].
Press again to continue playback.
Skip
Press [
:
] or [
9
] to skip track.
(this unit: [
:
/
6
] or [
5
/
9
])
[CD]
[USB]
: Press [
3
] or [
4
] to skip the
MP3/AIFF/FLAC/WAV/AAC/DSD
album.
Search
During play or pause
Press and hold [
6
] or [
5
].
(this unit: [
:
/
6
] or [
5
/
9
])
•
[iPod]
: Backwards search is only within
the current track.
Viewing available information
[CD]
[USB]
[Bluetooth]
“A
”:
Album number
“T
”:
Track number
(“
” stands for a number.)
“
”: Album
“
”: Track
Play menu
[CD]
[USB]
PLAYMODE
OFF
PLAYMODE
Cancels the play mode setting.
1-TRACK
Only plays the selected track.
• “1”, “ ” is displayed.
(Skip to the desired track.)
1-ALBUM
Only plays the selected MP3/AIFF/
FLAC/WAV/AAC/DSD album.
• Press [
3
] or [
4
] to select the MP3/
AIFF/FLAC/WAV/AAC/DSD album.
• “1”, “
” is displayed.
RANDOM
Plays the contents randomly.
• “RND” is displayed.
1-ALBUM
RANDOM
Plays the tracks in the selected MP3/AIFF/
FLAC/WAV/AAC/DSD album randomly.
• Press [
3
] or [
4
] to select the MP3/
AIFF/FLAC/WAV/AAC/DSD album.
• “1”, “
”, “RND” is displayed.
REPEAT
ON REPEAT
Turns on repeat mode.
• “
`
” is displayed.
OFF REPEAT
Turns off repeat mode.
SA-PMX82-M~TQBJ0997.book 8 ページ 2017年4月14日 金曜日 午前9時58分


