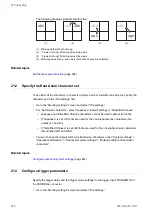
22 Laser settings
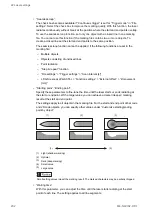
• “Scan speed [mm/s]” (LP-RF, LP-RV):
The parameter is available for processing applications.
Specify the speed at which the laser beam moves while processing. Use the slider to
adjust the speed. A high speed decreases the energy and shortens the processing time.
A low speed increases the energy and the processing time.
• “Guide laser ON”:
Select “Guide laser ON” to start radiating the guide laser.
Select “Guide laser OFF” to stop the radiation of the guide laser.
• “Start marking”:
Select “Start marking” to trigger the laser radiation. Perform the test marking process to
check the marking quality with the specified smart settings.
• “Estimated marking time” / “Estimated processing time”:
Displays the calculated time based on the input data that the marking or processing is
expected to take. To obtain a more precise result, perform marking time measurement.
• Select “Apply” to transfer the specified settings to the following parameters in the file:
‒ “Laser settings” > “Laser power”
‒ “Laser settings” > “Scan speed”
‒ “Laser settings” > “Laser frequency [kHz]” (LP-GS)
‒ “Laser settings” > “Pulse cycle [μs]” (LP-RF, LP-RV)
‒ “Laser settings” > “Pulse duration [ns]” (LP-RV)
‒ For processing applications: “Object group” > “Number of overwritings” (LP-RF, LP-
RV)
• To close the dialog, select “Close”.
Related topics
Configure smart settings for marking applications
Configure smart settings for processing applications
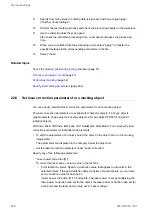
22.4 Configure smart settings for marking applications
With smart settings, you can select one of the predefined marking applications and if
necessary, fine-tune the contrast and laser power.
1.
Go to the “Marking settings” screen.
2.
Create the marking object and specify the desired layout.
3.
Turn laser pumping on to enable the lasing process.
4.
Select “Laser settings”.
236
ME-NAVIS2-OP-1


