


6-8
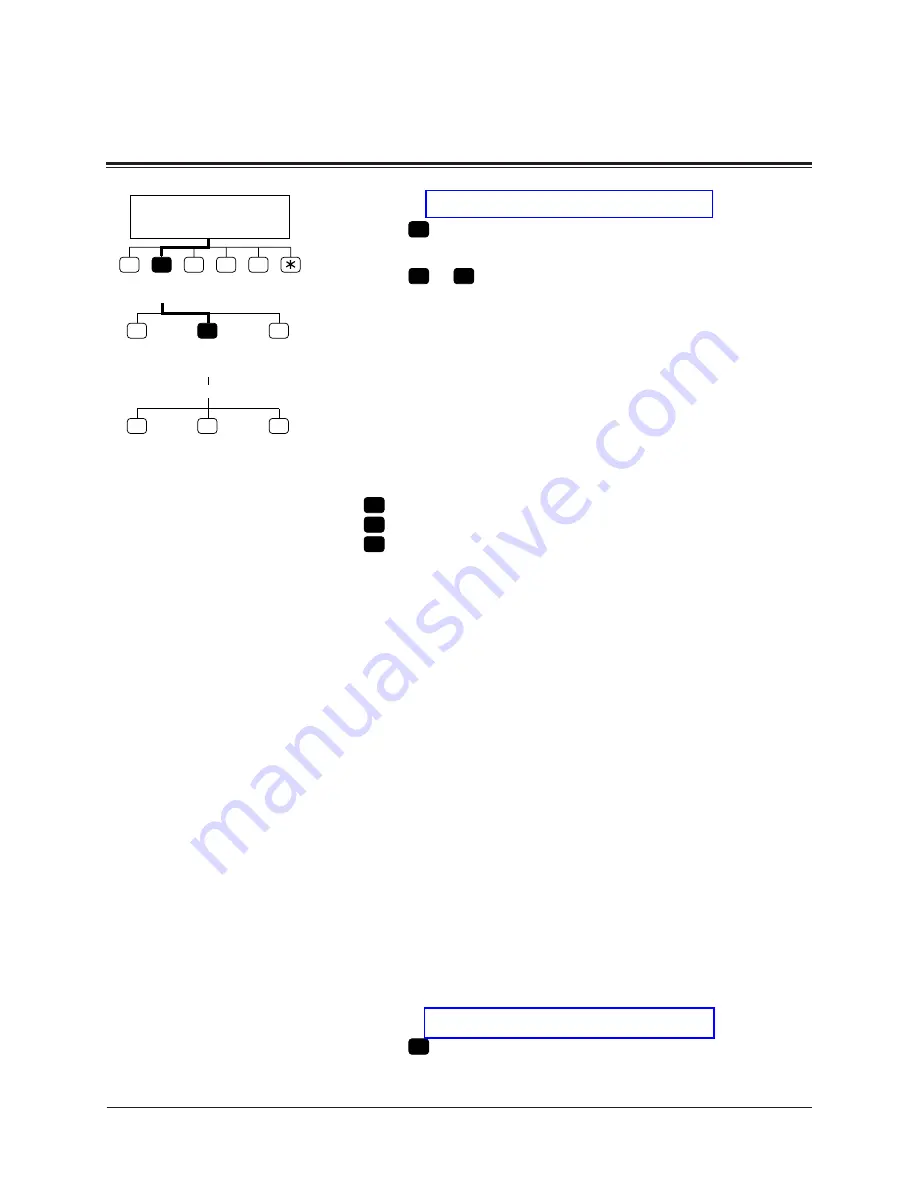
Message Manager
6.4
Setting up Message Waiting
Notification
1-2
Same as the Message Waiting Lamp Status.
3
Press
2
to change the way of notification.
4
Enter the device number.
5
Press
1
–
3
to select the status.
Tip:
Step 3 -
1
Schedule (enabled on the schedule)
2
Continuously (enabled whole day)
3
Not Used (disabled whole day)
6.4.2.2 Assigning Notification Numbers
You can set up to three telephone or beeper numbers where
you wish to receive notification. You can use the keys ‘0’
to ‘9’, a tone/pulse switch, and the beeper callback number
display entry code ‘X’.
If you add the Beeper Callback No. Entry Code at the end of
a beeper number, the notification is made in a little different
way. The VPS asks the caller to enter the number to which
he wishes to be called and displays it on the LCD of your
beeper. The timing of the callback number entry is either
before, after or without recording message. It depends on
System Programming.
It is also possible to have the caller select whether or not
enter the number.
You must have your System Manager authorize the use of
the Beeper Callback No. Entry Code.
1-2
Same as the Message Waiting Lamp Status.
3
Press
3
to assign the telephone number.
1
Setting
M.W.N.
Message Manager's
Main Command Menu
2
3
4
5
Change
M.W.Lamp
Status
1
2
3
Change
Device
Status
Assign
Tel No.
Schedule
Continuously
Device No.
Not Used
1
2
3
Summary of Contents for KX-TVP200BX
Page 3: ...MC Service ...
Page 5: ...KXTVP200C KXTVP204CTOP 3 ...
Page 68: ...Memo ...
Page 69: ...Memo ...
Page 73: ...Changes to Installation Manual 3 ...
Page 97: ...Changes to Worksheets 27 ...
Page 443: ...Worksheets W 3 5 See pages 6 12 6 13 Message Manager Top Menu 5 2 Company Name Company Name ...


