53
KX-FT932BR-B
To select characters with dial keypad
Note:
To enter another character that is located on the same dial
key, press
[ ]
to move the cursor to the next space.
To enter your logo
Example:
“BILL“
1. Press
[2]
2 times.
2. Press
[4]
3 times.
3. Press
[5]
3 times.
4. Press
[ ]
to move the cursor to the next space and
press
[5]
3 times.
To change uppercase or lowercase letters
Pressing the
[ ]
button will change to uppercase or lower-
case letters alternately.
1. Press
[2]
2 times.
2. Press
[4]
3 times.
3. Press
[ ]
.
4. Press
[5]
3 times.
To correct a mistake
1. Press
[ ]
or
[ ]
to move the cursor to the incorrect
character.
2. Press
[STOP]
.
• To erase all characters, press and hold
[STOP]
.
3. Enter the correct character.
To select characters using [ + ] or [—]
Instead of pressing the dial keys, you can select characters
using
[ + ]
or
[
—
]
.
1. Press
[
—
]
repeatedly to display the desired character.
Characters will be displayed in the following order:
(1) Uppercase letters
(2) Number
(3) Symbol
(4) Lowercase letters
• If you press
[ + ]
, the order will be reversed.
2. Press
[ ]
to insert the character.
3. Return to step 1 to enter the next character.
Summary of Contents for KX-FT932BR-B
Page 11: ...11 KX FT932BR B 6 Technical Descriptions 6 1 Connection Diagram ...
Page 21: ...21 KX FT932BR B 6 4 2 Block Diagram ...
Page 23: ...23 KX FT932BR B ...
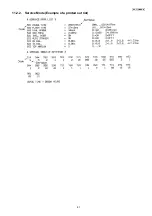
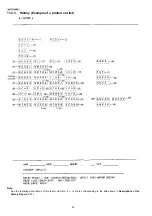
Page 61: ...61 KX FT932BR B 11 2 2 Service Mode Example of a printed out list ...
Page 67: ...67 KX FT932BR B ...
Page 68: ...68 KX FT932BR B CROSS REFERENCE Test Mode P 54 ...
Page 69: ...69 KX FT932BR B CROSS REFERENCE Test Mode P 54 ...
Page 70: ...70 KX FT932BR B CROSS REFERENCE Test Mode P 54 ...
Page 71: ...71 KX FT932BR B ...
Page 73: ...73 KX FT932BR B ...
Page 74: ...74 KX FT932BR B ...
Page 75: ...75 KX FT932BR B CROSS REFERENCE Test Mode P 54 ...
Page 102: ...102 KX FT932BR B NG Wave pattern Note Refer to NG Example P 107 ...
Page 104: ...104 KX FT932BR B I O and Pin No Diagram ...
Page 106: ...106 KX FT932BR B ...
Page 107: ...107 KX FT932BR B 12 5 5 3 NG Example ...
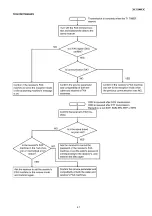
Page 111: ...111 KX FT932BR B 12 5 7 2 Troubleshooting Flow Chart ...
Page 116: ...116 KX FT932BR B 12 5 11 Thermal Head Section Refer to Thermal Head P 22 ...
Page 117: ...117 KX FT932BR B 13 Service Fixture Tools ...
Page 120: ...120 KX FT932BR B 14 2 Disassembly Procedurel 14 2 1 How to Remove the Operation Panel Block ...
Page 121: ...121 KX FT932BR B 14 2 2 How to Remove the Operation Board LCD and Platen Roller ...
Page 122: ...122 KX FT932BR B 14 2 3 How to Remove the Separation Holder and Document Feed Support ...
Page 123: ...123 KX FT932BR B 14 2 4 How to Remove the Image Sensor CIS and Feed Roller ...
Page 124: ...124 KX FT932BR B 14 2 5 How to Remove the Lock Lever and Thermal Head ...
Page 125: ...125 KX FT932BR B 14 2 6 How to Remove the Bottom Frame ...
Page 128: ...128 KX FT932BR B 14 2 10 Installation Position of the Lead Wires ...
Page 134: ...134 KX FT932BR B 15 2 3 Mechanical Movements in the Main Operations 15 2 3 1 Idle Status ...
Page 136: ...136 KX FT932BR B 15 2 3 4 Copying CROSS REFERENCE Sensor Section P 114 ...
Page 140: ...140 KX FT932BR B 16 1 4 Power Supply Board ...
Page 143: ...143 KX FT932BR B 16 3 Test Chart 16 3 1 ITU T No 1 Test Chart ...
Page 144: ...144 KX FT932BR B 16 3 2 ITU T No 2 Test Chart ...
Page 145: ...145 KX FT932BR B MEMO ...
Page 152: ...152 KX FT932BR B MEMO ...
Page 161: ...161 KX FT932BR B MEMO ...
Page 163: ...163 KX FT932BR B 20 1 2 Upper Cabinet Section ...
Page 164: ...164 KX FT932BR B 20 1 3 Lower Cabinet Section ...
Page 165: ...165 KX FT932BR B 20 1 4 Gear Block Section ...
Page 166: ...166 KX FT932BR B 20 1 5 Screws ...
Page 167: ...167 KX FT932BR B 20 1 6 Accessories and Packing Materials ...

