54
Step 1
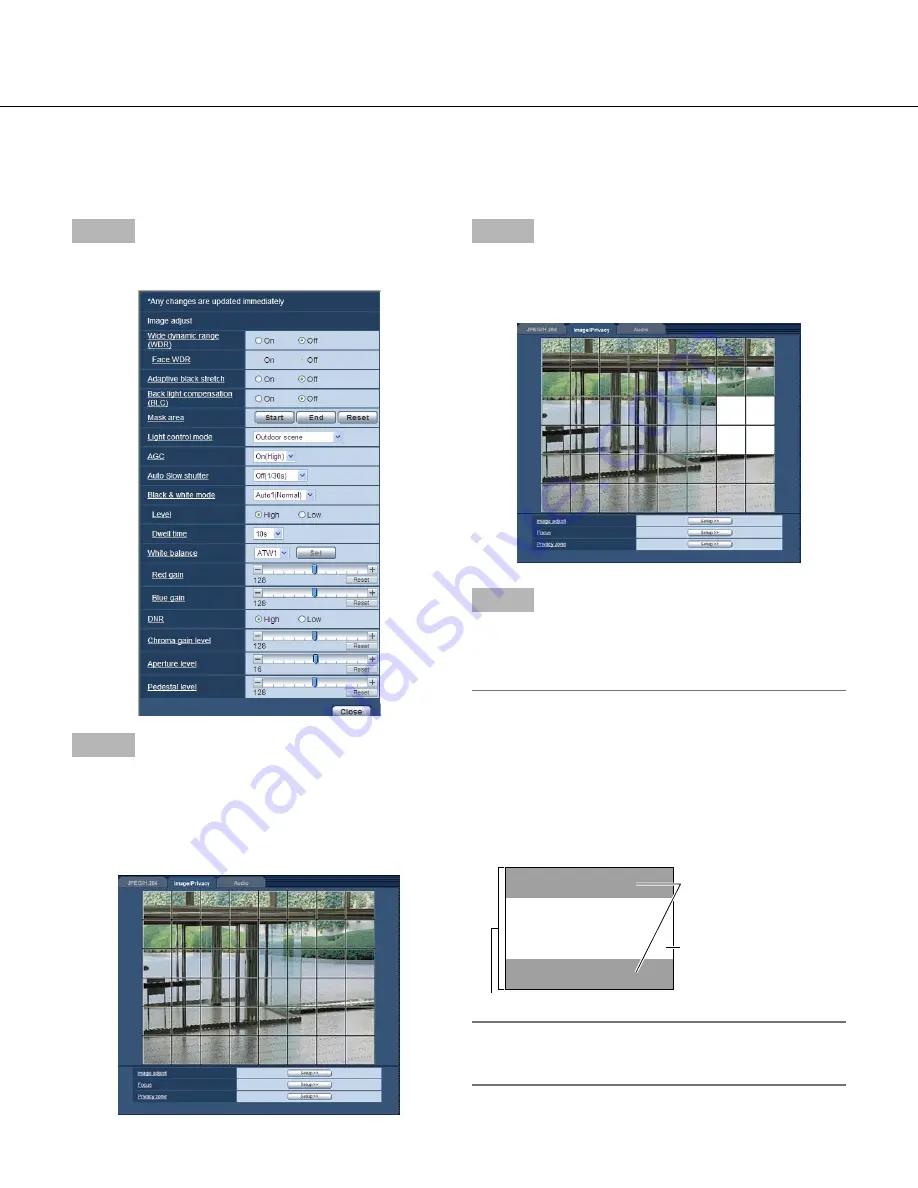
Display the "Image adjust" setup menu. (
☞
Page 50)
Step 2
Click the [Start] button of "Mask area".
→
Borders will appear and the image displayed on the
[Image/Privacy
] tab will be divided into 48 (6x8).
It will be divided into 32 (4x8) when "16:9" is select
-
ed for the aspect ratio.
Step 3
Click the divided areas to be masked.
→
The clicked areas will be masked and will become
white. To cancel masking, click the area again.
Step 4
Click the [End] button after completing masking areas.
→
The borders on the image displayed on the [Image/
Privacy] tab will disappear.
Important:
• When "16:9" is selected for the aspect ratio of
JPEG/H.264, the image will be displayed clipped
from the image of "4:3".
Therefore even when "16:9" is set, the brightness of
the nondisplayed masked area will affect the image,
it is recommended that the aspect ratio should be
once set to "4:3" before masking.
Image in the aspect ratio of "4:3"
Areas where the image is
not displayed when "16:9"
is selected for the aspect
ratio
Image in the aspect ratio of
"16:9" (Being cut out from
the aspect ratio of 4:3)
Note:
• When the [Reset] button is clicked, masking for all
the masked areas will be canceled.
Set mask areas
When "Off" is selected for
"Wide dynamic range (WDR)" and "Back light compensation(BLC)", it is possible to com-
pensate for backlight by masking brighter areas.


