


Chapter 2
Getting Started — Connecting
24 - ENGLISH
Note
f
For an HDMI cable, use an HDMI High Speed cable that conforms to HDMI standards. If a cable that does not conform to HDMI standards
is used, images may be interrupted or may not be displayed.
f
The <HDMI 1 IN> terminal/<HDMI 2 IN> terminal of this device can be connected to the equipment with the DVI-D terminal by using the
HDMI/DVI conversion cable. However, this may not properly function as no image is output on some equipment.
f
To input the Y/C signal to the <COMPUTER 1 IN> terminal using the optional D-SUB - S Video conversion cable (Model No.: ET-ADSV), go
to the [OPTION] menu
→
[COMPUTER IN] and set [COMPUTER 1 INPUT SETTING] to [Y/C]. (
x
page 48)
The <COMPUTER 2 IN> terminal does not support input of Y/C signal.
f
To automatically adjust the resolution of the image input device connected to the <HDMI 2 IN> terminal to the resolution of the display
(projector or flat panel display) connected to the <DIGITAL LINK OUT 1> terminal or the <DIGITAL LINK OUT 2> terminal, go to the
[OPTION] menu
→
[HDMI IN] and set [HDMI 2 EDID MODE] to [COPY]. (
x
page 50)
f
It may not operate properly, such as audio does not output, if the setting in the [OPTION] menu
→
[AUDIO SETTING]
→
[AUDIO IN
SELECT] is incorrect.
f
This device does not support VIERA Link (HDMI).
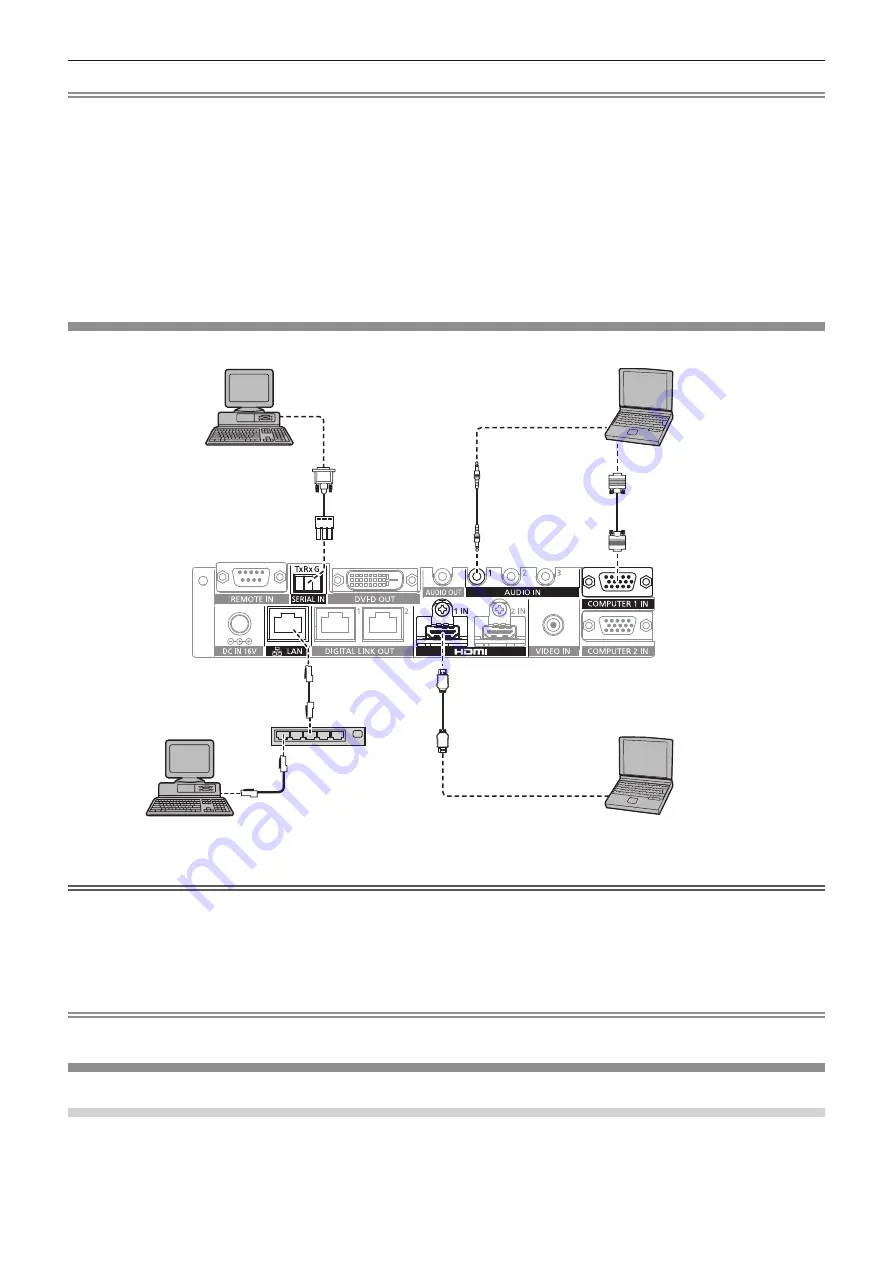
Connecting example: Computers
Control computer
*1
Control computer
*1
Computer
Computer
Computer cable (commercially
available)
Plug for 3-pin 3.5 mm detachable terminal
block
Hub
HDMI cable (commercially available)
*1
Controls this device and the display (projector or flat panel display) main body.
Attention
f
When connecting this device to a computer or an external device, use the power cord supplied with each device and commercially available
shielded cables.
f
Since the <LAN> terminal is very close to the <REMOTE IN> terminal or the <SERIAL IN> terminal, it may be difficult to remove the cable
connected to the <LAN> terminal when a cable is connected to the <REMOTE IN> terminal or the <SERIAL IN> terminal. When removing
the cable connected to the <LAN> terminal, remove the cable connected to the <REMOTE IN> terminal or the <SERIAL IN> terminal in
advance.
Note
f
To connect to the <SERIAL IN> terminal, refer to “<SERIAL IN> terminal” (
x
page 83).
Connecting example: Image display device
When connecting to the DIGITAL LINK compatible display
The DIGITAL LINK compatible display (projector or flat panel display) can be connected to the <DIGITAL
LINK OUT 1> terminal and the <DIGITAL LINK OUT 2> terminal of this device. Two displays regardless of the
model can be connected to the <DIGITAL LINK OUT 1> terminal and the <DIGITAL LINK OUT 2> terminal
simultaneously, but the display connected to the <DIGITAL LINK OUT 1> terminal will take priority.


