background image

VQT2J51

73

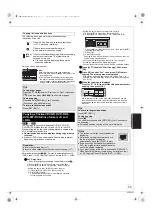
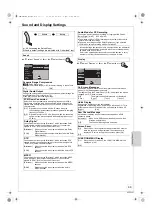
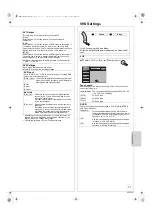
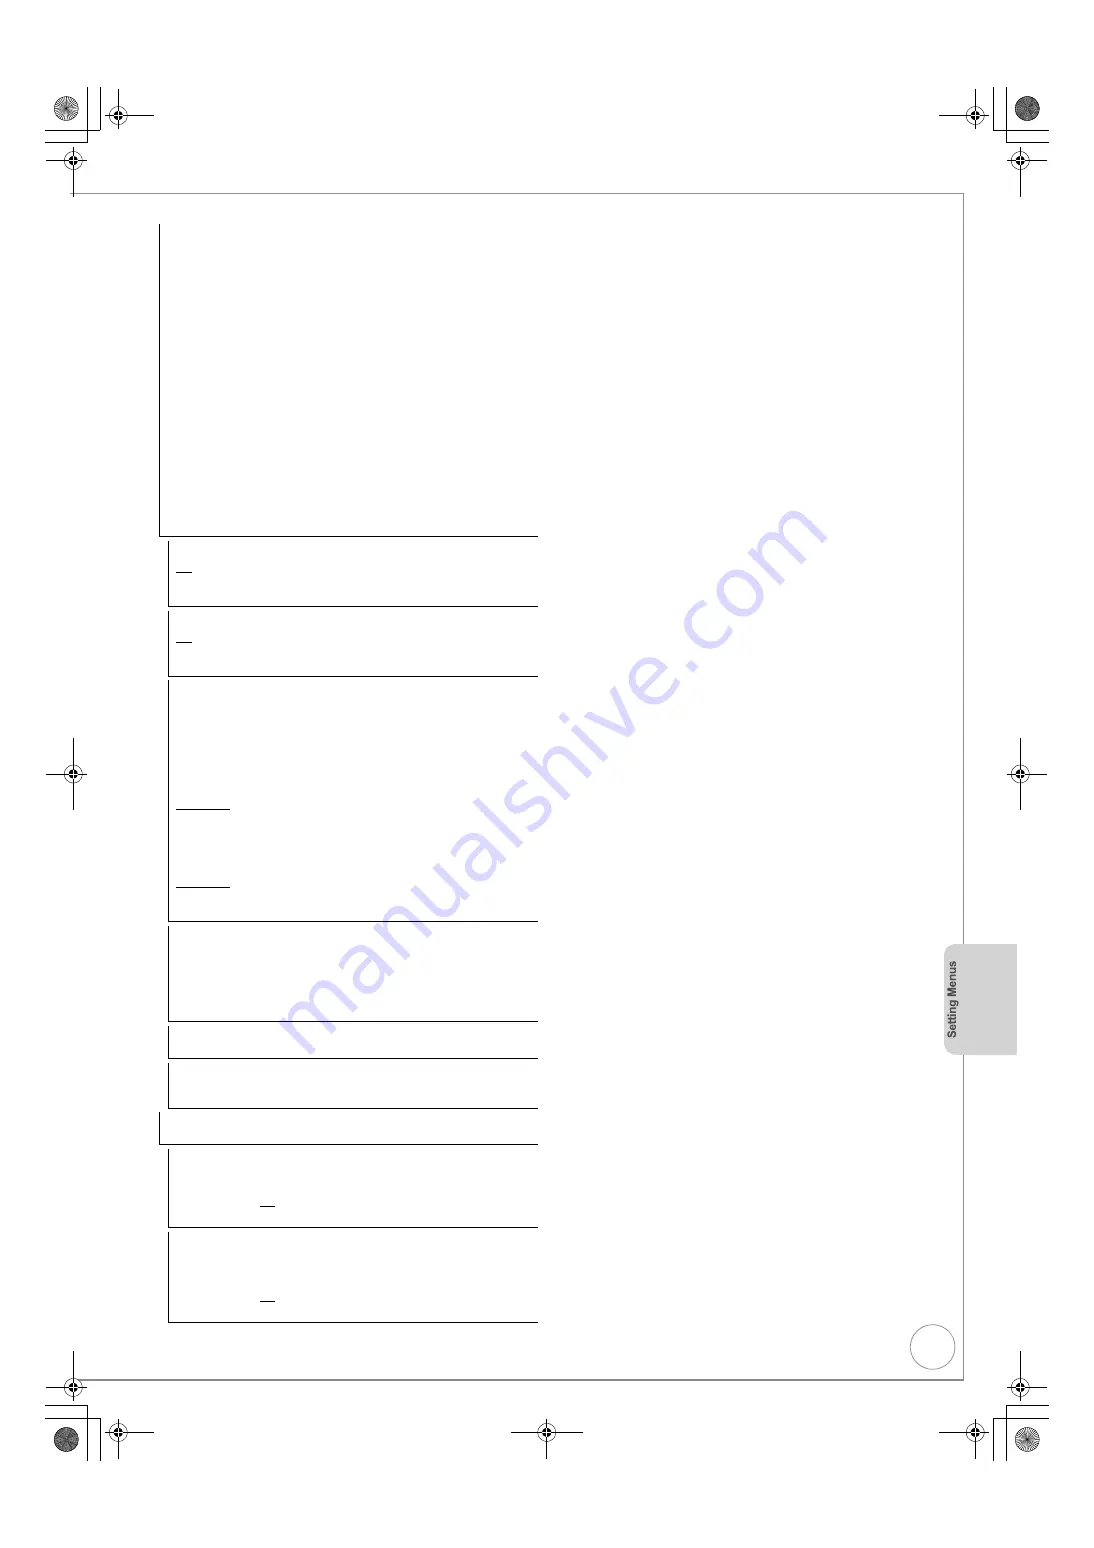
System Update

In order to update this unit, the TV Guide download, and support 

system changes made by broadcasts, this unit periodically performs 

software updates.

Press [OK] to show the following settings.

Update data and TV Guide download information are sent by an 

unscheduled digital broadcast. In order to receive these updates, 

you must be able to receive digital broadcasts.

An update will take approximately 60 minutes. While the update is in 

progress, “SW-DL” appears on the unit’s display. 

You cannot operate the unit until the update is complete.

Removing the AC mains lead while the update is in progress may 

damage the unit.

TV Guide download will take approximately 30 minutes.

While the TV Guide download is in progress, “GUIDE” appears on 

the unit’s display. The TV Guide download can be interrupted by 

switching on the unit.

To avoid hearing the startup sound of System Update for the unit, 

perform the following steps.

– Select the time for Software Update (

>

below, TV Guide/Software 

search period).

– Set “TV Guide Download in Standby” and “Software Update in 

Standby” (

>

below) to “Off”, and update manually (

>

below, 

Software Update Search Now).

TV Guide Download in Standby

[On]

When the unit is turned off, TV Guide data is downloaded 

automatically.

[Off]

Software Update in Standby

[On]

You can perform the unit updates automatically when the 

unit is turned off.

[Off]

TV Guide/Software search period

Selects the time to automatically perform TV Guide download and 

updates when the unit is turned off. This can only be set when “TV 

Guide Download in Standby” or “Software Update in Standby” is set 

to “On”.

If there is a programmed recording set for the time you have 

selected, the programmed recording will be given priority.

When the GUIDE Plus+ system is not available

[Automatic]

The unit will give priority to searching for update 

data at midnight.

[02:00–06:00]

[06:00–10:00]

[10:00–14:00]

[14:00–18:00]

[18:00–22:00]

[22:00–02:00]

When the GUIDE Plus+ system is available

[Automatic]
[Daytime]

Updating is executed during daytime (06:00–

22:00).

Software Update Search Now

Start the search for new software manually.

A new software version is announced by a message. Do not turn this 

unit off during the update. This could result in the loss of data. A 

message shows that the update has finished.

If applicable update data is found, press [

2

,

1

] to select “Yes”, 

then press [OK].

GUIDE Plus+ System Information

You can check the condition of GUIDE Plus+ system of this unit.

Post Code

You can input the postal code which is necessary to download area 

specific information of GUIDE Plus+ system.

Initialize

Press [OK] to show the following settings.

Shipping Condition

This returns Setup menus to default settings, except for the ratings 

level, ratings PIN, Slideshow Settings, Owner ID and clock settings, etc.
[Yes]

[No]

The timer recording programmes are also cancelled.

Default Settings

This returns Setup menus to default settings, except for the tuning 

settings, clock settings, disc language settings, ratings level, ratings 

PIN, Slideshow Settings, Owner ID and remote control code, etc.
[Yes]

[No]

The timer recording programmes are also cancelled.

DMR-EZ49VEB_VQT2J51.book  73 ページ  2009年12月21日 月曜日 午後5時40分

Summary of Contents for DMR-EZ49VEB

Page 1: ...hannels only not Pay TV or encrypted channels unless connected to an external source capable of receiving Pay TV or encrypted channels This unit does not have an analogue broadcast tuner About descrip...

Page 2: ...ator Title View Previous Page 02 02 Next DVD RAM MUSIC PICTURE VIDEO Select OK RETURN OPTION Previous Next 07 08 BBC 1 10 10 FRI BBC 1 11 10 SAT Select a function and an item You can access selected f...

Page 3: ...fuse cover with a screwdriver 2 Replace the fuse and close or attach the fuse cover Accessories Please check and identify the supplied accessories Use numbers indicated in parentheses when asking for...

Page 4: ...s Ltd 2002 2008 U S Patent Nos 6 836 549 6 381 747 7 050 698 6 516 132 and 5 583 936 This product incorporates copyright protection technology that is protected by U S patents and other intellectual p...

Page 5: ...56 Copying Titles or Playlists 57 Copying Titles VHS DVD 57 Copying Titles or Playlists DVD VHS 58 Copying a finalised DVD R DVD R DL DVD RW DVD Video format R and R DL 59 Copying Still Pictures 60 S...

Page 6: ...he problem persists seek advice from a qualified service person Cautions about condensation Condensation can cause unreliable playback of VHS recordings Condensation may form in the following cases Th...

Page 7: ...nit is stopped so the USB device screen is displayed Select an item then press OK to switch to the USB related operations 42 60 Removing the USB memory Complete all USB related operations and pull the...

Page 8: ...ategory 33 37 49 for editing Favourites 66 Recording function REC Start recording 22 REC MODE Change recording mode 22 EXT LINK Linked timer recordings with external equipment 31 DIRECT TV REC Direct...

Page 9: ...wer 7 AV3 input terminals 32 8 DVD VHS drive indicator 20 Lights when the DVD or VHS drive is selected There is no drive indicator for HDD or SD drive 9 DRIVE SELECT button 20 21 22 Drive changes each...

Page 10: ...iety of Q Link functions by connecting the unit to a Q Link compatible television 46 You can enjoy high quality viewing by connecting the unit to an RGB compatible television AV1 Output in the Setup m...

Page 11: ...e Programmes 19 To record digital satellite programmes Refer to Recording from a Digital Satellite Receiver 31 Connecting AC mains lead included When the unit is not to be used for a long time To save...

Page 12: ...ble HDTV and set HDMI Video Format in the Setup menu to 1080p 70 Notes If connecting to equipment that is only compatible with 2 channel audio output audio with 3 channels or more will be down mixed 9...

Page 13: ...REW JET REW FF SLOW SEARCH RESET VOL AV DRIVE SELECT STATUS EXIT OPTION RETURN DELETE OK D I R E C T N A V I G A T O R F U N C T I O N M E N U GUIDE Tips To cancel Auto Setup Press RETURN If the unit...

Page 14: ...orget Owner ID cannot be reset by Shipping Condition in the Setup menu 73 5 to store the PIN number 6 2 to select Yes then The cursor moves to Name 7 1 to enter the name 8 3 4 to select a letter then...

Page 15: ...e condition of the discs and you may not be able to play them due to the condition of the recording Recording Modes and Durations 28 Usable Discs for Recording and Playback Disc type Logo Data that ca...

Page 16: ...ossible to view 1 If your television is not equipped to handle PAL 525 60 signals the picture will not be shown correctly 2 Select NTSC in TV System 70 When playing back a disc ensure that you match t...

Page 17: ...Digital Cameras which require additional programme installation when connected to a PC are not supported MTP Media Transport Protocol device is not supported A multi port USB card reader is not suppor...

Page 18: ...t be in the order you number the folders Structure of MP3 folders R R DL CD USB Prefix with 3 digit numbers in the order you want to play them Order of play Structure of still pictures folders R R DL...

Page 19: ...SKIP 60s STOP PAUSE PLAY INPUT SELECT 0 9 8 7 6 5 4 3 2 1 CH CH TRACKING V LOCK PAGE CHAPTER PROG CHECK SKIP INDEX REW JET REW FF SLOW SEARCH RESET VOL AV DRIVE SELECT STATUS EXIT OPTION RETURN DELET...

Page 20: ...ered buttons to select an item e g 5 15 TV MANUAL SKIP STOP PAUSE PLAY INPUT SELECT 0 9 8 7 6 5 4 3 2 1 CH CH TRACKING V LOCK PAGE CHAPTER PROG CHECK SKIP INDEX REW FF SLOW SEARCH RESET VOL AV DRIVE S...

Page 21: ...the accidental erasure tab removed 4 Stopping Play Press Pausing Play Press Press again to restart play Notes Tapes are automatically rewound once they reach the end except during Timer recording fas...

Page 22: ...g turn on the Audio Description and set the volume 48 To record with the selected audio Before starting the recording select the desired audio channel or language if the programme has multiple audio c...

Page 23: ...not set correctly If NTSC has been selected for TV System 70 the GUIDE Plus system cannot be used Guide Link will not be displayed and will not function under the following conditions Timer programmes...

Page 24: ...rts properly COPY lights on the unit s display Copying is automatically completed when the tape reaches its end or the disc becomes full Tips Dividing a title to be copied When copying from VHS to DVD...

Page 25: ...d title 1 Press DRIVE SELECT to select the DVD drive 2 Press DIRECT NAVIGATOR 3 Press 3 4 2 1 to select the title you want to start recording then press OK 4 Go to the operation shown above Index sign...

Page 26: ...US EXIT OPTION RETURN DELETE OK D I R E C T N A V I G A T O R F U N C T I O N M E N U GUIDE Notes You cannot delete while recording or copying R R DL RW Even if you have set protection on other equipm...

Page 27: ...tles to them You can then play them in the same way as a commercially sold DVD Video However the discs become play only and you can no longer record or copy You can record and copy again if you format...

Page 28: ...e switches This may not work correctly with some video cassettes It may not work correctly when NTSC is set as the TV System 70 DVD Recording Modes and Durations Recording Mode DVD RAM DVD R DVD RW R...

Page 29: ...RAM R R DL RW V R R DL RW This function allows you to immediately start recording the programme that you are viewing on the TV without having to change the channels on this unit You can use the funct...

Page 30: ...the DIRECT NAVIGATOR screen Press DIRECT NAVIGATOR To stop recording After play stops 1 RAM Press DIRECT NAVIGATOR to exit the screen 2 Press 3 If the recording stop confirmation screen is displayed...

Page 31: ...andby mode or recording playback is only available if you select the DVD drive in the step 2 above When EXT L lights on the unit s display Direct TV Recording is unavailable Manual Recording Preparati...

Page 32: ...all videos and DVD Video on sale have been treated to prevent illegal copying Any software that has been so treated cannot be recorded using this unit Preparation Turn on the unit RAM If the disc is...

Page 33: ...ccidental erasure tab is intact Insert a disc or a video cassette with enough remaining blank space Confirm that the clock on the unit s display is set to the correct time If connected via a digital s...

Page 34: ...54 00 RETURN OK Press OK to store new programme Mode STTL Stop Start No Date Drive Channel Drive space NewTimer Programme VHS AD 2 59 SP F Timer programme is active Currently recording Programmes are...

Page 35: ...cancelled Timer recordings are activated regardless of whether the unit is turned on off Timer recordings begin when the set time is reached even when playing Timer recordings do not begin while editi...

Page 36: ...imer recording Landscape view The GUIDE Plus system offers detailed information as if you see a TV programme magazine This is convenient to check the status of Timer recording Portrait view This is co...

Page 37: ...ogramme type to display the list of categories 3 3 4 to select the desired item 4 A list appears with all programmes of the selected item When you select the landscape view the programmes that belong...

Page 38: ...c t It cannot be played because data is damaged etc Currently recording One time only recording restriction 92 CPRM NTSC PAL Title recorded using a different encoding system from that of the TV System...

Page 39: ...approximately 10 seconds RAM After creating chapters in your favourite scenes you can easily reach the head of scene using 9 SKIP or play on Chapter View 52 Tips Chapters cannot be created during EXT...

Page 40: ...cordings of at least 5 minutes to ensure that index signals are not spaced too closely together This unit can play tapes recorded in S VHS Some picture noise may occur depending on the type of tape us...

Page 41: ...i stereo audio Normal Normal audio 3 Recording mode 28 4 Operation status 5 Shows the tape counter and remaining tape time Pressing STATUS to cycle the display as follows No display Tape counter Remai...

Page 42: ...hen 1 Insert the USB memory 2 3 4 to select a file type then 3 If the menu screen appears 3 4 to select the item then OK e g CD Playback MP3 JPEG Play Mode JPEG Select file type OK USB device Picture...

Page 43: ...o select Start Slideshow then press OK Playing still pictures 1 Show Album View screen R R DL CD USB 42 Showing the menu screen RAM While stopped 1 Press DRIVE SELECT to select the drive 2 Press DIREC...

Page 44: ...pictures in the selected album at random Background Music Selects On to play Slideshow with Background Music Selects Off to play Slideshow without Background Music Random Selects On to play Backgroun...

Page 45: ...ct the title or file type you wish to delete The DELETE Navigator screen will be displayed Video 26 Picture 56 Copy Select when you wish to copy in the way other than One Touch Copy 24 Advanced Copy 5...

Page 46: ...rol operations on the connected equipment e g TV Set the input channel on VIERA to suit the terminal to be used as HDAVI Control 4 Turn on all HDAVI Control compatible equipment and select this unit s...

Page 47: ...t an item then press OK Using the Control Panel you can operate search backward search forward stop etc with the TV remote control Select Control Panel then press OK in step 2 of Using the OPTION menu...

Page 48: ...screen information When the digital channel information is being displayed Press STATUS again and detailed information will be displayed only when info is displayed During scrambled broadcasting You...

Page 49: ...added names 20 Maximum number of characters per name 44 After entering the name step 1 1 Press 3 4 2 1 to select Add to List then press OK You can also press 9 to select Add to List 2 Press 2 1 to sel...

Page 50: ...tle View Preparation RAM Release protection 64 Setting Protection Notes You cannot edit during recording or copying etc R R DL Management information is recorded in unused sections when you edit discs...

Page 51: ...ips Selecting Preview then pressing OK plays the title from 10 seconds prior to 10 seconds after the division point To change the point to divide at Press 3 4 to select Divide then press 1 PLAY to bri...

Page 52: ...to select Combine then press OK The selected chapter gets combined with the next chapter Tips Chapter Each section between the division points becomes a chapter RAM You can change the order of chapter...

Page 53: ...rm steps 1 of Accessing the Playlist View left 5 Press 3 4 to select Delete then press OK 6 Press 2 to select Delete then press OK to confirm RAM RW VR Playlist information e g length and date is show...

Page 54: ...to select Previous or Next then press OK You can also press 9 to view other pages Multiple editing Only Delete Copy Select with 3 4 2 1 then press Repeat A check mark appears Press again to cancel Ch...

Page 55: ...f Accessing the Album still picture Picture View left When editing an album press 3 4 to select Edit Album then press OK after step 3 4 Press 3 4 to select Delete Album or Delete Pictures then press O...

Page 56: ...select the album which contains the still picture to delete then press OK 2 Press 3 4 2 1 to select the still picture press OK 6 Press 2 1 to select Delete then press OK Set up Protection Cancel Prot...

Page 57: ...ed After finalising the discs become play only and you can also play them on other DVD equipment However you can no longer record or edit Preparation Insert a disc and video cassette that you can use...

Page 58: ...then press OK 8 Press 2 to select Yes then press OK to start copying Select the item in step 6 5 left Press OPTION After performing steps 1 3 left 4 Press 3 4 to select Cancel All then press OK 5 Pre...

Page 59: ...ying the top menu is recorded until the set time is reached Copying list icons and functions Title with One time only recording restriction 27 Copy once recording Title or playlist contains still pict...

Page 60: ...steps 1 3 left 4 Press 3 4 to select Cancel All then press OK 5 Press 2 to select Yes then press OK The settings and lists may be cancelled in the following situations When a still picture has been r...

Page 61: ...nnot be registered on the same list Notes Copy Mode is fixed at PICTURE High Speed The structure of folders on the USB memory may not be the same at the copy destination The sequence in which the stil...

Page 62: ...e subtitle on off and select the language below Soundtrack Subtitle language VCD SVCD Turn the subtitle on off and select the subtitle number Subtitle numbers are displayed even if there are not multi...

Page 63: ...VB Multi Audio cannot be selected during playback or recording Depending on the broadcast the items that can be selected will differ English 1 English 2 Dialogue Enhancer RAM R R DL RW V R R DL RW DVD...

Page 64: ...K Formatting starts RAM may take up to a maximum of 70 minutes A message appears when formatting is finished 8 Press OK to complete R R DL RW V R R DL RW Before finalising a disc select whether the to...

Page 65: ...ess OK 8 Press OK to complete Finalising Notes Do not disconnect the AC mains lead while finalising This can render the disc unusable When finalising a high speed recording compatible disc it may take...

Page 66: ...ss the Blue button to add all the available channels to the Favourite Only when no channels have been added to the Favourite 2 Press OK to save the Favourite To change the order of channels of a Favou...

Page 67: ...0 CH54 738 0 Signal Quality Signal Strength TV 15 Radio 4 Data 0 8 DVB channels found BBC ONE Wales BBC 2W BBC NEWS 24 BBC Radio Wales ITV 1 2 3 4 5 TV TV TV Radio TV Setup Disc Picture Sound Display...

Page 68: ...ally appear if available on the disc F U N C T O N M E N U OK Setup Picture Sound Display Connection Tuning Settings for Playback Settings for Recording Others Disc RETURN TAB SELECT VHS Settings for...

Page 69: ...ut a built in DTS decoder MPEG Choose whether to output by Bitstream which processes MPEG audio signals on other connected equipment or to convert the signals to PCM 2ch on the unit before output Bits...

Page 70: ...TV System to match the discs before playing them Change back the setting after playback of disc otherwise recording may not be done properly F U N C T O N M E N U OK Setup Picture Sound Display Connec...

Page 71: ...is connected to a digital satellite receiver with a 21 spin Scart cable and this unit receives a control signal Start and stop timings of recording are controlled by the control signal Ext Link 2 When...

Page 72: ...ime by the hour If the clock has not been set Power Save in Standby is activated at all hours Auto Standby Set the time to automatically turn the unit off After the unit has finished operating the uni...

Page 73: ...ates when the unit is turned off This can only be set when TV Guide Download in Standby or Software Update in Standby is set to On If there is a programmed recording set for the time you have selected...

Page 74: ...ame time until X HOLD disappears Using the Unit s Remote Control to Operate the TV Manufacturer Code No Panasonic 01 02 03 04 AIWA 35 AKAI 27 30 BEJING 33 BEKO 05 71 72 73 74 BENQ 58 59 BP 09 BRANDT 1...

Page 75: ...and DVD VHS output The unit has DVD VHS common out terminals and DVD priority out terminals The DVD priority out terminals can also output the VHS signal However this is not possible during DVD recor...

Page 76: ...er Connecting to a Television with Audio Video Cable not included AUDIO IN VIDEO IN R L AUDIO VIDEO L R TV This unit OUT Adding an Amplifer or Receiver Using an Audio Cable not included Using an Optic...

Page 77: ...Link It is recommended that you use Panasonic s HDMI cable Recommended part number RP CDHS15 1 5 m RP CDHS30 3 0 m RP CDHS50 5 0 m etc Non HDMI compliant cables cannot be utilised Using an HDMI High...

Page 78: ...r finalising the disc however you will be able to play it on any DVD Video compatible player Please tell me about CD R and CD RW compatibility with this unit This unit plays CD R CD RW discs which hav...

Page 79: ...digital audio signal from the unit be recorded to other equipment You can record if using the PCM signal When recording DVD change the Digital Audio Output settings to the following via the Setup men...

Page 80: ...e message is displayed 29 PLEASE WAIT Displayed when the unit is started This is not a malfunction The unit is carrying out its recovery process You cannot operate the unit while the message is displa...

Page 81: ...recording completely The disc may be full The maximum number of title has been exceeded 28 RAM RW V RW Create space by erasing unwanted titles Even if you erase recorded content from the DVD R DVD R...

Page 82: ...rol Disc Picture Sound Display Tuning Connection Others OK RETURN VHS To Reset This Unit To reset the unit s settings To reset the ratings level settings To restore the unit if it freezes Abkhazian 65...

Page 83: ...maining capacity of DVD R DVD R DL R and R DL is reduced and then recording or editing may be disabled for the second layer on DVD R DL and R DL this happens after about 60 times The time during searc...

Page 84: ...eject the disc Try another disc 1 Press I on the main unit to switch to standby mode If the unit doesn t switch to standby mode reset the unit 82 To restore the unit if it freezes 2 While the unit is...

Page 85: ...ear during playback or recording Perform DVB Auto Setup by Signal Quality in the Setup menu 67 No Digital Teletext Not all functions of Digital Teletext work on this unit When subtitle is on or additi...

Page 86: ...off To confirm the timer recording is going to work properly turn the unit on The screen changes automatically When Screen Saver in the Setup menu is set to On the display may turn to the screen save...

Page 87: ...d follow the on screen instructions Audio and video momentarily pause This occurs between playlist chapters This occurs as scenes change during Quick View Play k1 3 R DL R DL When playing a title reco...

Page 88: ...o format R R DL discs However you can record and copy again if you format DVD RW If you repeatedly insert discs or turn the unit on and off about 50 times or more the recording or editing of DVD R DVD...

Page 89: ...en etc are displayed The sound level after editing is not equal on DVD and on VHS The sound level on DVD and VHS may not match depending on the disc When the sound level in a particular part of the so...

Page 90: ...tart point Cannot delete chapters RAM When the chapter is too short to delete use Combine Chapters to make the chapter longer 52 The available recording time doesn t increase even after deleting title...

Page 91: ...nm CDs 662 nm DVDs Laser Power No hazardous radiation is emitted with the safety protection Television system Tuner System DVB T Channel Coverage UK UHF 21 to 68 ch RF converter output Not provided Vi...

Page 92: ...ormatted to become recordable Folder This is a place on the disc where groups of data are stored together In the case of this unit it refers to the place where still pictures JPEG are stored Formattin...

Page 93: ...rnate scan lines like interlace there is a minimal amount of screen flicker 720p In one high definition image 720 750 scan lines pass at the same time every 1 50th of a second to create a progressive...

Page 94: ...SHOCK OR PRODUCT DAMAGE DO NOT EXPOSE THIS APPARATUS TO RAIN MOISTURE DRIPPING OR SPLASHING AND THAT NO OBJECTS FILLED WITH LIQUIDS SUCH AS VASES SHALL BE PLACED ON THE APPARATUS USE ONLY THE RECOMME...

Page 95: ...ormation about collection and recycling of old products and batteries please contact your local municipality your waste disposal service or the point of sale where you purchased the items Penalties ma...

Page 96: ...22 33 Select subtitle 67 Show subtitle 48 E Edit Chapter 52 Playlist 53 Still picture 55 Title 50 Enabling discs to be played on other equipment Finalise 65 F Finalise 65 92 Format 64 92 FR Flexible r...

Reviews: