- 17 -
Y
H
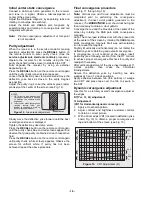
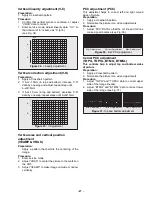
Adjustment
(VR2 for vertical dynamic convergence)
1.
Apply a crosshatch pattern.
2.
Adjust contrast and brightness customer controls
to obtain a correct picture.
3.
With a driver Adjust VR2 (located in deflection yoke
board Fig. 19) to obtain a proper corvergence at
left and right side of the screen. (see Fig. 14)
X
V
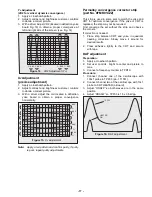
Adjustment
(precise adjustment)
1.
Apply a crosshatch pattern.
2.
Adjust contrast and brightness customer controls
to obtain a correct picture.
3.
With a driver adjust the coil located in deflection
yoke board to obtain a proper convergence
horizontally.
Note:
Apply a red pattern and confirm purity, if purity
is poor, repeat purity adjustments.
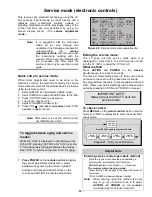
Permalloy convergence corrector strip
(part No. 0FMK014ZZ)
This strip is used in some sets to match the yoke and
CRT for optimum convergence. If the yoke or CRT is
replaced, the strip may not be required.
First converge the set without the strip and observe
the corners.
If correction is needed:
1.
Place strip between CRT and yoke, in quadrant
needing correction. Slowly move it around for
desired results.
2.
Press adhesive tightly to the CRT and secure
with tape.
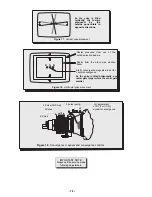
DAF adjustment
Preparation:
1.
Apply a crosshatch pattern.
2.
Set user controls, bright to center and picture to
max.
3.
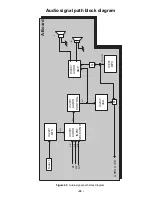
Connect a frequency counter to TPD10.
Procedure:
1.
Connect channel one of the oscilloscope with
100x1 probe to TPP33 (pin-1 T1551).
2.
Connect channel two of the oscilloscope with 10x1
probe to CRT HEATER (L-Board).
3.
Adjust “HDAFP” so both waves are in the same
position.
4.
Adjust “HDAFW” so TPP33 is 1.5
±
0.5kVpp.
G B&R G B&R
G B&R G B&R
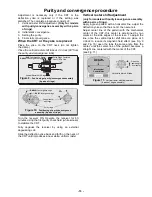
Figure 14. VR2 Adjustment (Y
H
)
G
B&R
G
B&R
G
B&R
G
B&R
Figure 15. X
V
adjustment
TPP33
HEATER
PIN
Figure 16. DAF adjustment
Summary of Contents for CT-32SC13-1G
Page 63: ... 50 A Board ...
Page 65: ... 52 ERJ6GEYJ183V NP2AH037AC ERENCES A Board ...
Page 66: ... 53 A Board ...
Page 69: ... 56 D Board ...
Page 70: ... 57 D Board ...
Page 71: ... 58 D Board ...
Page 74: ... 61 notes NOTES ...
Page 75: ... 62 G Board ...
Page 76: ... 63 G Board ...
Page 77: ... 64 G Board ...
Page 79: ... 66 L Board ...
Page 80: ... 67 L Board ...
Page 81: ... 68 A PCB ...
Page 82: ... 69 A PCB ...
Page 83: ... 70 D PCB ...
Page 84: ... 71 D PCB ...
Page 85: ... 72 G PCB ...
Page 86: ... 73 G PCB ...
Page 87: ... 74 L PCB ...
Page 88: ... 75 notes NOTES ...

