Recor
ding Features
-English-
19
Basic Recording
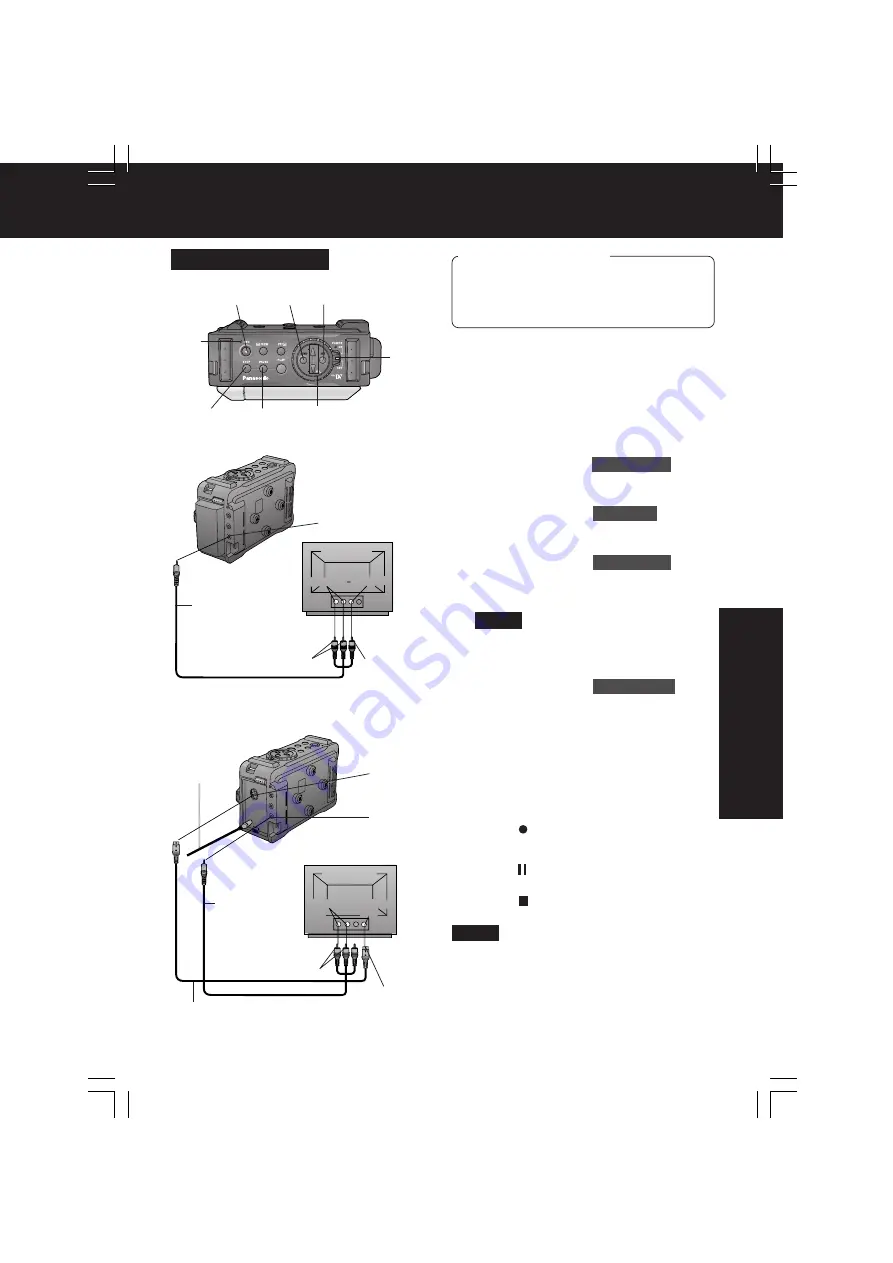
1
Set the POWER to ON
while pressing
the white button.
• The POWER lamp lights red.
• Be sure POWER is fully turned to the
ON position.
2
Press MENU
to display the MAIN
MENU screen.
3
Press +/–
to select
REC MODE
, then
press SET
to display the REC MODE
menu screen.
4
Press +/–
to select
AV JACK
in the
REC MODE menu.
Press SET
to
select IN. (Menu OSD: p. 29)
5
Press +/–
to select
AUDIO SEL
, then
press SET
to select LINE.
• “LINE AV IN” will appear on the
screen. (p. 32)
• Set LINE OUT: ON in the DISPLAY
menu to display the OSD screen on
your TV monitor.
6
Press +/–
to select
REC SPEED
in the
REC MODE menu.
Press SET
to
select “SP” or “LP”.
(Menu OSD: p. 29)
• Press MENU twice to exit.
7
Turn your TV ON and set it to LINE
INPUT or S-VIDEO.
Check your TV operating instructions
for further information.
8
Press (REC)
to start recording.
• The REC Lamp lights red.
9
Press (PAUSE)
to pause.
10
Press (STOP)
to stop recording.
Basic Recording
Before you begin
• Connect this unit to a power source.
(pp. 9, 10)
• Insert a cassette with the record tab
closed. (p. 6)
10
STOP
8
REC
1
POWER
9
PAUSE
REC
Lamp
• If left in Record/Pause for 5 minutes, this
unit will automatically go into Stop mode.
• Make sure this unit and TV are turned off
while connecting.
• Please connect the A/V Cable securely.
Note
Back of TV
Audio
Out
S-Video
Out
Back of TV
Audio Out Video Out
S-VIDEO
IN
A/V Cable
(Supplied)
To Video Out
To Audio Out
A/V IN
For best Chrominance and Luminance, use
the S-Video connection if available on your
TV.
A/V Cable
(Supplied)
[ TV with S-VIDEO OUT Jacks ]
A/V IN
[ TV with AUDIO/VIDEO OUT Jacks ]
DC Cable
(Supplied)
Note
3, 4, 5, 6
+/–
(SELECT)
2
MENU
3, 4, 5, 6
SET
To S-Video
Out
To Audio Out
S-Video Cable
(Not supplied)
DV1DC.Eng19-21.p65
2003/02/28, 17:02
19


