Chapter 4 Operation
—
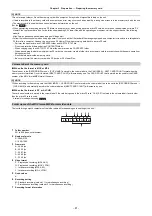
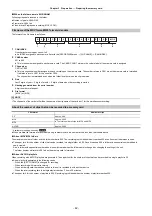
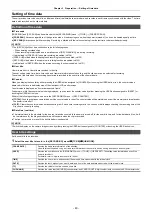
Basic operation of the screen
- 54 -
Major button operation and switching screen
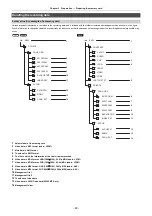
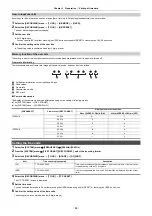
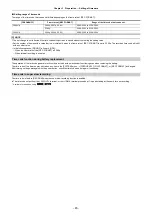
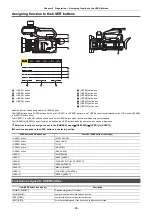
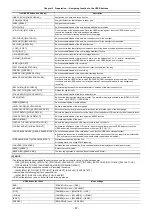
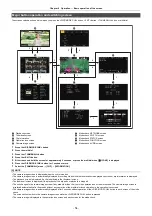
The screens switch as shown below when you press the <DISP/MODE CHK> button, <EXIT> button, <THUMBNAIL> button, or multidial.
1
Press the <DISP/MODE CHK> button.
2
Press the multidial.
3
Press the <THUMBNAIL> button.
4
Press the <EXIT> button.
5
Either touch and hold the screen for approximately 2 seconds, or press the multidial when [
ICONS] is displayed.
6
Press the <DISP/MODE CHK> button for 1 second or more.
7
Select the [THUMBNAIL] menu
→
[CLIP]
→
[INFORMATION].
@
NOTE
0
The camera image screen is displayed when the unit is turned on.
0
The camera image screen is automatically displayed if recording starts while the thumbnail screen, playback screen or clip information is displayed.
0
The playback screen is displayed if a clip is selected in the thumbnail screen.
0
The thumbnail screen is displayed if the playback of the clip ends or playback is stopped.
0
The unit changes to the camera image screen if any area other than the icon in the operation icon screen is touched. The camera image screen is
displayed automatically after 5 seconds without any operation of the multidial or touch operation in the operation icon screen.
0
The camera image screen is automatically displayed after 5 seconds without operation of the <DISP/MODE CHK> button in each screen of the mode
check.
The screen will not switch to the camera image screen while the <DISP/MODE CHK> button is pressed.
0
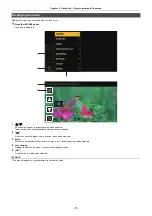
The camera image is displayed in the operation icon screen and each screen for the mode check.
A
Playback screen
B
Thumbnail screen
C
Clip information
D
Operation icon screen
E
Camera image screen
F
Mode check NETWORK screen
G
Mode check SWITCH screen
H
Mode check STATUS screen
I
Mode check FUNCTION screen
J
Mode check AUDIO screen
3
3
4
1
6
1
1
1
1
5
4
4
7
2
3
TCR 01 : 09 : 44. 23
TCR 01 : 09 : 44. 23
ヤラヒ
ヤラビ
ヤラヒ
ヤラビ
TCG 01 : 09 : 42. 08
TCG 01 : 09 : 42. 08
MOV 420 150M
MOV 420 150M
ICONS
ICONS
ATW
ATW
AGC
AGC ND: CLR
ND: CLR A. SHTR
A. SHTR
ブプㄎㄊㄏ
ブプㄎㄊㄏ
ブプㄎㄊㄏ
ブプㄎㄊㄏ
ヒ
ビ
ンユンモヺ
ンユンモヺ
ヴヵュ
ヴヵュ
ヰヱユワ
ヰヱユワ
2160 - 59. 94p
2160 - 59. 94p
ヤラヒ
ヤラビ
ヤラヒ
ヤラビ
パユヷ
パユヷ
モョパフ
モョパフ
・パパ
・パパ
ヒブチワヰヷチビパビパチヒベホパパホパパ
フビパ ヒブパ
フビパ ヒブパ
ヶラュ ブペハペフ
ヶラュ ブペハペフ
ラユヷヤ ビパパ
ラユヷヤ ビパパ
ヶラュ ブペハペフ
ヶラュ ブペハペフ
フビパ ヒパパ
フビパ ヒパパ
ヶラュ ビペハペヘ
ヶラュ ビペハペヘ
ラユヷヤ ヒブパ
ラユヷヤ ヒブパ
ヶラュ ビペハペヘ
ヶラュ ビペハペヘ
フビビ ヒブパ
フビビ ヒブパ
ヶラュ ビペハペヘ
ヶラュ ビペハペヘ
フビパ ヒパパ
フビパ ヒパパ
ヶラュ ビピハペベ
ヶラュ ビピハペベ
ラユヷヤ ヒブパ
ラユヷヤ ヒブパ
ヶラュ ビピハペベ
ヶラュ ビピハペベ
フビビ ヒブパ
フビビ ヒブパ
ヶラュ ビピハペベ
ヶラュ ビピハペベ
フビビ ヒパパ
フビビ ヒパパ
ョラュ ブペハペフ
ョラュ ブペハペフ
0001
0001
00:00:00.00
00:00:00.00
0002
0002
00:00:16.00
00:00:16.00
0003
0003
00:00:32.15
00:00:32.15
0004
0004
00:01:00.17
00:01:00.17
0005
0005
00:01:24.02
00:01:24.02
0006
0006
00:01:46.02
00:01:46.02
0007
0007
00:02:30.20
00:02:30.20
0008
0008
00:02:53.08
00:02:53.08
0009
0009
00:03:30.20
00:03:30.20
Summary of Contents for AG-CX7
Page 8: ...Chapter 1 Overview Before using the unit read this chapter ...
Page 188: ...Chapter 10 Notes Maintenance of the unit or frequently asked questions are described ...
Page 199: ...Chapter 11 Specification This chapter describes the specifications of this product ...
Page 208: ... Panasonic Corporation 2020 Panasonic Corporation Web site http www panasonic com ...

