background image

Making your first call

We recommend that you charge your Treo for a full three hours (or until the
LED is solid green) before using it for the first time. 
1. Press and hold the Wireless Mode button

. You will hear a series of

ascending tones.

2. If a Welcome screen appears, follow the onscreen instructions to set up

your Treo. 

3. Allow the Treo to complete a network search. The search may take several

seconds. When it is complete, the network status icon 

appears in the

upper right.

4. If prompted for a PIN, enter it on the PIN screen.   
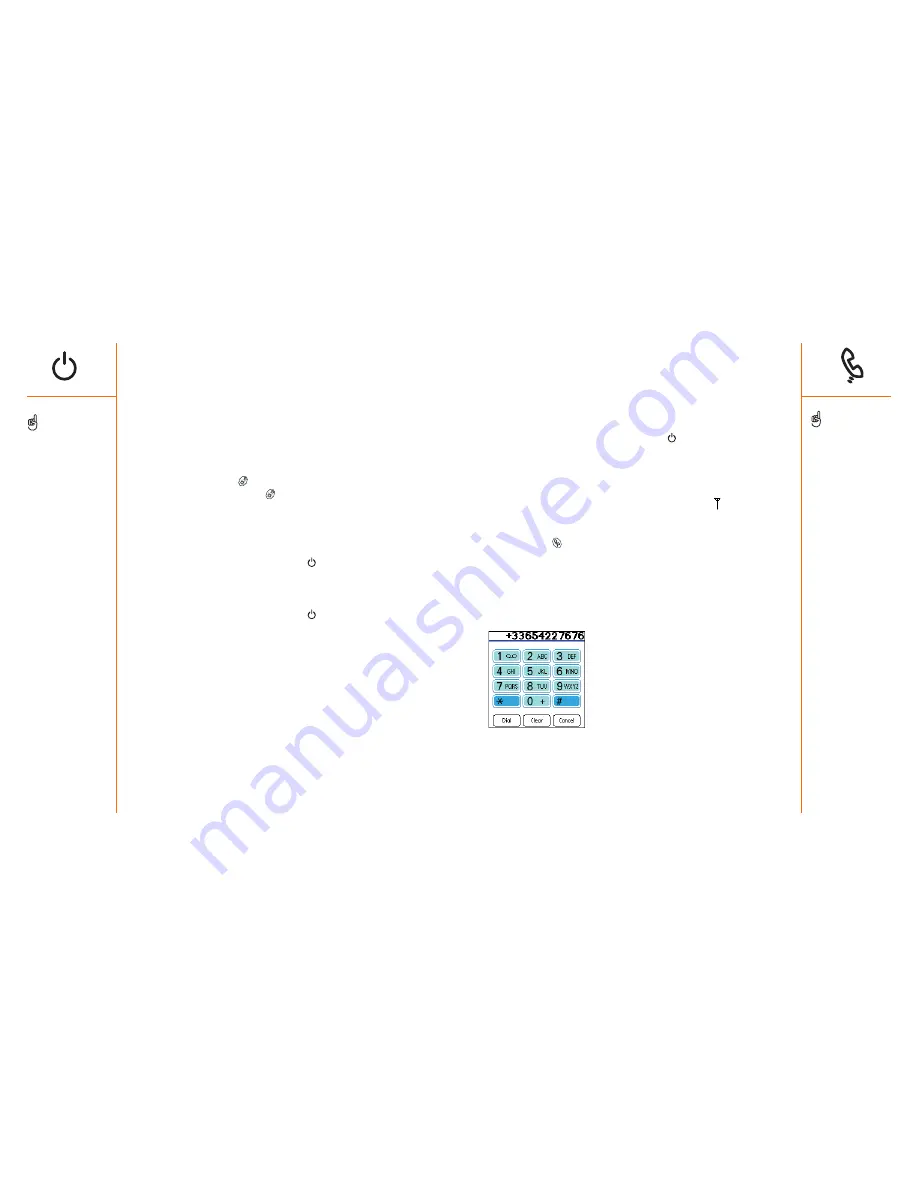
5. Press Phone

.

6. Using the number pad on the Treo keyboard, type the desired phone

number.

7. Press Center to dial.
8. When your call is complete, use the 5-way navigation control to choose

Hang Up.

Turning Treo on and off

You can use the Palm OS features of your Treo independently of the
wireless features and applications. Therefore, the screen and Wireless Mode
are designed to be turned off and on separately.

Turning the screen on and off

1.  Press the Screen button 

to turn on the screen. 

2. Briefly press the Screen button 

to turn off the screen.

Turning Wireless Mode on and off

Wireless Mode allows your Treo to connect to a mobile network so that you
can make and receive phone calls and use other wireless services. 
1.  Press and hold the Wireless Mode button

to turn on Wireless Mode.

You will hear a series of ascending tones. When Wireless Mode is on,
your Treo connects to a mobile network, and you can use the phone and
Internet features (if supported by the local network).

2. Press and hold the Wireless Mode button

again to turn off Wireless

Mode. You will hear a series of descending tones. When Wireless Mode
is off, your Treo does not have a connection to any mobile network. You
can still use the organizer and other Palm OS features. This is ideal for
airplane flights and for maximizing battery life.

14 ::   

Turning Treo on and off

Treo includes a keyboard
backlight for nighttime use.
The keyboard backlight
activates automatically when
the screen turns on, but
shuts off if the keyboard is
not in use. When the screen
is on, press Option then the
P key to manually activate
the keyboard backlight. 

Making your first call

::   15

If No Service appears in the
upper left, you are out of a
wireless coverage area. If
you believe you are in a
wireless coverage area and
this problem persists, contact
Orange for assistance.

If the Welcome screen does
not appear, recalibrate the
touchscreen. This ensures
that the screen responds
accurately to taps (see
page 133).

Learn how to quickly redial
your most recent calls on
page 38.

Summary of Contents for TREO

Page 1: ...using your Treo Includes setup information and instructions for most tasks...

Page 2: ...nc are registered trademarks and Palm and the Palm Powered logo are trademarks of PalmSource Inc and are used by Handspring under license This product contains ACCESS Co Ltd s NetFront 3 0 Internet br...

Page 3: ...OOK HERE Don t miss the helpful tips and cross references given in this column 109 when you re ready customizing your Treo 110 Phone settings 113 System Sound settings 114 Display and appearance 116 A...

Page 4: ...f your Treo on pages 33 80 including phone email web browsing and messaging First Two Weeks Using Organizer Features Your Treo is not just a phone It also includes a full featured Palm Powered organiz...

Page 5: ...some type 8 What you ll need Treo overview You should have received all of the following components in the Treo box Hardware Treo handset AC charger USB HotSync cable headset electrical socket adapter...

Page 6: ...r B LED Wireless Mode and charge indicator C Volume buttons D Phone E Calendar F Headset jack G HotSync and power supply connector H Microphone I Messaging J Screen on off button K 5 way navigation co...

Page 7: ...tity Module SIM card contains account information such as your phone number and voicemail access number To use the phone email or web features of your Treo you need to insert the SIM card If a SIM car...

Page 8: ...that you can make and receive phone calls and use other wireless services 1 Press and hold the Wireless Mode button to turn on Wireless Mode You will hear a series of ascending tones When Wireless Mo...

Page 9: ...page 14 2 Press Phone 3 Press Menu 4 From the Options menu choose Phone Info I If your phone number is not displayed exit Phone Info and make sure your SIM card is properly inserted in the SIM slot I...

Page 10: ...hrough the text Drag the slider of an onscreen scroll bar Highlighting items The 5 way navigation control lets you highlight items before launching or selecting them When an onscreen button OK Cancel...

Page 11: ...ns such as New OK and Details appear at the bottom of the screen In many cases you can jump directly to these buttons instead of scrolling to them From a list screen such as the Contacts list or E Mai...

Page 12: ...ess Option twice To turn it off press Option again When Option Lock is on this symbol appears in the lower right Entering other symbols and accented characters 1 Type the character that corresponds to...

Page 13: ...The fourth button turns the screen on and off and controls the keyguard A Phone B Calendar C Messaging D Screen Launching applications 25 24 Symbols and accented characters Symbols and accented charac...

Page 14: ...B port USB HotSync cable included with your Treo later versions may also be supported Button Primary application Secondary application Phone Blazer Web Browser Calendar Calculator Messaging E mail Scr...

Page 15: ...n appears click the same language you use on your Treo During the installation process you will be prompted to synchronize for the first time Connecting your Treo to your computer 1 Plug the AC charge...

Page 16: ...General Preferences see page 120 This turns off your screen automatically after a shorter period of inactivity Synchronizing contacts and other personal data Before you can synchronize your contacts...

Page 17: ...tion icon in the upper right corner Tap the Information icon with your stylus to learn about the tasks you can perform in that dialog If you need more information Books Many books on Palm Powered devi...

Page 18: ...n you are connected to a GPRS network and a data session is active for example when you are browsing the web You can still receive calls Displays the signal strength The stronger the signal the more b...

Page 19: ...another search press Backspace to delete letters you ve entered Or just press Phone to start all over Dialing calls 37 Dialing with an Orange Favorites button Orange Favorites buttons are shortcuts f...

Page 20: ...the onscreen Answer button Press the headset button if headset is attached The audio continues playing but you won t hear it during your call Dialing from a web page or text message Treo recognizes mo...

Page 21: ...not need to press Option to type numbers or while on an active call Using Answer Phone Answer Phone is Orange s voicemail service Setting up Answer Phone 1 Turn on Wireless Mode as described on page 1...

Page 22: ...waiting conference calling and call forwarding Making a second call You can make a second call while your first call is still active 1 After dialing the first number use the 5 way navigation control...

Page 23: ...l 2 Use the 5 way navigation control to choose Conf This joins the two active calls in a conference session 3 Repeat this process to add other calls to the conference call 4 To end the conference use...

Page 24: ...service Forwards calls when your Treo is not connected to a mobile network If the forwarding number appears in the pick list select the number If the forwarding number does not appear in the pick lis...

Page 25: ...se the name of the entry you want to open 3 Choose Edit 4 Make changes to the entry as necessary 5 Choose Done Deleting a contact 1 Open the contact you want to delete 2 Press Menu 3 From the Record m...

Page 26: ...s buttons 3 Choose a blank button 4 Choose the Types pick list then select Speed Dial 5 Enter a label for the favorite If the entry is for an existing contact choose Lookup Start typing the last name...

Page 27: ...Press Left or Right to move between links on the page To follow a link to another web page highlight the link and then press Center You can also tap the link on the screen with your stylus Using a pho...

Page 28: ...5 Choose OK 6 Use the stylus to drag and drop the new bookmark into a slot on the current page To move the bookmark to a different page drag and drop it on the page icon 7 Choose OK Saving a page Bla...

Page 29: ...hlight the text you want to copy 2 Press Menu 3 From the Edit menu choose Copy C 4 Go to the application in which you want to paste then position the cursor where you want to paste the text 5 Press Me...

Page 30: ...2 From the Page menu choose Find Text on Page 3 Type the text you want to find 4 Check or uncheck the Wrap Search box to indicate whether you want the search to wrap from the end of the page to the b...

Page 31: ...aller ID see page 112 for details You can move pictures to a Windows computer by performing a HotSync operation Pictures are 12 bit color at a maximum of 640x480 resolution 0 3 megapixels Taking a pic...

Page 32: ...re viewing software on your Windows computer Moving pictures 1 From the Pictures view choose the picture you want to move 2 Press Menu 3 From the Picture menu choose Move M 4 Choose the category or ex...

Page 33: ...with more than 160 characters are split into several messages Refer to your service plan for per message pricing and availability Creating and sending a message 1 Make sure Wireless Mode is turned on...

Page 34: ...n bold messages you ve read appear in plain text An item that is locked and cannot be deleted or purged until you unlock it An outbound message that is waiting to be sent A chat session Chats containi...

Page 35: ...the Chat screen Display my name in chat window as Enter the name you want displayed as the label for your messages in the Chat screen Label Color Select the color in which you want messages to appear...

Page 36: ...pears 7 Add ring tones sound clips pictures or text to the message Choose Add Picture to insert a picture Once a picture is inserted choose the picture to edit or remove it Choose Sound to insert a ri...

Page 37: ...vider to determine if your account is POP3 compatible If not contact Orange to learn about their corporate email solutions or use a third party solution Customizing your Photo Messaging settings 1 Pre...

Page 38: ...selected Other from the pick list earlier choose the tabs for Server and Advanced and enter the necessary information If you do not have this information contact your email service provider to obtain...

Page 39: ...ed folder Receiving and viewing messages manually Your Treo can automatically check your email on a regular basis see page 79 for more details If you prefer you can manually send and receive messages...

Page 40: ...u can customize the E Mail settings for each individual account on your Treo Remember the preferences you set will only apply to the email account you are currently viewing 1 Press Menu 2 From the Opt...

Page 41: ...essage Include attachments when forwarding Sends attachments as well as the original message when forwarding even if you cannot open an attachment on Treo Always show Bcc Displays the Bcc field when c...

Page 42: ...nt view Choose Go or press Menu From the Options menu choose Go to Day O then choose a date from the calendar Creating an event 1 Press Calendar until you are in Day view 2 Press Left and Right to sel...

Page 43: ...ext day at midnight of the current day Show Completed Floating Events Displays completed floating events 4 Choose OK to close the Display options dialog 5 Choose OK Scheduling a repeating event 1 Crea...

Page 44: ...ress Calendar until you are in Day view 2 Press Menu 3 From the Options menu choose To Do Preferences 4 Set any of the following preferences Show Categories Determines which To Do List categories disp...

Page 45: ...Priority Choose the Priority number for this item 1 is most important Later you can arrange your To Do List based on the importance of each item Category Assign the item to a specific category Due Dat...

Page 46: ...r right corner then select All 3 Choose the CityTime icon 4 Press Menu 5 From the Options menu choose Select Home City H 6 Choose the Home City pick list then select the city closest to your location...

Page 47: ...addition to your Home City you can display the day and time for four other cities anywhere around the globe These other cities are called remote cities 1 Use the stylus to tap a pick list in the lower...

Page 48: ...and English values Area Area conversions for metric traditional and English values Volume Volume conversions for metric and English values 3 Choose the pick list near the upper middle of the screen th...

Page 49: ...umber then press Center to dial Using Find The Find feature locates any text in the built in applications and databases and in some third party applications The Find feature performs an exact search o...

Page 50: ...y at the IR port of the receiving device 8 Wait for the Beam Status dialog to indicate that the transfer is complete before you continue using your Treo Receiving beamed information 1 Turn on your scr...

Page 51: ...ity on your computer before you install applications on your Treo These instructions tell you how to install basic prc Palm OS application and pdb Palm OS database files onto your Treo Some Palm OS so...

Page 52: ...Files Handspring user name Macintosh Mac HD Applications Palm Users user name If you find a prc or pdb file for the application you just removed delete the file from the Backup folder Installing appli...

Page 53: ...rds 1 Press down and release the mock card 2 After you feel the expansion slot eject the mock card remove the card from the expansion slot Using Application Info The Info screens display basic statist...

Page 54: ...lock into place and hear the confirmation tone A Notch B Camera lens Launching applications on an expansion card After you insert an expansion card in the expansion slot you can launch any of the app...

Page 55: ...rom the Card menu choose Rename Card R 5 Type a new name for the card 6 Choose OK Formatting an expansion card Formatting an expansion card is similar to formatting a disk on a computer When you forma...

Page 56: ...ncher 2 Choose the pick list in the upper right corner then select All 3 Choose the Prefs icon 4 Choose the pick list in the upper right corner then select Sound 5 Choose the Application pick list the...

Page 57: ...s buttons 3 Highlight the Orange Favorites button you want to give a picture caller ID 4 Press Menu 5 From the Edit menu choose Edit Favorites Button E 6 Choose More 7 Choose Select Image 8 Choose the...

Page 58: ...ess Applications Launcher 2 Choose the pick list in the upper right corner then select All 3 Choose the Prefs icon 4 Choose the pick list in the upper right corner then select General 5 Choose the Col...

Page 59: ...r settings Arranging applications by category You can assign an application to a category and then display a specific category of applications in the Applications Launcher 1 Press Applications Launche...

Page 60: ...clock Date The date format Week starts The first day of the week usually Sunday or Monday Numbers The format for numbers with decimal points and commas Date and time settings Setting the date and time...

Page 61: ...al Preferences enable you to set the auto shutoff interval the beam receive feature sounds and screen colors for your Treo 1 Press Applications Launcher 2 Choose the pick list in the upper right corne...

Page 62: ...he keyboard automatically locks Disable touchscreen when The conditions under which the touchscreen disables Phone Lock You can lock your SIM card to prevent unauthorized use of your mobile account Wh...

Page 63: ...ress Applications Launcher 3 Choose the pick list in the upper right corner then select All 4 Choose the Security icon 5 Choose the Current Privacy pick list then select Show Records 6 If the Show Pri...

Page 64: ...ves the security password for your Treo If you forget your Treo password you cannot view your data in Palm Desktop You can change your password but all records marked as Private will be deleted You ca...

Page 65: ...alm Powered device To transfer all compatible applications and data from your previous device to your new Treo 1 Perform a HotSync operation with your old device and your old desktop software to back...

Page 66: ...use the reset tool to gently press the reset button on the back of your Treo 3 When the Palm Powered logo appears release Up Trouble installing Palm Desktop The CD included with your Treo installs th...

Page 67: ...A hard reset erases all data and third party software on your Treo Never perform a hard reset without first trying a soft and system reset You can restore previously synchronized data with the next Ho...

Page 68: ...rength is weak 1 If standing move about 2 meters in any direction 2 In a building move near a window Open any metal blinds 3 In a building move outdoors or to a more open area 4 Outdoors move away fro...

Page 69: ...ices and that these services have been correctly activated Orange should also be able to tell you if there are any outages in your location Confirm your user name and password Confirm that high speed...

Page 70: ...dar Contacts Notes and Tasks to be available offline 3 Verify with your computer hardware vendor that your operating system supports your internal USB Controller 4 Perform a soft reset see page 131 5...

Page 71: ...web browser to see if you can view a web page you ve successfully viewed before If necessary ensure that you are viewing the page directly from the Internet press Menu then from the Page menu choose R...

Page 72: ...for email Is SSL required for POP3 or SMTP email transactions If you are using a circuit switched data CSD connection contact your Internet service provider for this information instead of Orange Then...

Page 73: ...the Treo keyboard and 5 way navigation in mind You may encounter strange behavior or errors in these applications if you use the keyboard and navigation control Getting more help Contact the author or...

Page 74: ...ge 59 Third party applications You can delete infrequently used applications or move them to an expansion card see page 103 Also remember that your Treo includes an expansion slot and that you can sto...

Page 75: ...u transfer Contrast with GPRS GPRS General Packet Radio Service The next generation of mobile Internet connectivity that allows persistent data connections You pay for the amount of data you transfer...

Page 76: ...posure compliance at a qualified test laboratory and found to comply with the regulations regarding exposure to RF Energy SAR was measured with the unit transmitting at its maximum certified RF power...

Page 77: ...125 messages 67 77 private entries 125 text on web page 58 using the Find feature 22 77 96 129 Orange Favorites 49 51 To Do List items 87 wallpaper 112 Current date and time 118 Customer service 32 C...

Page 78: ...rity 88 speed dial 50 PIN 15 122 123 149 PUK 122 149 Messages accessing with Orange Favorites 41 51 addressing 64 67 72 73 75 75 Answer Phone 41 alert tones 110 111 attachments 72 73 75 77 141 checkin...

Page 79: ...references 68 PUK 149 slot 9 11 13 tray 13 Slider 19 114 Small font for text 115 SMS Messages See Text Messaging Soft reset 131 133 134 138 145 146 Sorting applications 116 browser bookmarks 56 browse...

Page 80: ...ce 11 2 cm x 6 0 cm x 2 2 cm 4 41 in x 2 36 in x 87 in with antenna 167 6 grams 5 92 ounces Yes LCD Touchscreen includes stylus User adjustable brightness and contrast 3375 colors 11 5 bit color compa...

Reviews: