Sending and receiving messages with E-Mail
:: 75
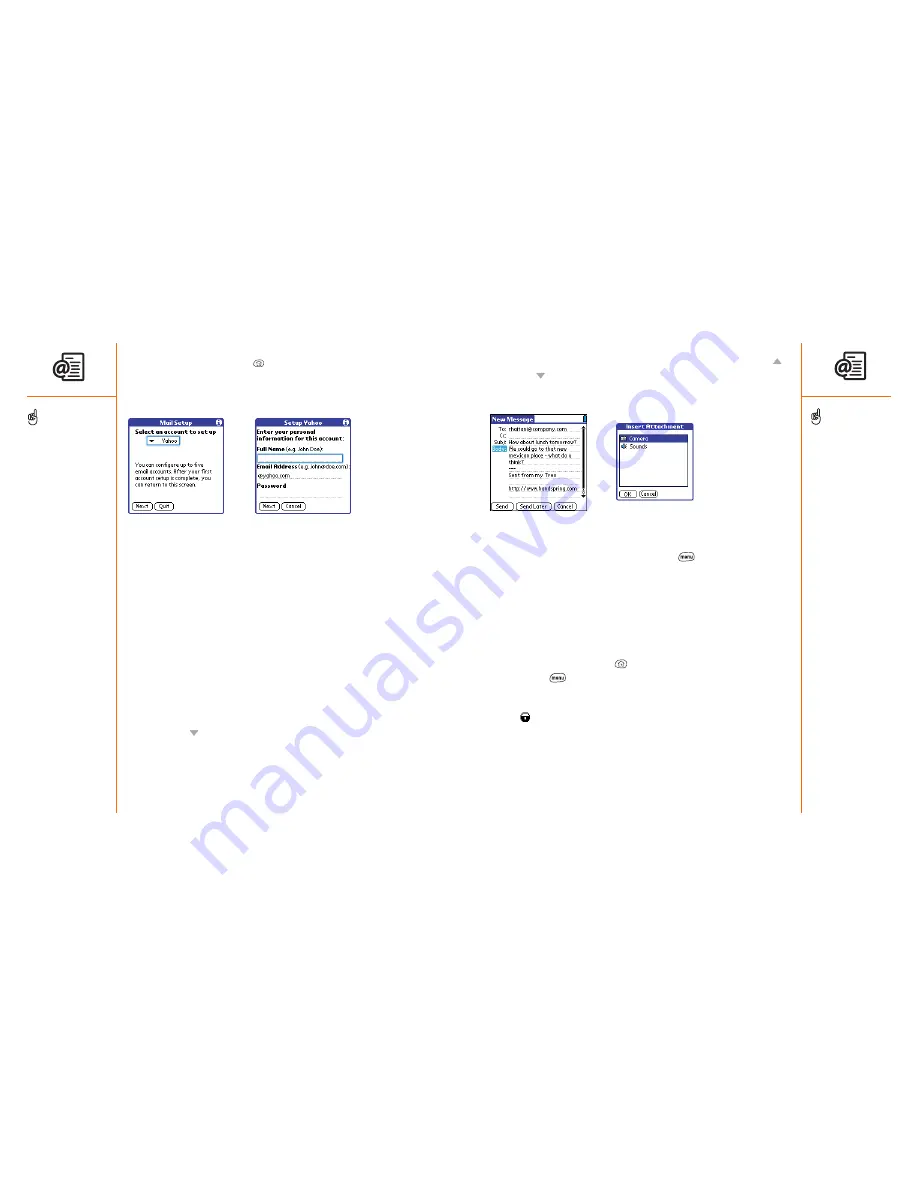
3. Enter the subject and message text. To move between fields, press Up
or Down
.
4. Choose Send to connect and send all messages immediately. Or, choose
Send Later to put this message into your Outbox.
Attaching items to your messages
1. Create the message to which you want to attach the item.
2. From the New Message screen, press Menu
.
3. From the Options menu, choose Insert Attachment.
4. Choose the type of item you want to attach.
5. Choose the specific item you want to attach.
Attaching applications to your messages
You can create a new email with a Palm OS application attached (subject to
copyright restrictions).
1. Press Applications Launcher
.
2. Press Menu
.
3. From the App menu, choose Send.
4. Choose the application you want to send. If the application has a lock
icon
next to it, it is protected and can’t be forwarded.
5. Complete the message and send.
1. Press Applications Launcher
.
2. Choose the E-Mail icon.
3. Choose the pick list, then select your email service provider. If your email
service provider is not listed, select Other.
4 Choose Next.
5. Type your Full Name (as you want it to appear when you send
messages), your full email address, and your Password for this account. If
you selected Other from the pick list earlier, choose the tabs for Server
and Advanced, and enter the necessary information. If you do not have
this information, contact your email service provider to obtain it. For
SMTP, enter the regional SMTP server provided by Orange.
6. Choose OK to continue.
7. Choose Done.
Creating and sending messages
1. From the Inbox, choose New.
2. Begin typing the addressee’s email address, first name, or last name
(depending on how you sort your Contacts list). E-Mail remembers your
most recent addressees and suggests choices. To accept a suggestion,
press Down
. To send to a different address, keep typing the email
address or name.
74 ::
Sending and receiving messages with E-Mail
To send a copy or blind
copy, choose Cc or Bcc,
select those lines and enter
the address(es) in those
fields. See page 80 for
details on displaying the
Bcc field.
To save a message without
sending, choose Cancel
(instead of Save), then
choose Yes in the Save
Draft screen.
You cannot attach
Appointments and Contacts
to existing emails, only
new emails.
To address a message to
several people, separate
each address with a comma
or space. When you’re
finished adding addresses
press Center to finish.
If you receive an error
when sending a message,
you may need to specify
an SMTP server for your
email account, or add
other security preferences
before you can send
emails. For more
information, see the
troubleshooting tips on
pages 140-142.


