


8
9
7. LIST OF ICONS
Icon
Function
Name
Warming up
Warming up
It is displayed on the analyzer LCD
once it is powered on.
CHECK
CHECK
Open the lid of the analyzer.
Open the lid
Insert Test Cartridge into the analyzer.
Insert
Test Cartridge
Apply sample to sample area of reagent pack.
Apply sample to
sample area
Insert reagent pack with sample
into the analyzer.
Insert Reagent
Pack
Insert
Check Cartridge
Insert Check reagent pack into the analyzer.
Insert
Check Reagent
Pack
Analyzer is under 'Check Mode‘.
Insert Check Cartridge into the analyzer.
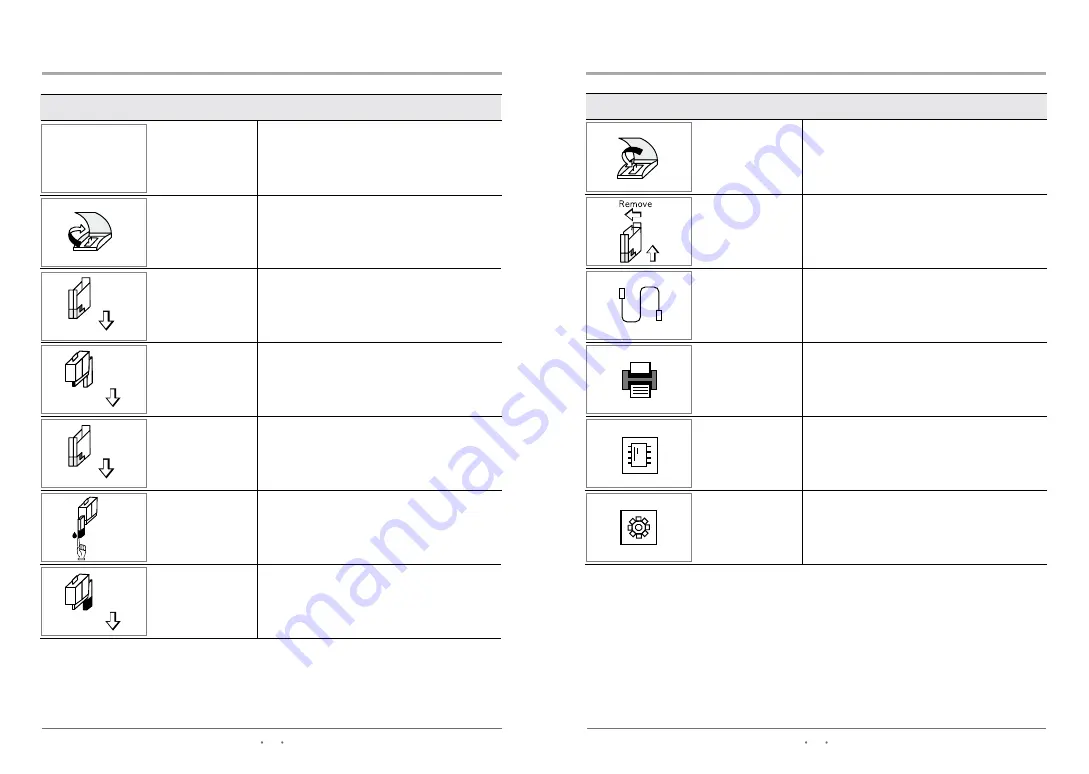
7. LIST OF ICONS
Icon
Function
Name
Indicates that the analyzer is connected
to a PC.
PC Connection
Indicates that the thermal printer use
is active.
Printer
Select this icon to view the test results
in memory.
Memory
Select this icon to set up the analyzer.
Set up
Remove the cartridge from the
analyzer.
Remove cartridge
Close the lid of the analyzer.
Close the lid


