932502G / 0618
2. THE DSPEC 50
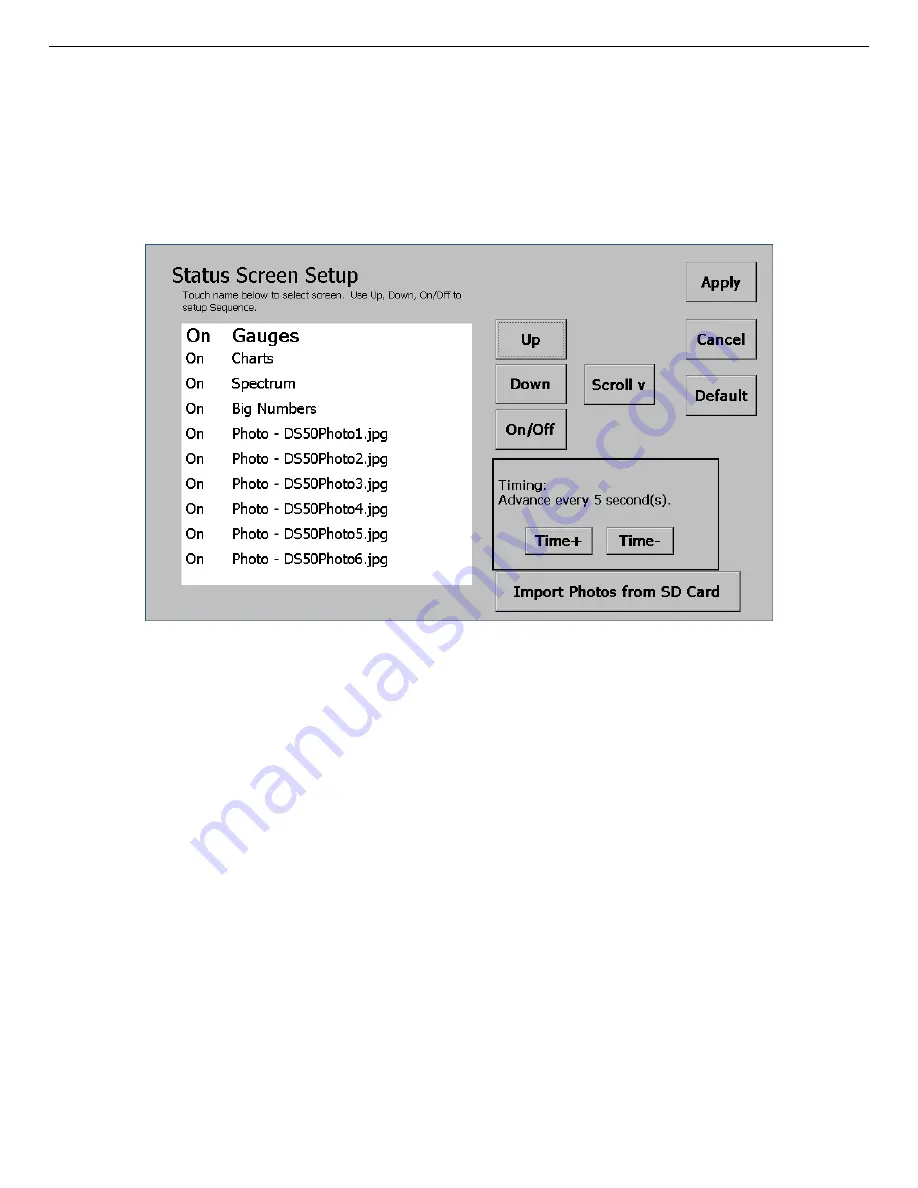
Figure 7. Control The Display of Status Screens.
2.1.3. The Display Control Screen (Status Screen Setup)
Tapping the yellow “multi-screen” thumbnail opens the screen shown in Fig. 7, which allows
you to display or hide the four data display screens and up to nine
.JPG
-format images of your
choice; control the display order of the images; determine the display interval; and import
.JPG
images via the rear-panel SD slot.
To turn a screen on or off, tap its name (the name will enlarge), then tap the
On/Off
button. To
change a screen’s display order, tap it, then tap the
Up
and
Down
buttons as needed to reposi-
tion it. Tap
Scroll
to move up and down through the list of screens. Tap
Time+
and
Time
!
to
change the screen display interval.
The DSPEC 502 has two sets of the four data display screens, identified here with a suffix of
MCA-1
or
MCA-2
.
Tap
Apply
to accept any changes and return to the Switchboard. Tap
Cancel
to return to the
Switchboard without any changes. Tap
Default
to turn all screens on, and restore them to the
factory order and display interval.
2.1.3.1. Import Photos from SD Card
You can import a maximum of nine
.JPG
images. They must be named
DS50Photo#.jpg
, where
#
is from 1 to 9. Copy the images to an SD card, orient the card with the contacts facing up,
19


