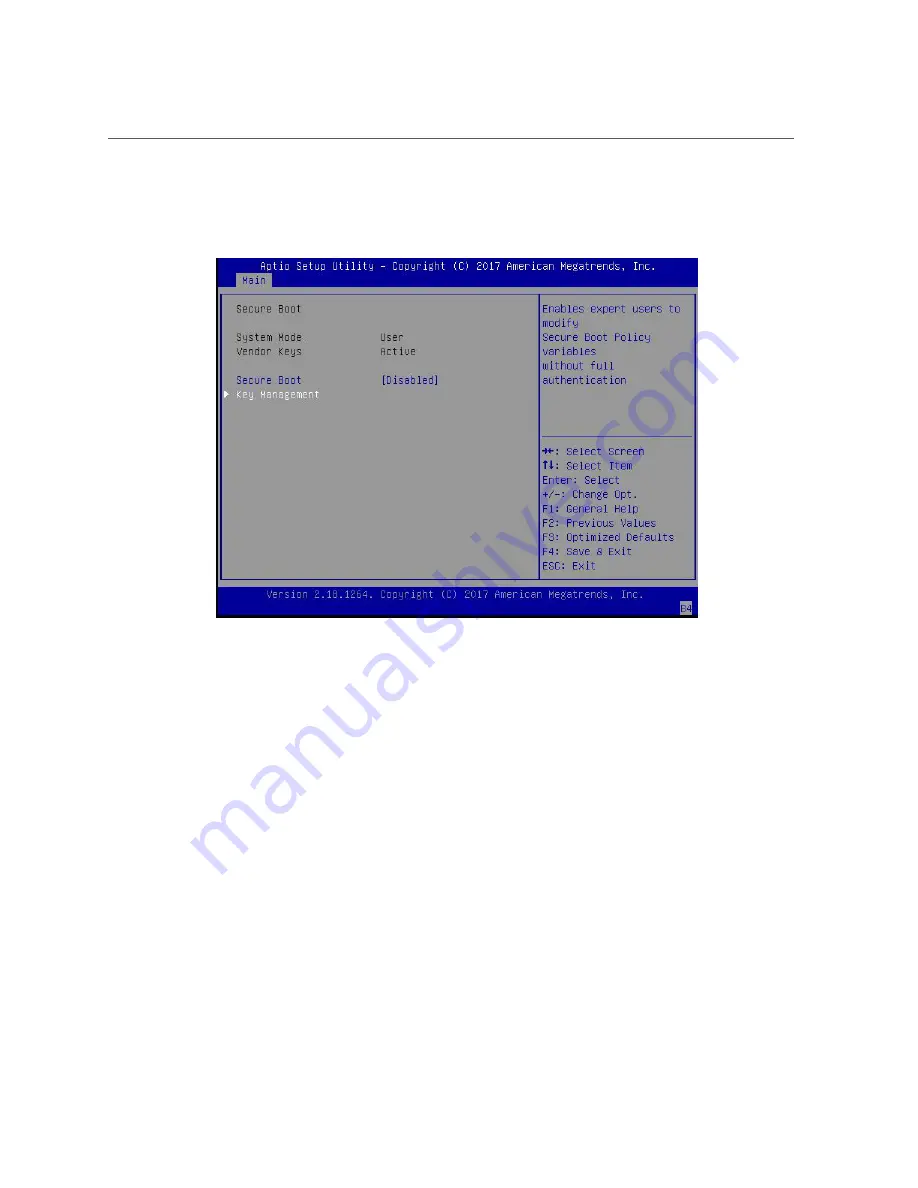
Configure UEFI Secure Boot
3.
On the Security Settings screen, select
Secure Boot
and press Enter.
4.
On the Secure Boot screen, select
Secure Boot
and press Enter. Do one of the
following:
■
Select
Enabled
to enable UEFI Secure Boot. Continue with the next step to
manage policy variables.
■
Select
Disabled
to disable UEFI Secure Boot. Continue with
to save
changes and exit from the BIOS Setup Utility.
When enabled, Secure Boot allows you to manage Secure Boot policy variables.
5.
To manage Secure Boot policy variables, select
Key Management
and press Enter.
The Key Management screen provides options to provision factory default Secure Boot keys or
to enroll an Extensible Firmware Interface (EFI) image.
■
To provision factory default keys – See
Setting Up BIOS Configuration Parameters
243
Summary of Contents for X7-2L
Page 1: ...Oracle Server X7 2L Service Manual Part No E72474 02 October 2017 ...
Page 2: ......
Page 12: ...12 Oracle Server X7 2L Service Manual October 2017 ...
Page 14: ...14 Oracle Server X7 2L Service Manual October 2017 ...
Page 48: ...48 Oracle Server X7 2L Service Manual October 2017 ...
Page 66: ...66 Oracle Server X7 2L Service Manual October 2017 ...
Page 84: ...84 Oracle Server X7 2L Service Manual October 2017 ...
Page 92: ...92 Oracle Server X7 2L Service Manual October 2017 ...
Page 110: ...110 Oracle Server X7 2L Service Manual October 2017 ...
Page 130: ...130 Oracle Server X7 2L Service Manual October 2017 ...
Page 138: ...138 Oracle Server X7 2L Service Manual October 2017 ...
Page 142: ...142 Oracle Server X7 2L Service Manual October 2017 ...
Page 156: ...156 Oracle Server X7 2L Service Manual October 2017 ...
Page 164: ...164 Oracle Server X7 2L Service Manual October 2017 ...
Page 172: ...172 Oracle Server X7 2L Service Manual October 2017 ...
Page 178: ...178 Oracle Server X7 2L Service Manual October 2017 ...
Page 218: ...218 Oracle Server X7 2L Service Manual October 2017 ...
Page 254: ...254 Oracle Server X7 2L Service Manual October 2017 ...


