13
Use common sense, care and caution to dispose of the hot water
which you just purged from the appliance.
Caution: Make sure that water has actually flown into the
tank before you start brewing and always keep water in the
tank.
Prepare Steam for Cappuccino
The steam function can be used to make froth for cappuccino and
act on following steps:
1. Fill the water tank with fresh water about 3/4 full.
2. Make sure the water tank is correctly positioned on the
machine after filling with water.
3. Close the lid on the top of the water tank .
4. Plug the machine into a 230V outlet, then press on the power
switch to “1”position.
5. As soon as switch on the machine, the power indicator (red)
is up.
6. The machine can not be reached to the optimum temperature
until green ready indicator is up too, only at this time, the
machine has entered the position for making steam.
7. As the ready indicator (green) light is up, you may turn on
clockwise coffee/steam knob to steam position, soon the
steam is releasing out from steam nozzle.
. .
Caution: Make sure that you should turn the coffee/steam
knob to the very end of the steam position, otherwise, the
steam will fail to run out.
8. A cappuccino consist of 1/3 each of espresso, milk and milk-
froth. Fill a cup 1/3 with espresso to froth up the milk for
cappuccino.
9. A Steam nozzle consists of a metal tube, a rubber sleeving.
10. Pour about 1/3 pitcher of low-fat milk, place the pitcher
under the steam nozzle of the appliance (Note: The milk
should be well-cooled and the pitcher used should also be
cold, so do not rinse it first in warm water.)
11. When making froth for cappuccino, hold the steam nozzle
just below the surface of the cold milk. Do not touch the
bottom of the pitcher. This allows the steam to mix with
air to create rich, creamy froth. Swivel the pitcher to create
more foam. Foam should be dense with small, closely
packed bubble for rich taste and long-lasting foam.
.
Caution: To make sure that first, releasing up some water
from steam nozzle before making froth for cappuccino.
12. You may turn counterclockwise coffee/steam knob back to
“Zero” position as soon as the sufficient steam is obtained.
. .
Caution: The metal tube may be hot, so do not touch it
when making steam as it should be finished within 20
seconds for each time.
13. Wipe the frothing jet with a clean, damp cloth.
14. To complete your cup of cappuccino, take the cup of espresso
from cup warmer and spoon the froth on top of the coffee.
Cleaning and general care
Caution: Before cleaning or removing parts, unplug the
machine and allow to cool completely.
.
1. The detachable water tank, drip tray and cup tray can be
washed in warm, soapy water. Use a soft cloth or sponge to
avoid scratching the surface.
2. Wipe down the external parts with a soft cloth or sponge.
Do not use harsh abrasive cleansers or bushes as they may
scratch the surface.
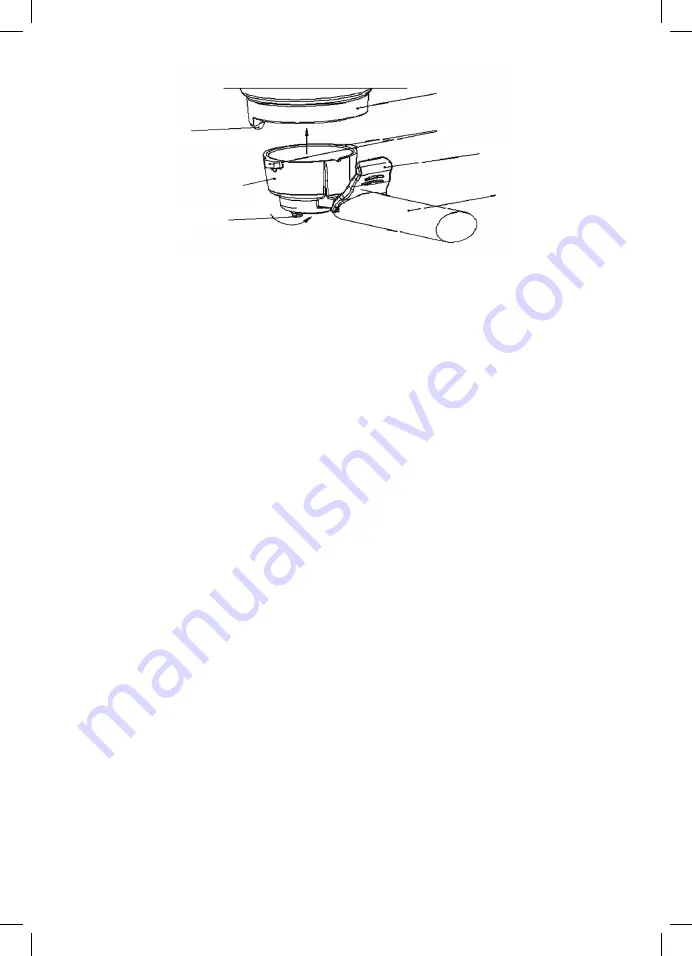
3. Occasionally the brewing system will need to be brushed out.
Screw down it and gently brush coffee grounds out from the
housing. A soft toddler’s toothbrush is ideal for this purpose.
4. After cleaning, screw back the brewing system in a clockwise
direction.
Again: The porta filter may be hot. Be careful not to burn or
scald yourself.
For Best Results
1. Be sure to refrigerate your coffee to retain the robust flavor
and rich aroma.
2. The quality of water you use directly affects the taste of your
coffee. The better the water, the better the coffee. Always use
fresh water.
3. Clean the internals of the machine periodically to ensure the
freshest tasting espresso.
4. Always use fresh, cold skim milk when frothing for
cappuccino.
5. Chill your frothing pitcher in the refrigerator before making
froth.
6. Make sure the frothing pitcher is metal or ceramic, never
glass.
7. Clean the steam nozzle and rubber sleeving after each use
with a damp cloth or sponge.
Progection
The filter
carrier
Two small holes for
dripping espresso
Handle
The plastic pressing
plate
Lug
Infusion head
BREWING SYSTEM
ES2010_ES3210_IM_203.indd 13
200-11-05...23:54:54


