


USER MANUAL
DVI MATRIX ROUTER
– ODM1818
ODM1818 Manual - Edition 7a
Page 34
3.4.3
PC Operation using RS-232
1) Run PC Application.
2) Check the communication cable (RS-232, LAN or USB) and turn on the router.
3) Double click the PC Application.
4) Set identical Router ID number on the PC Application and ODM1818 using the
Dipswitch settings on the rear panel of router. (Default factory setting is 255)
5) Router will initialize and verify the connection status of communication cable.
6) Message 'connection is completed successfully' appears on status display area,
and begins loading of switching-patterns from router.
7) If incorrect cable, COM port or Router ID is detected,
message „Device Not
Found
‟ will appear on the status display.
8) Verify that cable is securely connected then check COM port.
To check COM port, click right side of
„RS-232‟ button and make sure the
COM port number and baud rate are set properly. Make necessary
changes then click left side of RS-232 to initiate RS-232 connection again.
[Note] The default interface for PC Application is RS-232. See below instructions to use
LAN.
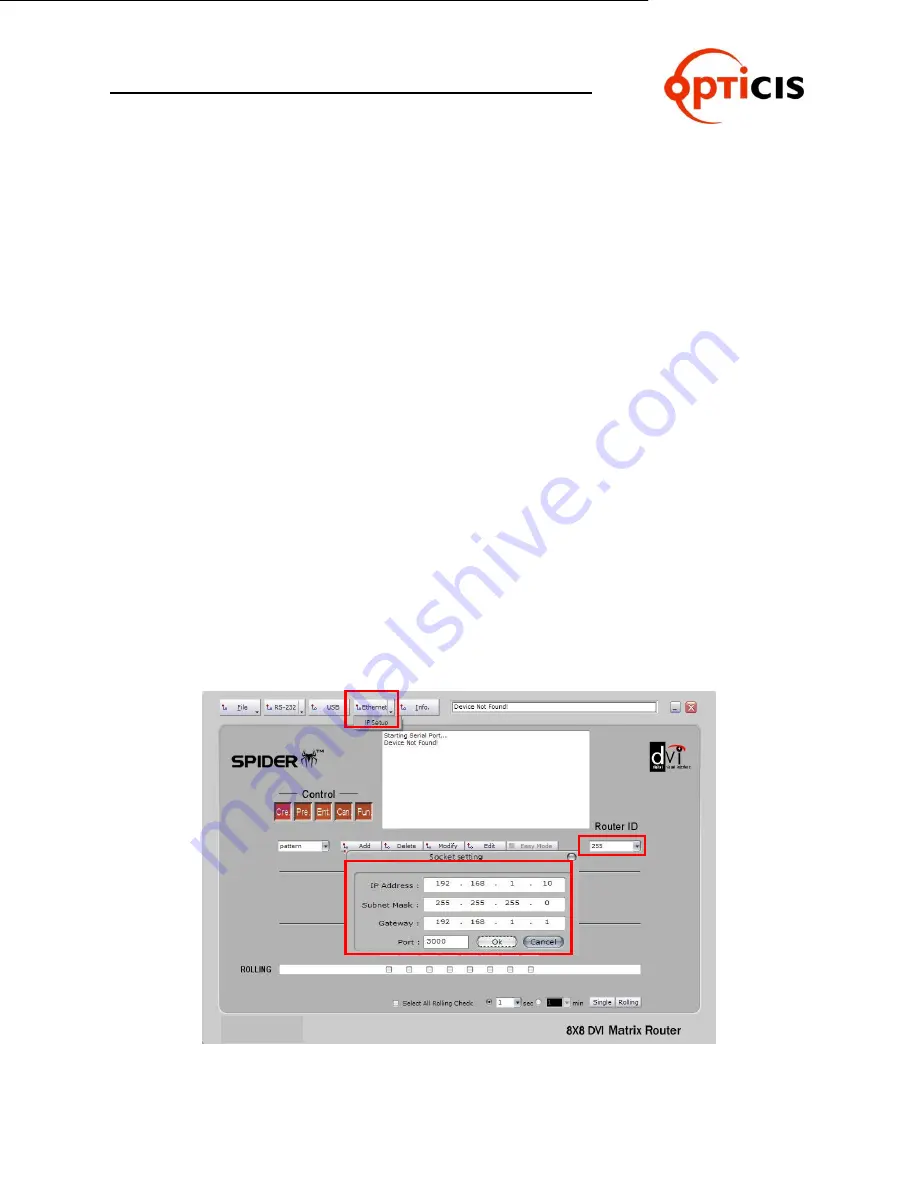
3.4.4
PC Operation using Ethernet
Network configuration by PC program.
1) Select right side of
Ethernet
button to configure the network setup as below:
2) Enter same IP address as the Router. (Refer to Chap. 2.6.5)
ODM1818