


Installation Instructions EC 2-25 Lift
(Subject to technical alterations! - Status 09/2018)
This is a translation. The German original shall prevail.
Page 32 of 50
Fan cover
6.8
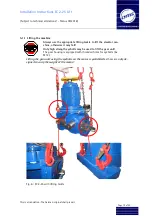
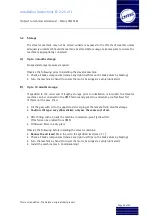
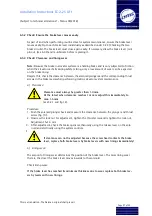
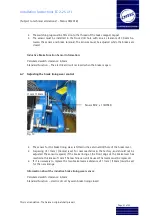
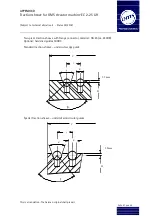
Replacing the incremental encoder
Fig. 14 Fixing the encoder Fig. 13: Supporting the encoder
•
Remove the handwheel together with the central fixing bolt and washer.
•
Loosen the two radial fixing bolts under the incremental encoder (see fig. 23).
•
Loosen the fixing bolt on the locking plate and carefully lift the encoder.
•
Proceed in reverse order to reassemble.
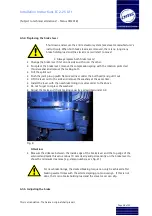
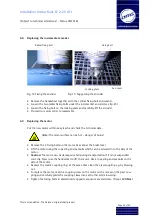
6.9
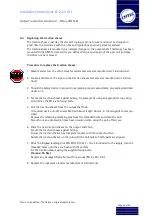
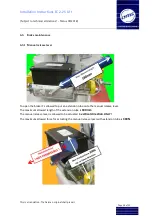
Replacing the motor
Put the new motor within easy reach and check the technical data.
Note:
The motor surface can be hot – danger of burns!
•
Remove the 4 fixing bolts on the motor base above the brake lever.
•
Lift the motor using the rope sling and eyebolts which can be screwed in to the side of the
motor.
•
Caution:
The motor can be damaged or fall during transportation if it is not suspended
correctly. Never use the handwheel to lift the motor. Use a rope sling and eyebolts on the
side of the motor.
•
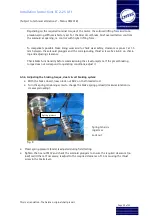
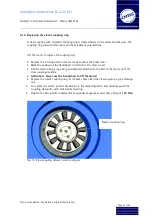
Replace the elastic coupling ring; at the same time clean the claw coupling e.g. by blowing
out.
•
To replace the motor, match a coupling claw on the motor with a recess on the gear cou-
pling and carefully guide the coupling claws into each other while lowering.
•
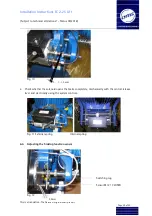
Tighten the fixing bolts in diametrically opposite sequence several times. (Torque
120 Nm
)
Fixing bolt
Radial fixing bolt
Locking plate
Summary of Contents for Hypodrive EC 2-25 Lift
Page 2: ......


