


Installation Instructions EC 2-25 Lift
(Subject to technical alterations! - Status 09/2018)
This is a translation. The German original shall prevail.
Page 12 of 50
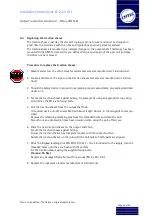
3.3
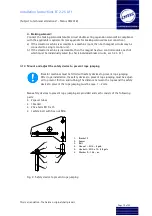
Install the rope clamp
To prevent rope slippage during installation or maintenance work, an optional rope clamp is
available for the traction sheave.
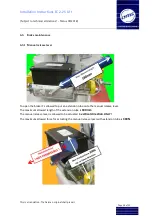
Fit the rope clamp on the side of one of the traction sheave openings (see fig. 3). Ensure that
the lug of the inside clamp bar snaps securely behind the frame of the opening. This prevents
the rope clamp slipping after tightening the locking bolts.
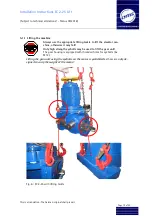
Tighten both locking bolts until the outer and inner bars are approximately parallel to each
other. The inner bar is supported by the frame, thus ensuring that the forces are equally dis-
tributed over all the ropes.
Fig. 3: Side-fitted rope clamp
When using a rope clamp, ensure that:
1.
It does not collide with any other parts.
2.
It does not get tangled in the upward / downward ropes.
3.
It does not block anything.
4.
The next safety device to prevent rope jumping is not obstructed by the rope clamp. If
necessary, remove the bolt from the safety device to prevent rope jumping.
Pulling the elevator car out of the safety catching device using the rope clamp,
additional „loose rope“
and
letting the balance weight fall is prohibited.
Outer bar
Traction
sheave
Inner bar
Rest of frame of
opening
Summary of Contents for Hypodrive EC 2-25 Lift
Page 2: ......


