14
GB
Setting Up
Notes
• Before making
connections, turn off
the power of the
printer, television,
digital camera, video
camera, the computer
or any other equipment
to be connected to the
printer.
• Also refer to the
operating instructions
of the equipment to be
connected to the
printer.
Notes
• If the Smart Media does
not fit properly, do not
attempt to force it into
the slot. Confirm the
inserting direction
again and re-insert it
into the slot.
• Print the images of the
Smart Media as they
were recorded with the
OLYMPUS digital
camera. For the images
retouched or saved
with the computer or
the images recorded
with a digital camera of
other manufacturers,
proper display and
printing performances
are not guaranteed.
• You can use the Smart
Media of the following
capacities with the
printer:
– 2MB (3.3V/5V)
– 4MB (3.3V/5V)
– 8MB (3.3V)
– 16MB (3.3V)
Setting Up
Connecting the printer
• When printing from the Smart Media, see below.
• When printing from the OLYMPUS CAMEDIA C-
1400L/C-1000L/C-1400XL digital cameras, see page
15.
• When printing from the video equipment with the
video input connector, see page 16.
• When printing from the computer, see page 17.
After making connections, connect the AC power cord
of the printer to the wall outlet. (page 18)
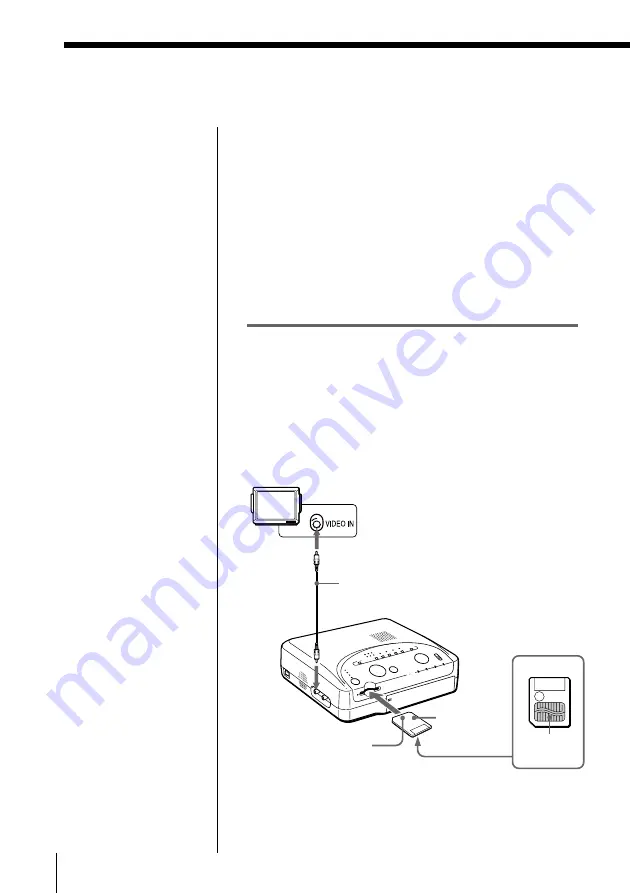
Inserting the Smart Media into the
printer
When printing the images recorded on the Smart
Media, insert the Smart Media into the slot of the
printer. Also connect the printer to the television to
display the images to be printed.
For printing operations, see page 25.
Television
Set TV/
VIDEO
selector to
“VIDEO.”
Video connecting cable (supplied)
To VIDEO
OUT
Smart
Media
With the notch facing
forward and the
electrode facing down.
Rear
Electrode


