Rapid Shape D30+, Original Operating Instructions
Introducing the Rapid Shape D30+: a groundbreaking 3D printer that brings your imagination to life. With its cutting-edge features and unrivaled precision, this innovative device promises to revolutionize your printing experience. Enhance your understanding with the original operating instructions manual available for free download at manualshive.com.
Share
Download


Reviews:
No comments
Related manuals for D30+

86
Brand: Oki Pages: 4

mg6400 series
Brand: Canon Pages: 4

G0923
Brand: Grizzly Pages: 56

FilmMaker 4
Brand: Xante Pages: 31

Aficio SP C730DN
Brand: Ricoh Pages: 100

MPS730b
Brand: Oki Pages: 143

EMP-30
Brand: Epson Pages: 68
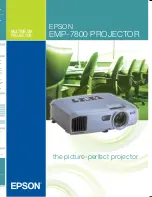
EMP 7800
Brand: Epson Pages: 4

EMP 800
Brand: Epson Pages: 1

EMP-30
Brand: Epson Pages: 1

EMP-82
Brand: Epson Pages: 87

EMP-73
Brand: Epson Pages: 108

EMP 800
Brand: Epson Pages: 89

EMP 7800
Brand: Epson Pages: 151

EMP-820
Brand: Epson Pages: 2

L382 SERIES
Brand: Epson Pages: 97

L566
Brand: Epson Pages: 4

L800
Brand: Epson Pages: 107


