background image

OL3020 User Manual                                           

35


Date Holiday 

Greetings 

January 1 
 
January 2-3


New Year’s Day


Happy Holidays 
Happy New Year 
Wishing You A Prosperous 
New Year


February 14


Valentine’s Day


Happy Valentine’s Day


April 1


April Fool’s Day


April Fool’s Day! 
Have a Fun Day


2

nd

 Sunday in May


Mother’s Day


Happy Mother’s Day


Friday – Monday of 
Memorial Day 
weekend


Memorial Day


Have a Happy Memorial Day 
Weekend


3

rd

 Sunday in June


Father’s Day


Happy Father’s Day


July 4


Independence Day


U.S. Independence Day 
Celebration


Friday – Monday of 
Labor Day Weekend


Labor Day


Have a Happy Labor Day 
Weekend


Sunday after Labor 
Day


Grandparent’s Day


Have a Grand Grandparent’s 
Day


October 31


Halloween


Boo…. Have a SPOOOKY 
Halloween


4

th

 Thursday in 

November


Thanksgiving Day


Turkey Days are Here! 
Happy Thanksgiving


Day after Thanksgiving 
to December 28


Happy Holidays


December 29-31 

New Year’s Day


Happy Holidays 
Wishing You A Prosperous 
New Year


6 Demonstration 

Mode 

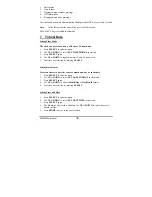
This allows the user to view a selection of displays. This includes: 

Summary of Contents for OL3020

Page 1: ...OLYMPIA OL3020 OWNER S MANUAL MANUAL DEL USARIO ...

Page 2: ...stered trademark of Olympia International Holdings Ltd InfoGlobe is a registered trademark of Wave Industries Ltd Disclaimer The information contained in this document is subject to change without notice Wave Industries makes no warranty of any kind with respect to this information Wave Industries shall not be liable for any direct indirect incidental consequential or other damage alleged in conne...

Page 3: ...ge 14 14 Setting Local Area Code 14 15 Setting Tone Pulse Preset to Tone 14 16 Setting RINGER ON OFF 15 17 Setting Date Time 15 18 Setting Display Contrast 15 19 Caller ID Operation Handset 17 20 Visual Message Notification Handset 24 21 Speed Dial Memory 0 9 25 22 Pre dialing Handset OFF 28 23 Redial with Handset OFF 29 24 Dialing Digits 30 25 Call Timer 30 26 Battery Voltage Low Detection 31 27 ...

Page 4: ...OL3020 User Manual 4 11 Caller ID 39 12 Setting Timer On Off 41 13 Troubleshooting the InfoGlobe 42 Part III Consumer Information 错误 未定义书签 ...

Page 5: ...ld be operated only from the type of power source indicated on the marking label If you are not sure of the type of power supply to your home consult your dealer or local power company 8 Do not allow anything to rest on the power cord Do not locate this product where the cord will be damaged by persons walking on it 9 Do not overload wall outlet extension cords as this can result in the risk of fi...

Page 6: ...restore the product to normal operation v If the product has been dropped or cabinet has be damaged vi If the product exhibits a distinct change in performance 13 Avoid using a telephone other than a cordless type during an electrical storm There may be a remote risk of electrical shock from lightning 14 Do not use the telephone to report a gas leak in the vicinity of the leak ...

Page 7: ...ROPERLY 1 Do not dispose of the battery in a fire The cell may explode Check with local codes for possible special disposal instructions 2 Do not open or mutilate the battery Released electrolyte is corrosive and may cause damage to the eyes or skin It may be toxic if swallowed 3 Exercise care in handling batteries in order not to short the battery with conducting materials such as rings bracelets...

Page 8: ...rol 12 Pause key pause time is 4 seconds 13 Low battery warning tone 14 Backlit LCD Display 15 Auto Answer when Handset is removed from cradle 16 Any key answer 17 Redial CID transfer to memory up to 16 digits long 2 Handset Caller ID Features 1 Caller ID and Call Waiting ID compatible 2 CID memory stores up to 64 names and numbers 3 3 line Handset display 4 Total call counter 5 New call LED indic...

Page 9: ...t area for local dialing enter 000 for the Area Code then press MEM SET T P T Set Tone Pulse is now displayed Press or to change the dialing mode then press MEM RINGER ON or OFF is now displayed Press or to change the ringer mode then press MEM DATE TIME is displayed Press digits or or to adjust date and time then press MEM CONTRAST is displayed Press or to adjust the display contrast then press M...

Page 10: ...o the Handset battery socket Place the battery pack and wires in the compartment 3 Close the battery compartment 4 You may change the face panel with one of the color options provided 5 Plug the power and telephone cords into the corresponding jacks on the bottom of the Base 6 Run the cords through the channels provided OL3020 User Manual 10 ...

Page 11: ...and Base communicate with each other automatically This process may take a minute 9 Leave the Handset in the Base for 10 hours so that the battery pack is fully charged 10 The CHARGE indicator on the Base glows when the Handset is charging Maximum talk time on a full charge is 4 hours Maximum standby time on a full charge is 5 days Your results may be somewhat less that these maximums 6 Layout of ...

Page 12: ...ered up the Handset should be placed in the cradle of the Base Unit for charging and setting a new security code 2 Each time the Handset is placed on the cradle of the Base Unit the Base will generate and transmit a new security code to the Handset 3 The completion of a successful security code transfer operation will be indicated by a flash of the In Use LED on the Base Unit and a beep generated ...

Page 13: ... be shown on LCD display 2 If the communication link is not established within 8 seconds there error beeps will be heard from the Handset to indicate communication has failed 3 You can dial the phone number first then press TALK this is called pre dial or press TALK first then dial 10 Terminate a Call 1 To terminate a call press the TALK button OR 2 Place the Handset in the cradle the call is then...

Page 14: ...tion Your phone offers 3 languages English French and Spanish Press or to choose the desired language and then press the MEM key to confirm After confirmation Area Code will be displayed 3 14Setting Local Area Code 0 0 0 A R E A C O D E 1 If you dial 7 digits to make a local call you need enter your 3 digit area code The digits will shift to the left one by one as you enter them If you dial 10 dig...

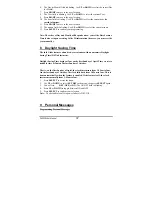
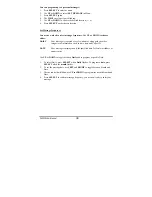
Page 15: ...lect the desired setting and the display will update to the current setting RINGER ON RINGER OFF RINGER ON 3 Press MEM key to confirm After confirmation you will enter DATE TIME setting 4 17Setting Date Time 1 0 3 0 PM 10 00 DATE TIME 1 Press the appropriate digits to enter first the time and then the date 2 To change the AM PM setting press any digit 3 Press or to skip forward or backward 4 Press...

Page 16: ...to standby During programming Press CHAN to return to idle mode Or if no key is pressed for 20 seconds you will be returned to idle mode Display contrast can also be set by pressing FLASH during standby idle mode 3 Press or to set the desired contrast 4 Press MEM to confirm After confirmation the display returns to standby mode ...

Page 17: ...em prompts CID and phone call timer dial number 12 digit number line 1 Display caller s number CID or 2 Display dialed digits phone New call Call counter Shows the amount of calls new calls in standby mode Example of old calls CALL 18 of new calls NEW CALL 9 Repeat Call icon Lights on to indicate that the displayed call arrived more than once Clock 1 Shows the real time clock AM PM format or 2 The...

Page 18: ...during start up English Spanish or French Note2 If the unit receives more than 64 calls the oldest CID information will be erased except VIP calls 1 RECEIVING CALLS i When Caller ID is activated the Telephone Company sends the caller s telephone number and name if available and the call s date and time between the first and second rings The device receives and displays this information for each ca...

Page 19: ...rst three digits match with the area code that you have programmed the LsCD shows the last 7 digits only area code will be omitted See Setting local area code 2 REVIEWING NEW CALLS i In standby mode with the NEW CALL indicator flashing pressing or the LCD displays the latest new call information 4 0 9 1 0 3 0 J 5 N 8 PM 7 10 00 H O 6 NEW CALL I M 1 2 H T 3 S 1 ii Repeatedly press or to review all ...

Page 20: ...the time and date will be displayed and the call counter will show the total number of new calls including those already reviewed PM 10 00 5 1 0 3 0 NEW CALL Press CHAN to return to standby idle mode No activity for 20 seconds will return the display to standby mode 3 REVIEWING OLD CALLS i In standby mode press or to review old call information from the oldest to the newest button or from the newe...

Page 21: ...rm deletion iv If the deleted message was the last record in memory the display will go back to standby mode If there are other records in memory the next CID record received after the deleted record will be displayed v VIP call records can t be deleted See Set VIP Calls for details Press any key to cancel the deletion No activity for 20 seconds it will return the handset display to standby idle m...

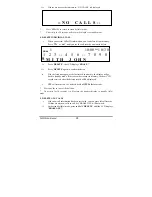
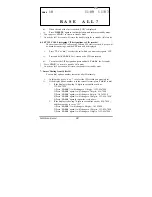
Page 22: ...vity for 20 seconds will return your handset to standby mode 7 Smart Dialing from Caller ID You can dial a phone number stored in Caller ID memory i In idle mode press or to select the CID record you want to dial ii If the display phone number is in the correct format press TALK to dial 1 If the display is showing 10 digits in second line such as 123 456 7890 1 Press CALLS it will change to 11 dig...

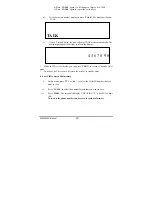
Page 23: ...n the display 4 5 6 7 8 9 0 While in CID review mode you can press CHAN to return to standby idle mode No activity for 20 seconds will return the display to standby mode 8 Save CID to Speed Dial memory i In idle mode press or to select the Caller ID number that you want to save ii Press CALLS to select the number format that you want to save iii Press MEM The screen will display LOCATION X where X...

Page 24: ...No activity for 20 seconds will return the display to the standby idle mode 20 Visual Message Notification Handset In conjunction with voicemail service through your local telephone service provider subscription required your phone can alert you to new voicemail messages by providing an envelope icon on the display NOTE most but not all service providers can provide this notification service After...

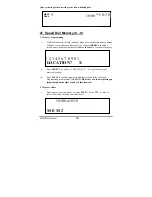
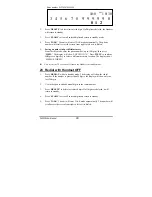
Page 25: ...t press adds an additional 4 seconds to the pause 1 2 3 4 5 6 7 8 9 0 1 LOCATION X ii Press MEM You will see LOCATION X X is the lowest empty memory location iii Press MEM to confirm or press a different location 0 9 if desired Programming is completed CAUTION Make sure you re not replacing an important phone number already in that location 2 Memory editor i Enter memory search mode by pressing ME...

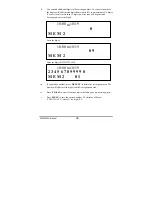
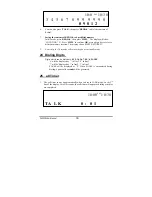
Page 26: ... 10 00 PM10 19 Enter the digit 9 10 00 PM10 19 0 9 M E M 2 Enter the digits 01234567899990 10 00 PM10 19 2 3 4 5 6 7 8 9 9 9 9 0 M E M 2 0 1 iii If you make a mistake press DELETE to delete the last digit entered The display will shift entered digits from left to right hand side iv Press FLASH to clear all entered digits including any pre existing digits v Press MEM to save the entered number The ...

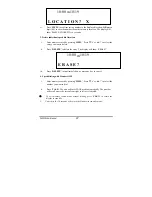
Page 27: ...lete the entry The display will show ERASE 10 00 PM10 19 E R A S E iii Press DELETE to confirm deletion or press any key to cancel 4 Speed Dialing with Handset OFF i Enter memory search by pressing MEM Press or to select the number you want to dial ii Press TALK The unit will enter TALK mode automatically The number will scroll across the screen from right to left as it is dialed To exit memory se...

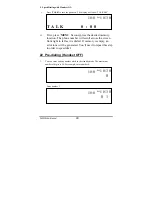
Page 28: ... number will scroll across the screen from right to left as it is dialed If memory is empty an error tone will be generated You ll need to repeat this step in order to speed dial 22 Pre dialing Handset OFF 1 You can enter a phone number while in the standby mode The maximum number of digits is 24 For example enter number 0 PM 10 0 0 1 0 3 0 Enter number 1 PM 10 0 1 0 1 0 3 0 OL3020 User Manual 28 ...

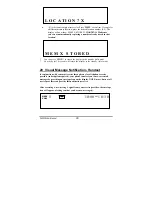
Page 29: ... MEM to confirm OR press a digit key to select a different memory location The display shows MEM X STORED No activity for 20 seconds will return the Handset to standby mode 23 Redial with Handset OFF 1 Press REDIAL while in standby mode The display will show the redial number If the number is greater than 24 digits the display will show only the last 24 digits 2 Use the keypad to add additional di...

Page 30: ...activity for 20 seconds will return the phone to standby mode 24 Dialing Digits Digits which can be dialed are 0 1 2 3 4 5 6 7 8 9 PAUSE will be displayed as ٱ in line2 in line3 will be displayed as ٱ in line2 in line3 PAUSE will be displayed as P When PAUSE is encountered during dialing a pause of 4 seconds will be generated 25 all Timer 1 The call timer comes up automatically when you are in TAL...

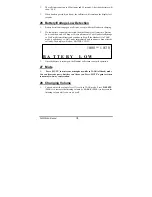
Page 31: ...ly and continue to beep If the Handset is in TALK mode it will change to Halt mode immediately and continue to beep after the call ends The display will show BATTERY LOW PM 10 00 1 0 3 0 E T R Y O L W T B A 3 Once the battery is recharged the Handset will return to normal operation 27 Mute 1 Press MUTE to mute your microphone while in TALK off hook mode You can hear your party but they can t hear ...

Page 32: ...n off 2 InfoGlobe Control Keys LEFT Power ON OFF Hold LEFT down to turn Globe On and Off Press and hold key for at least 1 second Press to go to left character setting Start stop rotation in CID list view Press to exit menu and return to standby RIGHT Press and hold to start Demonstration Mode Press to go to right character setting Delete record s in CID list view Press to exit menu and return to ...

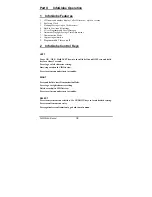
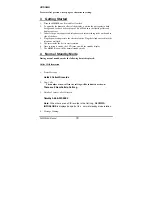
Page 33: ...t Plug the telephone cord into the telephone wall jack 5 The rotor inside the device starts rotation 6 Once rotation is steady the LED turns on with the standby display 7 The OL3020 is now in the normal standby mode 4 Normal Standby Mode During normal standby mode the following data is displayed Caller ID Information 1 Preset Message Holds 5 Caller ID records 2 New Calls The number of new calls in...

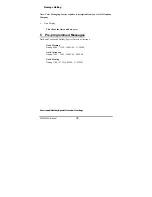
Page 34: ... 5 Time Display This shows the time and date as set 5 Pre programmed Messages Daily and Year round Holiday Special Occasion Greetings Good Morning During 00 00 11 59 12 00AM 11 59AM Good Afternoon During 12 00 16 59 12 00PM 4 59PM Good Evening During 17 00 23 59 5 00PM 11 59PM Year round Holiday Special Occasion Greetings ...

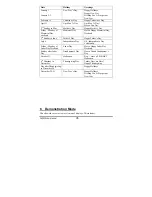
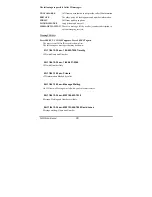
Page 35: ...y in June Father s Day Happy Father s Day July 4 Independence Day U S Independence Day Celebration Friday Monday of Labor Day Weekend Labor Day Have a Happy Labor Day Weekend Sunday after Labor Day Grandparent s Day Have a Grand Grandparent s Day October 31 Halloween Boo Have a SPOOOKY Halloween 4th Thursday in November Thanksgiving Day Turkey Days are Here Happy Thanksgiving Day after Thanksgivin...

Page 36: ... the menu 3 Press SELECT again 4 Use UP or DOWN to toggle between 12 and 24 hour clock 5 Confirm your selection by pressing SELECT Setting Date Format Users can choose to have the order of month and day set in the date 1 Press SELECT to enter the menu 2 Use UP or DOWN to select SET DATE FORMAT in the menu 3 Press SELECT again 4 Use UP or DOWN to choose Month Day or Day Month format 5 Confirm your ...

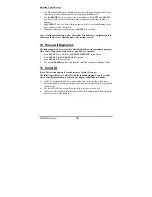
Page 37: ...ly 8 Daylight Saving Time The Info Globe features a hundred year calendar with an automatic Daylight Saving Time DST adjustment Daylight Saving Time begins at 2am on the first Sunday of April Time reverts to standard time at 2am on the last Sunday of October That is on the first Sunday of April the clock increments from 1 59am to 3am On the last Sunday of October the clock falls back from 1 59am t...

Page 38: ...peated every few minutes along with the other categories of information such as time date and Caller ID DATE Your message is displayed only the specified date Perfect for birthdays or anniversaries Use UP or DOWN to toggle between Daily and to program a specific Date 1 To select Daily press SELECT when Daily flashes To program a date press SELECT when the month flashes 2 To set the message date us...

Page 39: ...re erases the Caller ID list and user programmed messages Date Time Time Mode Date Format and DST are retained 1 Press SELECT press UP to find ERASE MEMORY in the Menu 2 Press SELECT again ERASE ALL appears 3 Press SELECT key to confirm 4 The word ERASED appears and then the InfoGlobe returns to Standby Mode 11 Caller ID Note This section applies if you subscribe to Caller ID service The InfoGlobe...

Page 40: ...vice Viewing CID List Press SELECT CID LIST appears Press SELECT again The most recent Caller ID record is shown first The following are messages that may be shown 01 11 04 12 30am 186 653 7038 Timothy CID with Name and Number 02 11 04 12 30am 1 866 537 0384 CID with Number Only 03 11 04 12 30am Private CID information blocked by caller 04 11 04 12 30am Message Waiting No CID data a Message was le...

Page 41: ...or 10 seconds the InfoGlobe will return to the Caller ID review mode 12 Setting Timer On Off The unit can be programmed to turn on and off at a set time e g turned off at 10 30pm and turned on at 6 00am 1 Press SELECT to enter the menu Press UP or DOWN and scroll to SET ON OFF TIME 2 Press SELECT again The current setting will be shown e g ON HH MMTT OFF HH MMTT 3 The hour setting HH for the ON ti...

Page 42: ...ephone company Ensure that telephone cord is plugged in correctly 3 There are sounds of vibration coming from base Vibrations coming from the Info Globe are normal However check that the device is standing firmly on a level surface and that there are no other objects close to the unit that may be producing the sound 3 Floating display looks faint Check that AC adapter has been plugged in properly ...

Page 43: ...OL5800 The digits represented by 00 are the REN without a decimal point e g 03 is a REN of 0 3 The REN is separately shown on the label too If this equipment causes harm to the telephone network the telephone company will notify you in advance that temporary discontinuance of service may be required But if advance notice isn t practical the telephone company will notify the customer as soon as pos...

Page 44: ...oduct Use of other accessories may not ensure compliance with FCC RF exposure guidelines This equipment generates uses and can radiate radio frequency energy and if not installed and used in accordance with the instructions may cause harmful interference to radio communications However there is no guarantee that interference will not occur in a particular installation If this equipment does cause ...

Page 45: ...efect and include this in the package Please include payment for any service or repair not cover by warranty as determined by Wave Industries WAVE INDUSTRIES WILL NOT HONOR ANY RETURNED PRODUCT THAT IS SHIPPED WITHOUT THE PROPER DOCUMENTATION WHICH INCLUDES A VALID RETURN AUTHORIZATION NUMBER CLEARLY PRINTED ON THE OUTSIDE OF THE PACKAGE Warranty does not cover batteries damage from misuse or negl...

Reviews: