GETTING STARTED
13
•
When inserting a xD-Picture Card, make sure the curved side of the card is facing you and the metal
contacts are facing downward.
note:
It is important that you remember the correct orientation of the card when you insert it into the
printer as inserting it any other way could damage the card and the printer.
1
On your printer’s front panel, choose the correct slot for the memory card that you wish to insert.
2
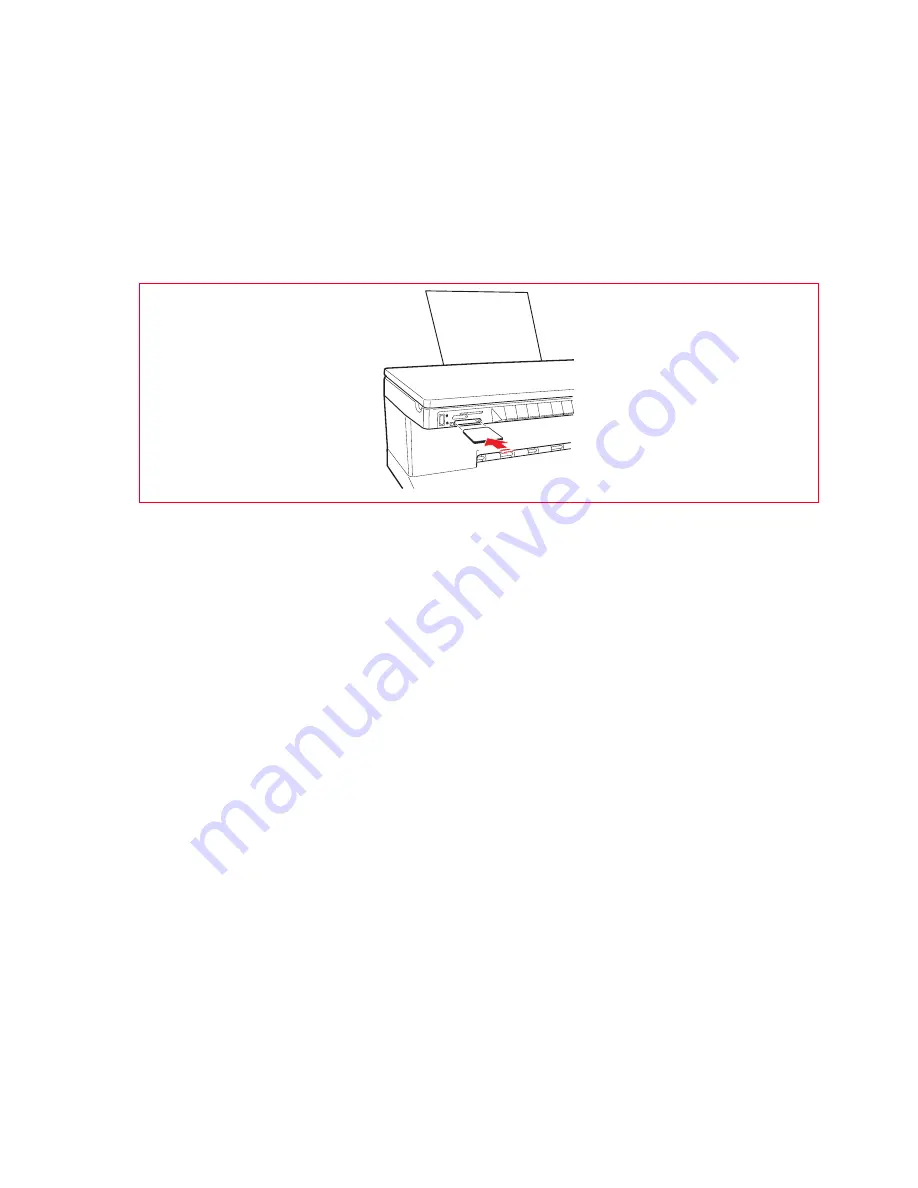
Orient your specific memory card as indicated at the beginning of this section, carefully insert it into the
slot and gently push it in until it stops. The following figure shows an example of the insertion of a
MultiMedia card.
note:
The memory card does not go in all the way; do not try to force it in since doing so will damage
the card and the printer.
If the card is inserted correctly, an iconis displayed on the LCD indicating the total number of photos
stored on the memory card (only the compatible files are opened and counted).
Removing a Memory Card
1
Carefully pull the card completely out of its slot.
CAUTION:
DO NOT remove the memory card while it is still being accessed either by the printer or
personal computer since doing so could damage the photos stored on the card.
The printer’s Idle screen is displayed next, indicating that your printer is in stand-by waiting for further
operating commands.
Summary of Contents for Photo Wireless Any_Way
Page 1: ......
Page 8: ...CHAPTER 1 4 LOCATING YOUR PRINTER S COMPONENTS...
Page 18: ...CHAPTER 1 14...
Page 38: ...CHAPTER 4 34...
Page 46: ...CHAPTER 5 42...
Page 52: ...CHAPTER 6 48...
Page 55: ...Code 257657 M 01...


