4.1 Establishing a Data Connection with the PC
Depending on your Body Screener
TM
model, a data connection has to be established either via WiFi
or USB cable. Please make sure your Body Screener
TM
is powered on before continuing.
4.1.1 Connection via WiFi
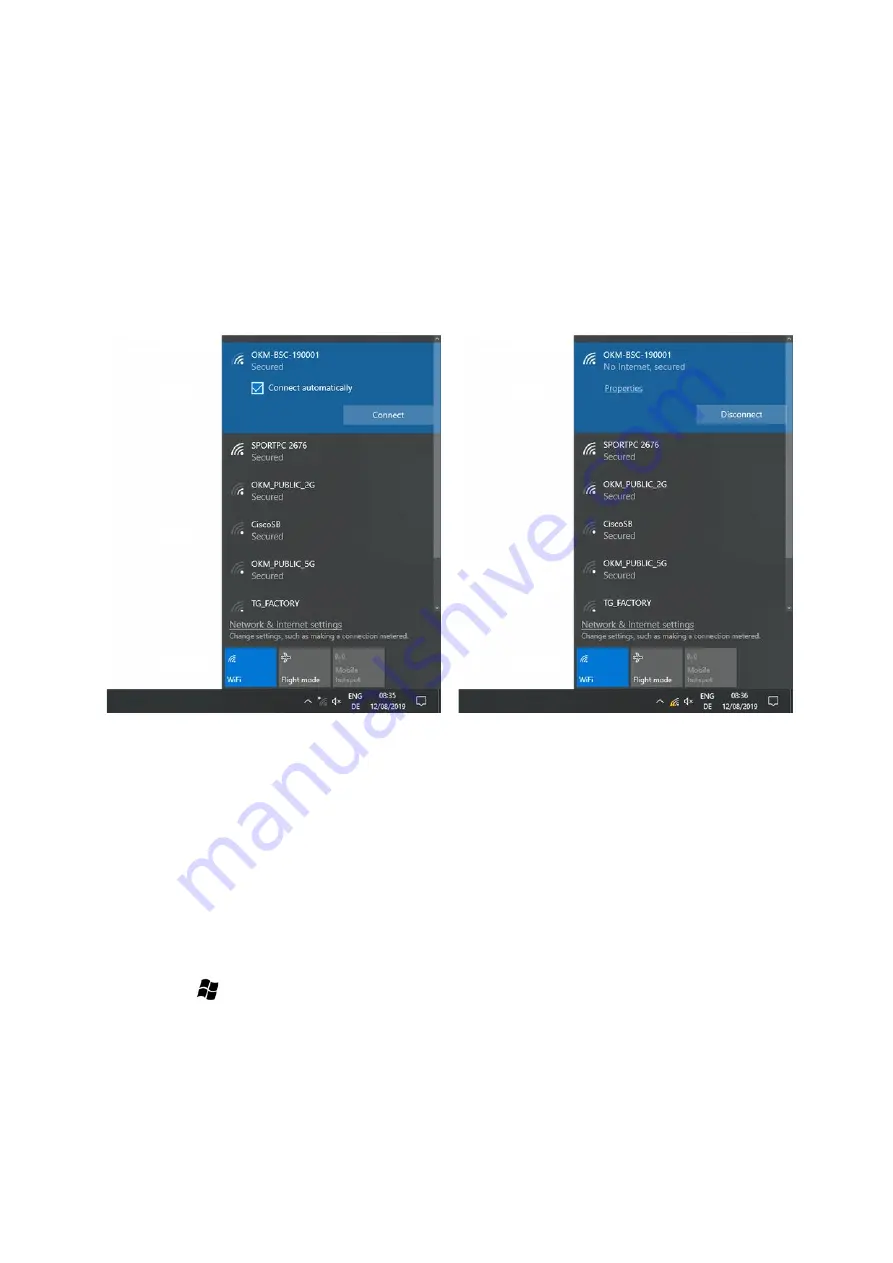
First, you have to click the Windows
Network & Internet settings
icon in the right bottom corner of
the task bar. A list of available networks expands. Then, you need to select the proper WiFi network
(named after your Body Screeners
TM
serial number), tick the checkbox
Connect automatically
and
click the
Connect
button.
For a successful WiFi connection you have to enter the 8-digit password that is included in your
Body Screener
TM
package. After the connection has been established, you will also see a
corresponding message within the information area of Windows
Network & Internet settings
.
4.1.2 Connection via USB cable
If your Body Screener
TM
is equipped with an USB port, you have to prepare your PC with appropriate
USB drivers. To do that, plug one end of the USB cable into the USB port of your Body Screener
TM
and the other end into a free USB port of your PC.
Now open Windows
Device Manager
to start installing the USB drivers. In Windows 10 you simply
push the keys
+ X
simultaneously, which opens a menu where you click on
Device Manager
(see figure 7, left).
13
Figure 6: Establish connection via WiFi
Summary of Contents for BODY SCREENER
Page 1: ...USER MANUAL...


