- 53 -
Scanning to E-mail
4
Scanning
Connecting using wireless LAN
(MC342dw, MC362w, MC562w, MC562dw,
ES5462dw MFP, MPS2731mc only)
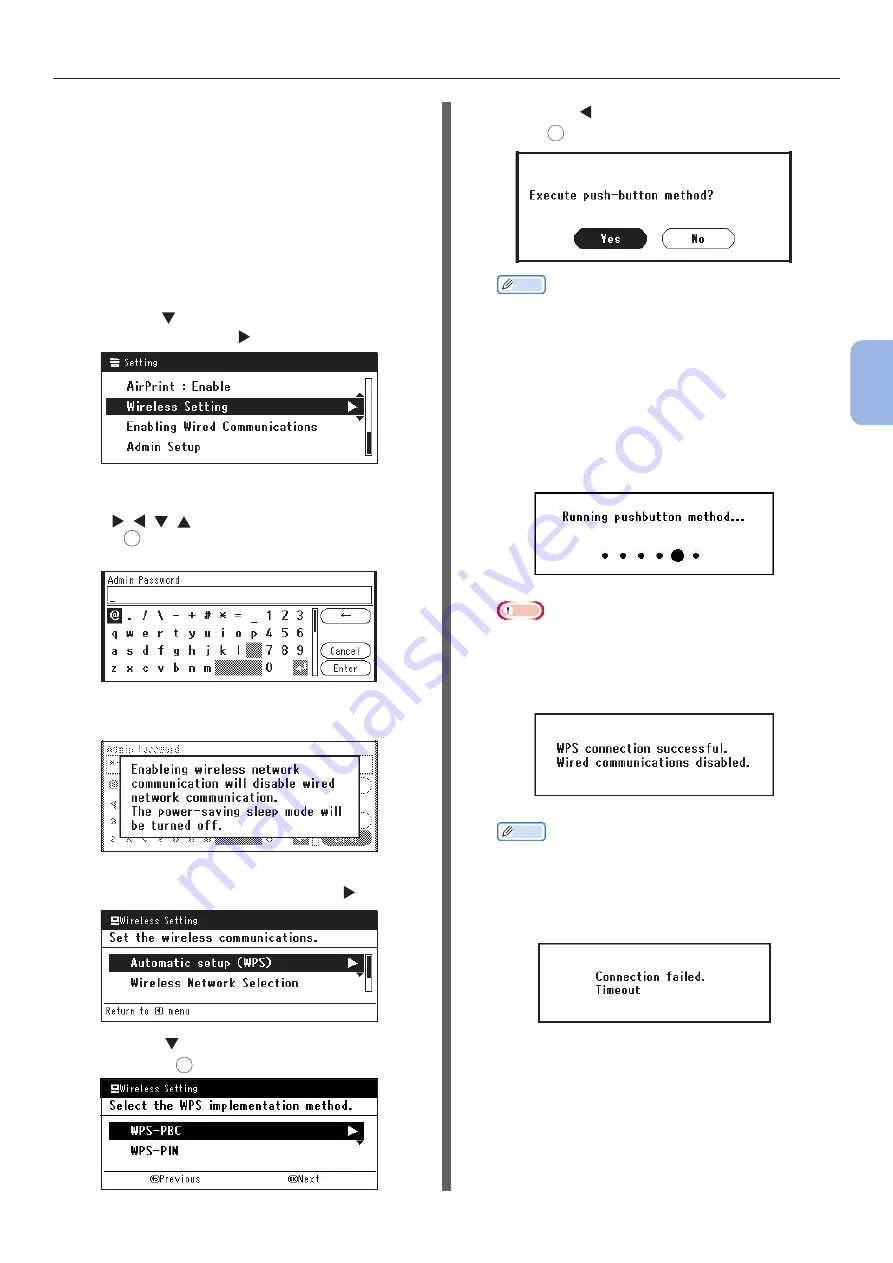
Use the WPS (push button) function to set the
wireless LAN. For details on other methods
for setting the wireless LAN, refer to the
Configuration Guide.
1
Press the <SETTING> key on the operator
panel.
2
Press the to select [Wireless Setting],
and then press the .
3
Log in by entering administrator password
of the device.
Use
, , ,
key to select letter and then
press
OK
.
Default administrator password is “aaaaaa”.
The message below will be displayed for
about 5 seconds.
4
Check that [Automatic setup (WPS)]
is selected, and then press the .
5
Press the to select [WPS-PBC], and
then press
OK
.
6
Press the to select [Yes], and then
press
OK
.
Memo
● Start the WPS push button for wireless AP after clicking
[Yes] in the confirmation screen. Alternatively, if WPS
push button for wireless AP is started first, start the
WPS push button on this equipment.
● If [No] is selected, the screen returns to that from
step 5.
7
If [Yes] is selected in step 6, [Running
pushbutton method...] is displayed in
the screen.
Note
● Panel operations cannot be performed during WPS
execution.
● When [WPS connection successful] is displayed,
this equipment is connected to the wireless LAN.
Memo
● If [Connection failed Timeout] is displayed, it
is possible that the wireless AP of the connection
destination could not be found within the time limit.
Select [Yes] again in step 6 within 2 minutes of
starting WPS push button for wireless AP.
● If [Overlap] is displayed, WPS-push button is being
executed on 2 or more wireless AP. Please wait for a
short time and then retry.


