-
15
-
5.3.2
Date
Stamp
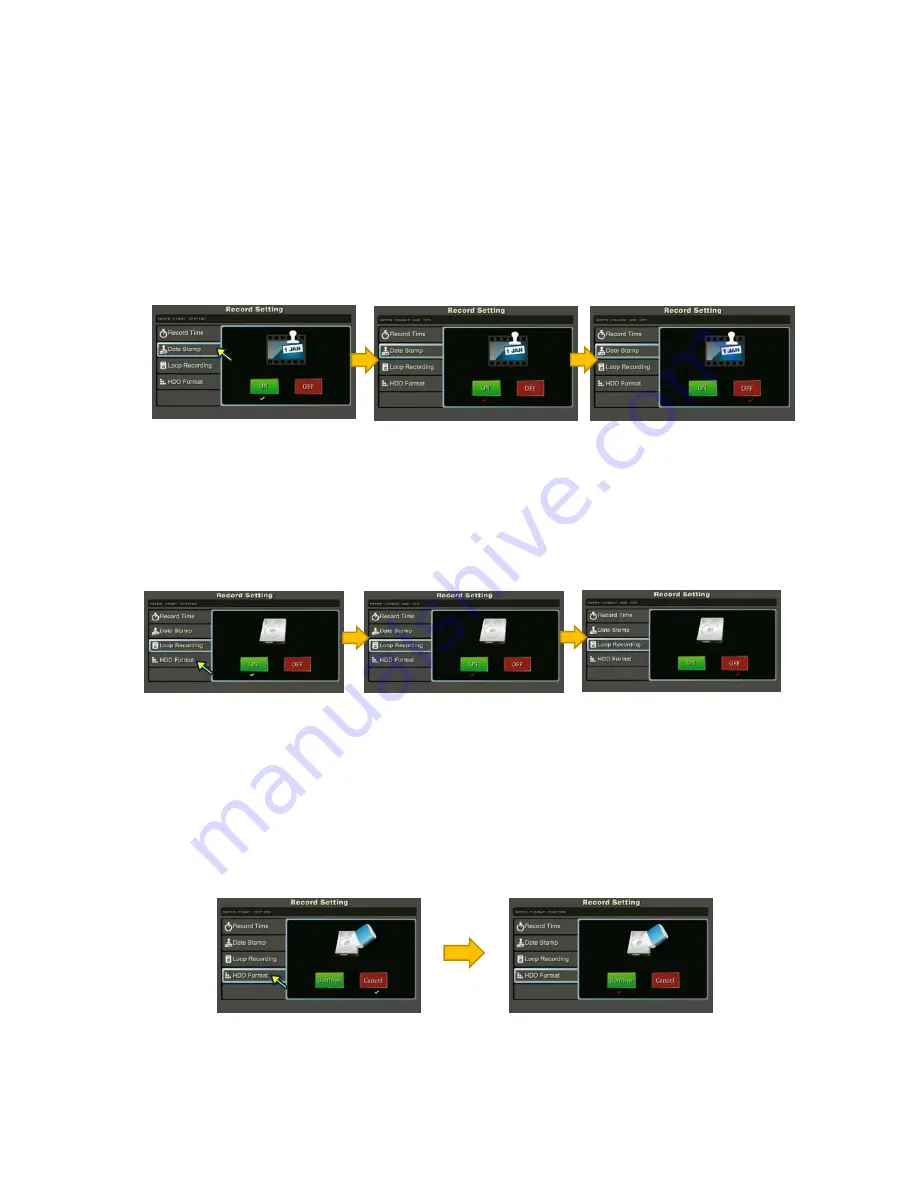
Enable/disable “Date/Time” stamp on Live View screen. Default is “ON”, date and
time are shown at the lower left corner of each camera channel.
To change the setting:
1. Press [ENTER] button to go into “Date Stamp” menu. Default value in
“ON” marked with RED tick under the ON label
2. Use [LEFT / RIGHT] button to select turn “ON” or “OFF” date stamp in Live
View, press [ENTER] again to confirm changes
3. Press [MENU] to exit
5.3.3
Loop
Recording
Set to enable/disable HDD video loop recording. When the internal hard drive is full
during video recording, the NVR will delete oldest files to release HDD space.
1. Press [ENTER] button to go into “Loop Recording” menu. Default value in
“ON” marked with RED tick under the ON label
2. Use [LEFT / RIGHT] button to select turn “ON” or “OFF” loop recording,
press [ENTER] again to confirm changes
3. Press [MENU] to exit
5.3.4
HDD
Format
This function formats the internal hard disk drive.
(a) Press [ENTER] button to go into “HDD Format” menu
(b) Select “Confirm”, press [ENTER] button to start formatting the hard disk drive.
Note:
(1) MUST format a new installed HDD in the NVR before using it to record video
(2) MUST use a 7200rpm HDD with at least 32MB internal cache
CAUTION
:
All data in the hard disk drive will be erased and cannot be recovered.
Default
status
– display
time
stamp
in
Live
View
Select
[OFF]
to
disable
time
stamp
in
Live
View,
press
[ENTER]
to
confirm
Default
status
– Loop
recording
ON
Select
[OFF]
to
disable
loop
recording,
press
[ENTER]
to
confirm
Select
<Confirm>
and
press
[ENTER]
to
format
the
HDD


