117
4
3
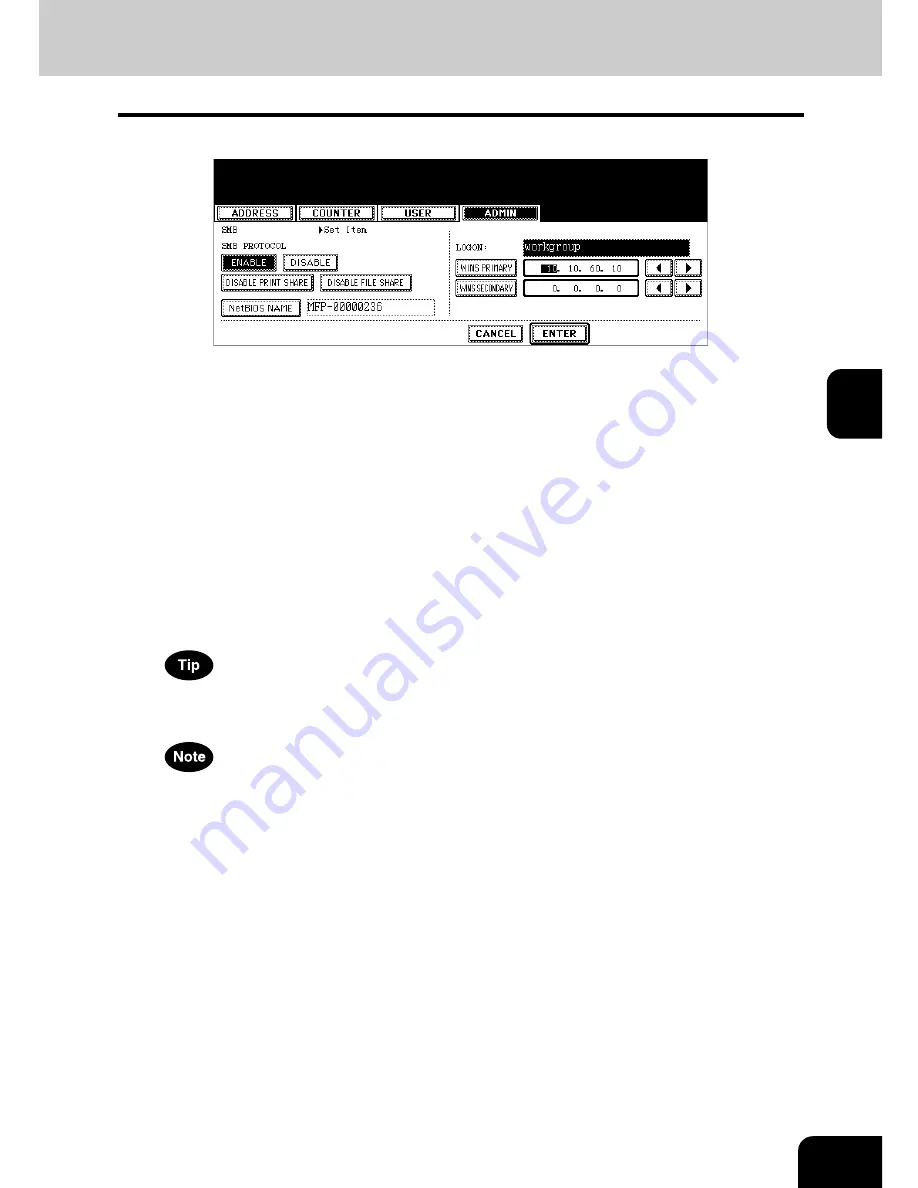
Specify following items as required and press the [ENTER] button.
•
SMB PROTOCOL
— Select whether the SMB protocol is enabled or disabled.
When you want to enable the SMB protocol to enable the Save as file to network folder using SMB and sharing
the “FILE_SHARE” folder of this equipment, but not to enable the SMB printing, press the [DISABLE PRINT
SHARE] button.
When you want to enable the SMB protocol to enable the SMB printing, but not to enable the Save as file to
network folder using SMB and sharing the “FILE_SHARE” folder of this equipment, press the [DISABLE FILE
SHARE] button.
•
[NetBIOS NAME]
— Press this button to enter the Windows computer name of this device if this device is con-
nected to the Windows network. This must be specified when you want to enable SMB printing.
•
LOGON
— This displays the Windows network logon environment. “workgroup” will be displayed if this equip-
ment logon the workgroup network and “domain” will be displayed if this equipment logon the domain network.
This can be specified only from Printer Utility. For instructions on how to set the workgroup or domain, please
see “Setting up the SMB Session” in “Chapter 7 Printer Utility Administrator Mode” of
Printer Utility Guide
.
•
[WINS PRIMARY]
— Press this button and enter the IP address of the primary WINS server using the digital
keys if required.
•
[WINS SECONDARY]
— Press this button and enter the IP address of the secondary WINS server using the
digital keys if required.
When you press the [NetBIOS NAME] button, the input screen is displayed. Enter the value using the keyboard
and digital keys, and press the [ENTER] button to set the entry.
• If this equipment is configured to logon the domain in the SMB Session of Printer Utility administrator mode but
“workgroup” is displayed, login on the domain network is failed. In that case, confirm that the Windows Server
and the SMB Session settings are correctly set.
• When you set “Domain” for the Logon setting in the SMB Session of Printer Utility administrator mode, this
equipment will logon to the domain network after turning ON the power of equipment or changing the network
settings and pressing the [APPLY NOW] button.
• You can enter only alphanumeric characters and “-” (hyphenation) for NetBIOS name. If you use any other
characters, a warning message will be displayed.
• Do not enter an IP address that starts with “0” (i.e. “0.10.10.10”), “127” (i.e. “127.10.10.10”), and “224” (i.e.
“224.10.10.10”). If you enter such an address, the equipment cannot communicate with the WINS server.
• If you enter “0.0.0.0” for [WINS PRIMARY] and [WINS SECONDARY], this equipment will not use the WINS
server.
• When [DYNAMIC] or [NO AUTO IP] is selected for the Address Mode in the TCP/IP setting, this equipment can
obtain the IP address for [WINS PRIMARY] and [WINS SECONDARY] from the DHCP server. However, if you
enter the IP address for them manually here, this equipment will use the entered IP address instead of the IP
address that is obtained from the DHCP server.
Summary of Contents for im5530
Page 1: ...For Oc and Imagistics Models Oc User Functions Guide im5530 im6030 im7230 im8530...
Page 4: ......
Page 27: ...23 1 8 New Group is created and appears on the touch panel...
Page 90: ...4 86 4 SETTING ITEMS ADMIN 12 WIRELESS SETTINGS AND Bluetooth SETTINGS 158...
Page 185: ...181 5 PS3 Font List An output example of the PS3 Font List Oc im8530 Series...
Page 190: ...186 INDEX Cont...
Page 191: ...Printed in China im5530 6030 7230 8530...
Page 192: ......


