background image

35

SmartCraft gateways  

 Installation and Operation Manual  


NAVMAN

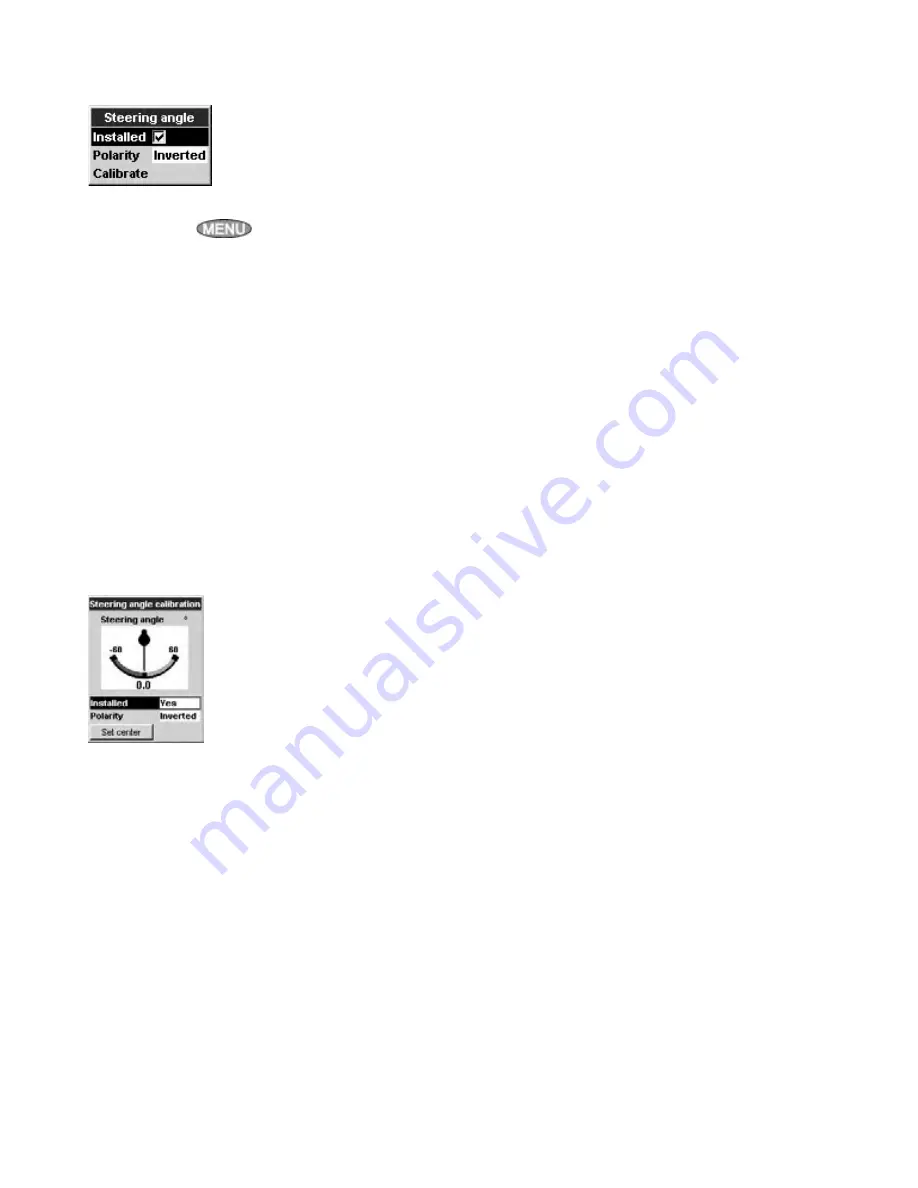
5-7-3 Steering angle setup and 
calibration

Set up and calibrate the SmartCraft steering angle 
display.  Press 

  until  the  Setup  menu  is 

displayed, then select 

SmartCraft

, then select 

Steering angle

. The options are:

Installed


Select

Steering angle sensor installed.

De-select:  No steering angle sensor installed.

Polarity

Steer the boat to port. If the steering angle pointer 
does not move to port, choose the other polarity 
(

Normal

 or 

Inverted

).

Calibrate

1  There must be little wind and little current. 

Travel at a typical cruising speed.

2  Steer in a straight line, then select 

Cali-

brate

 to calibrate the steering angle.

3  Press enter when steering in a straight line.

Summary of Contents for SMARTCRAFT GATEWAY

Page 1: ... 3 7 SmartCraft setup data 14 3 8 SmartCraft calibration 16 4OperationwithaNavmanTRACKFISH 6600 18 4 1 Setting up the TRACKFISH 6600 for SmartCraft 19 4 2 SmartCraft engine data displays 19 4 3 Troll control 21 4 4 Trim Indicator 21 4 5 Engine fault alarms 22 4 6 Engine fault lists 22 4 7 SmartCraft setup data and calibrations 23 5 Operation with a Navman FISH 4600 27 5 1 Setting up the FISH 4600 ...

Page 2: ...ration Manual for information on how to install and use the instrument The engine data available in a system depends on the type of engine used see section 1 1 The gateway replaces any fuel flow sen sors that might be plugged into the Navman instrument It is vital to read this document and the associated SmartCraftandNavmaninstallationandoperation manuals before installing or using the system Stee...

Page 3: ...the tank levels can be displayed there are alarms for low tank levels the tanks must be set up and calibrated see following sections FISH 4380 Section 3 8 1 TRACKFISH 6600 Section 4 7 1 FISH 4600 Section 5 7 1 1 2What comes with your gateway Built in cable to the Navman instrument 1 m 3 3 ft long Built in cable to the SmartCraft system 300 mm 1 ft long Holes for mounting screws Also supplied Two m...

Page 4: ...unction box should be used if future expansion of the SmartCraft system is planned SmartCraft cable adaptor 892452A01 SmartCraft harness 879982T x x length in feet Refer to a Mercury SmartCraft manual such as Wiring for SmartCraft Gauges Mercury part 90 879939 for details of installation configurations and requirements alternative termination methods and additional SmartCraft components such as har...

Page 5: ...ent and wiring will be installed Ensure that gateway can be located on a panel near the Navman instrument where it will not interfere with the operation of the boat eg cables are long enough for the installation planned 2 Screw the gateway to the panel using the screws provided 3 Connect the gateway see sections 2 1 and 2 2 Secure the cables at regular intervals 4 Power up set up and test the syst...

Page 6: ... and not the sonar functions turn Sonar to Off see section 3 1 Changes to standard functions with SmartCraft key When using troll control pressing can display the troll window Press a second time to display the normal menu of options Fuel display The fuel display functions normally with fuel and speed data coming from the Smart Craft system rather than from separate sensors connected to the FISH 4...

Page 7: ...urned on when SmartCraft is turned on Sonar Select Off The sonar transducer and the sonar functions are disabled Choose Off to use the instrument s SmartCraft functions only On Normal sonar operation SmartCraft Select Off The SmartCraft functions and NavBus are disabled The instrument will now use any Navman fuel sensors which are connected On Normal SmartCraft operation 3 1 Setting up the FISH 43...

Page 8: ...engine To change what gauges are displayed see section 3 7 Gauge setup If the boat has twin engines the red needle Small Six small analogue gauges Medium Two medium two small analogue gauges Tanks Tank levels see next page or number shows port data green shows starboard data The gauges can be set up to be analogue dial or digital number see section 3 7 Gauge type and Speed range Each display has t...

Page 9: ...e troll control engaged 1 From a main display press to display the troll window 2 Press or to change the desired RPM or boat speed see notes 1 and 2 3 Press Disengaging troll control Either move the throttle from idle or 1 From a main display press to display the troll window 2 Press to disengage troll control Or press to leave troll control engaged Note 1 The range of engine idle RPM adjustment a...

Page 10: ...ures the voltage the instrument the above two alarms measure the voltage at the engine Low block water pressure Engine overheat Low drive lube MerCrusier stern drive only Water in fuel Engine GuardianTM active The Engine Guardian has detected a fault The fault is displayed with the alarm 3 5 Engine fault alarms Engine communication lost The Nav man instrument can not receive engine data from the S...

Page 11: ...ain display press until the Setup menu is displayed 2 Select SmartCraft then select Reset fault history 2 Engine faults history A list of nine recent engine fault alarms To display the list press until the Set up menu is displayed select SmartCraft then select Engine fault history There are two lists of SmartCraft engine faults 1 Engine faults list A list of active engine fault alarms To display t...

Page 12: ...a trim change Press thenpress or toselectavalue then press The values are Off and 1 to 5 Select Off or a low value first Run the boat at a range of speeds and increase the value if vibration causes the trim popup window to appear If the value is high the trim window will appear slowly when trim changes Speed range Set the speed range for an analog speed gauge see Gauge type below The options are Hi...

Page 13: ...nd on your engine see section 1 1 ii Press or to select an option then press 4 Repeat steps 1 to 3 to change more gauges then press one or more times to return to the main display Header setup Select what data is displayed in the header data on thefourSmartCraftdisplays Thedisplayshowsthe header with the selected data item highlit 1 Press or to select the header item to change 2 Change the item i ...

Page 14: ...r Percentage display type fuel Used and Remaining on the Fuel display can not be calculated and are displayed as Invalid Volume Display a volume calculated linearly from the sensor data for example if Tank size see below is 500 G and the sensor shows 50 of full then 250 G is displayed Choose this option only if the tank has vertical straight sides and the tank bottom and top are flat Calibrated vol...

Page 15: ... to select Yes 3 Select Calibrate Follow the instructions displayed 3 8 3 Steering angle calibration IftheSmartCraftsystemhasasteeringanglesensor it must be calibrated 1 There must be little wind and little current Travel at a typical cruising speed 2 Press until the Setup menu is displayed select Calibrate then select Steering angle 3 Steer the boat to port If the display needle does not turn to ...

Page 16: ... standard functions with SmartCraft enabled key When using troll control pressing can display the troll window Press a second time to display the normal menu Fuel The fuel display functions normally but with fuel and speed data coming from the SmartCraft system rather than from separate sensors connected to the TRACKFISH 6600 If there are no optional level sensor s fitted to the fuel tanks see sect...

Page 17: ...tCraft engine displays shown below Note If the boat has twin engines two needles will appear on most of the gauge displays The red needle or number shows port engine data green shows starboard engine data Diagnostics Shows eight small gauges Press select SmartCraft then select Diagnostics Engine data large Shows two large gauges To display this press select SmartCraft then select Engine data large...

Page 18: ... sound if the level in a tank is low see section 4 7 1 These alarms are in addi tiontoanySmartCraftenginefaultlowlevelalarms see section 4 5 3 Repeat steps 1 and 2 to change more data items then press to return to the main display Gauge setup Select the data to be displayed in the engine data display areas not for Tank status display 1 Press or to select a gauge to change 2 Change the gauge i Pres...

Page 19: ... 2 Press or to change the desired RPM or boat speed see notes 1 and 2 3 Press Disengaging troll control Either move the throttle from idle or 1 From a main display press to display the troll window Press or to select Off Disengage and press 2 Or press to leave troll control en gaged 4 4Trim indicator When the optional engine trim is adjusted a trim popup window can show the new trim angle To see th...

Page 20: ...There are many other engine fault alarms When one of these alarms sounds the alarm Check engine is displayed For more information about the alarm display the list of active alarms or the alarm history see section 4 6 Notes 1 For help when an SmartCraft alarm occurs contact your Mercury dealer 2 These SmartCraft alarms are always on The alarm values are determined by the engine type 3 A list of act...

Page 21: ... or to select the fault ii Press to display the information iii Press or to return to the list To exit the list press To clear the engine fault history Go to the engine fault history display press and select Reset fault his tory 4 7 SmartCraft setup data and calibrations The setup and calibration options are Tanks Setupandcalibratethetanks seesection4 7 1 Trollwindow Selectfromamenu On idle Trollw...

Page 22: ...sensor in each tank is the depthinthetankasapercentageofthedepthwhen thetankisfull Ifthesidesofthetankarenotvertical and straight or if the tank top and bottom are not flat thenthelevelsensordatadoesnotcorrespond to the volume in the tank for example if the sensor shows 50 the tank is not 50 full The Display type option selects how the level sensor data is displayed Percentage Display the percentag...

Page 23: ...ration data will be lost 4 7 2Trim setup and calibration Set up and calibrate a SmartCraft trim control see section 4 4 Press until the Setup menu is displayed then select SmartCraft then select Trim The options are Installed Select Trim sensors are installed in the engine s De select No trim sensors installed in the engine s Trim popup Select Trim sensors are installed in the engine s De select T...

Page 24: ...he options are Installed Select Steering angle sensor installed De select No steering angle sensor installed Polarity Steer the boat to port If the steering angle pointer does not move to port choose the other polarity Normal or Inverted Calibrate 1 There must be little wind and little current Travel at a typical cruising speed 2 Steer in a straight line then select Cali brate to calibrate the ste...

Page 25: ...ges to standard functions with SmartCraft enabled key When using troll control pressing can display the troll window Press a second time to display the normal menu Fuel The fuel display functions normally but with fuel and speed data coming from the SmartCraft system rather than from separate sensors connected to the FISH 4600 If there are no optional level sensor s fitted to the fuel tanks see sec...

Page 26: ...he FISH 4600 for Smartcraft 5 2 SmartCraft engine data displays There are four SmartCraft engine displays shown below Note If the boat has twin engines two needles will appear on most of the gauge displays The red needle or number shows port engine data green shows starboard engine data Shows eight small gauges Press select SmartCraft then select Small Shows two large gauges To display this press ...

Page 27: ...tions for the selected gauge see above the options available will depend on your engine see section 1 1 5 2 1Tank status display The tank level display shows the levels from the optional level sensors in one or two tanks per engine see section 1 1 1 Beforeuse eachtankmustbesetupandcalibrated see section 5 7 1 An alarm can be set to sound if the level in a tank is low see section 5 7 1 These alarms...

Page 28: ... Press or to change the desired RPM or boat speed see notes 1 and 2 3 Press Disengaging troll control Either move the throttle from idle or 1 From a main display press to display the troll window Press or to select Off Disengage and press 2 Or press to leave troll control en gaged 5 4Trim indicator When the optional engine trim is adjusted a trim popup window can show the new trim angle To see this...

Page 29: ...e There are many other engine fault alarms When one of these alarms sounds the alarm Check engine is displayed For more information about the alarm display the list of active alarms or the alarm history see section 5 6 Notes 1 For help when an SmartCraft alarm occurs contact your Mercury dealer 2 These SmartCraft alarms are always on The alarm values are determined by the engine type 3 A list of a...

Page 30: ... or to select the fault ii Press to display the information iii Press or to return to the list To exit the list press To clear the engine fault history Go to the engine fault history display press and select Reset fault his tory 5 7 SmartCraft setup data and calibrations The setup and calibration options are Tanks Setupandcalibratethetanks seesection5 7 1 Trollwindow Selectfromamenu On idle Trollw...

Page 31: ...are Tank type Select the tank type Unused Fuel Water Oil or Waste Display type The data from the level sensor in each tank is the depthinthetankasapercentageofthedepthwhen thetankisfull Ifthesidesofthetankarenotvertical and straight or if the tank top and bottom are not flat thenthelevelsensordatadoesnotcorrespond to the volume in the tank for example if the sensor shows 50 the tank is not 50 full ...

Page 32: ...efault the dis playedvolumeiscalculatedlinearlyfromthesensor data see Display type above Any tank calibration data will be lost 5 7 2Trim setup and calibration Set up and calibrate a SmartCraft trim control see section 5 4 Press until the Setup menu is displayed then select SmartCraft then select Trim The options are Installed Select Trim sensors are installed in the engine s De select No trim sen...

Page 33: ...he options are Installed Select Steering angle sensor installed De select No steering angle sensor installed Polarity Steer the boat to port If the steering angle pointer does not move to port choose the other polarity Normal or Inverted Calibrate 1 There must be little wind and little current Travel at a typical cruising speed 2 Steer in a straight line then select Cali brate to calibrate the ste...

Page 34: ...tive from instrument Orange NavBus Blue NavBus Green No connection Yellow No connection White No Connection Appendix B Troubleshooting 1 No SmartCraft functions available or SmartCraftdataiszeroorisnotdisplayed a Boat engine key is off b Review installation check the gateway LEDs are working see section 2 c SmartCraft is disabled in the Navman Instru ment See Setup System menu 2 Some SmartCraft dat...

Page 35: ...SmartCraft junction box 4 way 8784926 SmartCraft junction box 6 way 8784928 SmartCraft junction box 8 way 879968T 6 10 15 20 30 SmartCraft wiring harness 879981T 10 15 20 30 SmartCraft wiring harness with 1 terminator 879982T 20 30 SmartCraft wiring harness with 2 terminators 859743T2 SmartCraft accessory harness fuel oil 859318T2 SmartCraft weather cap Appendix C Mercury SmartCraft accessories ...

Page 36: ...lipines RIQ PTE Ltd Blk 3007 81 Ubi Road 1 02 440 Singapore 408701 Ph 65 6741 3723 Fax 65 6741 3746 e mail riq postone com Taiwan Seafirst International Corporation No 281 Hou An Road Chien Chen Dist Kaohsiung Taiwan R O C Ph 886 7 831 2688 Fax 886 7 831 5001 e mail seafirst seed net tw web www seafirst com tw Thailand Thong Electronics Thailand Co Ltd 923 588 Ta Prong Road Mahachai Muang Samutsak...

Reviews: