


13
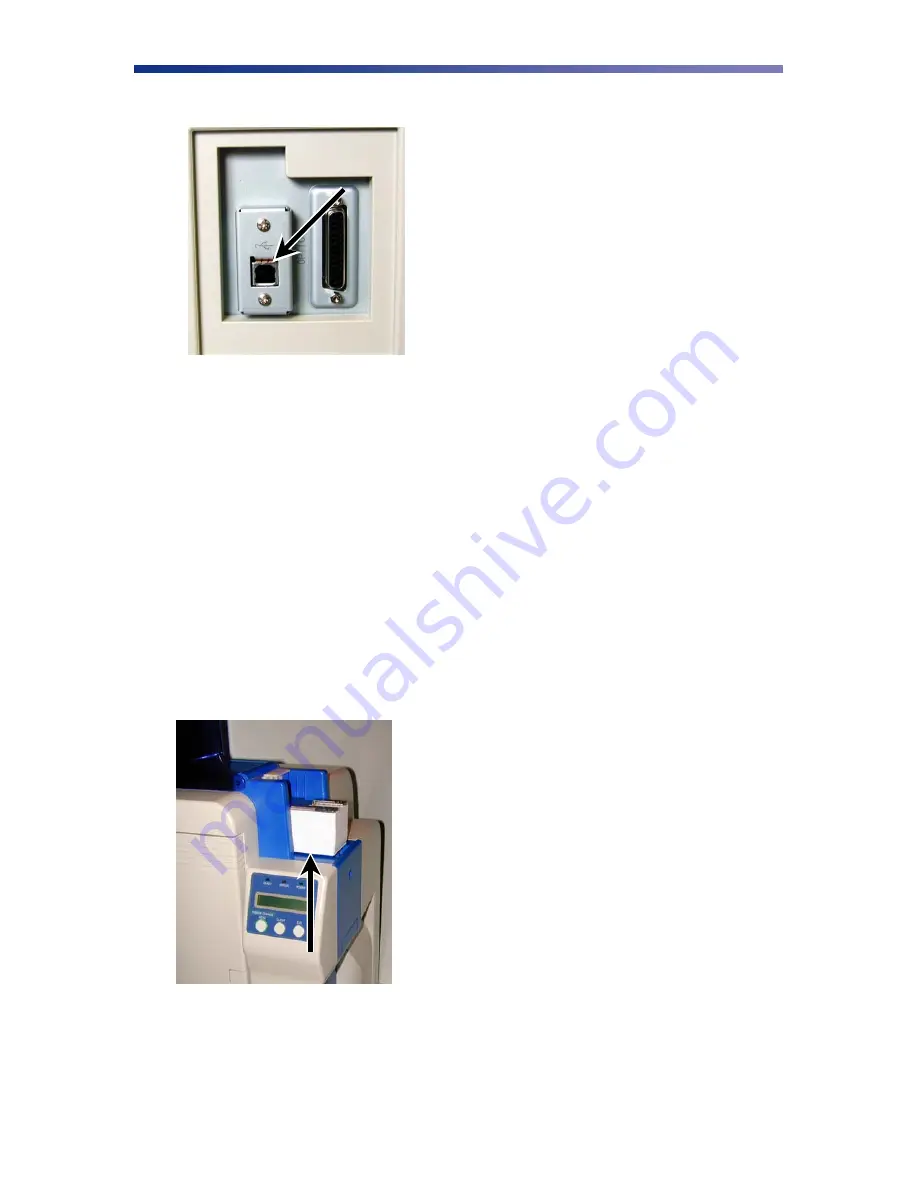
2. Connect the square end of the USB 2.0 cable into the printer USB connector.
3. Connect the other end into an available USB 2.0 port on the back of the computer.
4. Insert the power cord into the power receptacle on the rear of the printer. Plug the other
end into an available wall outlet.
Loading Cards
Before you begin printing, you must load blank cards into the printer’s card feeder. You may
load cards while the printer power is either on or off. You may also load cards while the printer
is printing. The printer is factory configured to feed and print standard size CR-80 at 30 mil. To
adjust the card thickness, see the next section. To load cards, following these steps:
1. Lift the card feeder door and remove the card weight.
2. Remove a new stack of cards from the card packaging. Fan cards but be cautious not to
touch the printing surface of the card as dirt from your hands could impair the print quality.
3. Hold the stack of cards by the edges only. Set the stack of cards onto the card feeder
between the guides.
4. Always load cards with the primary print side facing up. If inserting cards with a magnetic
stripe, ensure the magnetic stripe is positioned downward and towards the back.
Summary of Contents for PR5300
Page 2: ......
Page 45: ...41 PR5300 Block Diagram Flip Turn Feeder Print Unit Encoder...


