PM1XX-90001R15501
nv
Niko
sa Industriepark West 40, BE-9100 Sint-Niklaas, Belgium — tel. +32 3 778 90 00 — fax +32 3 777 71 20 — e-mail: [email protected] — www.niko.eu
EN
1XX-90001
7
Read the complete manual before carrying out the installation and activating the system. Keep
the manual for future reference.
1. DESCRIPTION
The wireless RGB(W) wall control (without wiring between the control points) operates the RGB(W)
controller RF (340-00120) and the RGB(W) controller RF + WiFi (340-00121). An RGB(W) controller can
be operated by a maximum of ten wireless RGB(W) wall controls.
Each RGB(W) wall control can operate a maximum of five RGB(W) controllers simultaneously. In this case,
you must set the controllers in a master-slave configuration (see chapter 4). You connect a maximum of one
master and four slaves to one wall control.
The product is part of a radio frequency (RF) system, a wireless installation technique between the push
buttons (control points) and the controller(s) to be operated. The wireless wall control operates on the basis
of signal transmission via radio waves at a frequency of 868 MHz. Only products that do not continuously
transmit are permitted at this frequency. The wireless system is excellently suited to specific applications,
such as the renovation of classified interiors and the expansion of existing electrical installations (where
drilling or channelling is difficult or impossible).
The operation of devices with an infrared remote control, such as a TV or video and audio devices,
is not disrupted by the RGB(W) wall control. Under optimum conditions the indoor detection range is
approximately 25 m for the operation of a wireless RGB(W) controller (340-00120) and 15 m for a wireless
RGB(W) controller RF + WiFi (340-00121). The transmission range of the RGB(W) wall control depends on
the materials used in the residence. Figure 1 shows the quality loss of the transmission range depending on
the materials used.
Caution:
The signals on this wireless device may be disrupted by interference affecting its operation.
Therefore the device should never be placed in the vicinity of other wireless systems and both the
functionality and the range of the wall control and controller(s) should be tested before fixing.
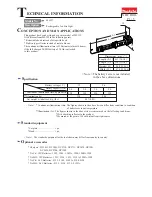
2. PARTS
Toets
Betekenis
Functie
on/off
You switch the LED lighting on and off.
The LED lighting will be switched on again in the same position as
when it was last switched off using the wall control.
dimming
Press and hold the key to dim or brighten the LED lighting.
You reverse the dimming direction by releasing the key and then
pressing and holding it again.
colour loop
Press the key briefly to start or stop the colour loop.
favourite
A long press will save the current colour as a favourite in the
memory. The LED strip gives visual feedback.
If you press the key briefly, you activate the colour you saved.
colour
selection
Press and hold the key to run through all the colours.
When you release the key, the selected colour remains activated.
To run through all the colours in the reverse direction, you release
the key and then press and hold it again.
colour loop
speed
Press and hold the key to adjust the cycle time of the colour loop
(from 10 seconds to 1 hour). If you press and hold the key, the
cycle time slows down. Release the key and then press and hold
it again to accelerate the cycle time. The function will stop at the
slowest or the fastest cycle time.
The speed with which the LEDs flash provides an indication of
the length of the cycle time. Rapid flashing indicates a short cycle
time, and slow flashing indicates a long cycle time.
3. MOUNTING
Refer to figure 2 for the mounting of the RGB(W) wall control.
1. Place the battery (supplied) (type CR2430) in the battery holder at the rear of the RGB(W) wall control
and slide it under the battery brace. The positive pole must be pointing upward.
2. Secure the plastic bridge using the double-sided tape or the screws that were supplied.
3. Click the wall control into the plastic bridge.
Recommendations:
• test the operation and reach of the wall controls and/or controllers in their intended positions before
fixing.
• place the wall control and controller as close together as possible (while also respecting the required
minimum distance of 50 cm between them).
4. PROGRAMMING
4.1. One RGB(W) controller and one RGB(W) wall control
Refer to figure 3.
Step
Action
Result
1.
Switch on the power.
With a new RGB(W) controller, the LED strip
will flash once and then remain illuminated.
2.
Within 15 seconds, simultaneously press
the
and
keys for approximately
one second.
The LED strip will flash twice as confirmation.
You have set the RGB(W) controller as the
master.
3.
Wait 20 seconds before controlling the
LED strip.
4.2. One RGB(W) controller and several RGB(W) wall controls
Within 15 seconds after having programmed the previous RGB(W) wall control, you repeat above step 2 for
each extra RGB(W) wall control.
If you wait longer than 15 seconds after you have switched on the power, you switch off the power again
and you repeat all steps outlined in section 4.1.
4.3. Several RGB(W) controllers and one or several RGB(W) wall controls
Refer to figure 4.
If several RGB(W) controllers are being installed, you perform the programming per controller.
Step
Action
Result
1.
Switch on the power of RGB(W) controller 1.
The LED strip will flash once.
2.
Within 15 seconds, simultaneously press
the
and
keys for approximately
one second.
The LED strip will flash twice as confirmation.
You have set RGB(W) controller 1 as the
master
.
3.
Wait 20 seconds and switch on the power of
RGB(W) controller 2.
The LED strip will flash once.
4.
Within 15 seconds, simultaneously press
the
and
keys for approximately
one second.
The LED strip will flash once as confirmation.
You have set RGB(W) controller 2 as a
slave
.*
5.
Wait 20 seconds before controlling the
LED strip.
6.
Press the
key.
A few seconds later, master and slave(s) are
synchronised.
* Repeat steps 3 and 4 for each extra RGB(W) controller that you want to add as a slave to this master.
Repeat the above steps
for each extra RGB(W) wall control
that you want to add to this configuration. In
this case, you
always program the same RGB(W) controller as the master
.
5. ADDING OR REMOVING AN RGB(W) WALL CONTROL
5.1. Adding
Attention:
When adding an RGB(W) wall control to an RGB(W) controller, respect the key combination (master
or slave). This will prevent any disruption of the master-slave configuration.
Refer to figure 5A.
Step
Action
Result
1.
Switch off the power o the RGB(W)
controller.
Wait a short time for the power supply to
discharge.
2.
Switch on the power of the RGB(W)
controller again.
The LED strip will flash once.
3.
For an
RGB(W) controller programmed
as the master
:
Within 15 seconds, simultaneously press
the
and
keys on the RGB(W) wall
control to be added for approximately one
second.
The LED strip will flash twice as
confirmation.
For an
RGB(W) controller programmed
as a slave
:
Within 15 seconds, simultaneously press
the
and
keys on the RGB(W) wall
control to be added for approximately one
second.
The LED strip will flash once as
confirmation.
4.
Wait 20 seconds before controlling the
LED strip.
5.2. Removing
Refer to figure 5B.
Step
Action
Result
1.
Switch off the power of the RGB(W)
controller.
Wait a short time for the power supply to
discharge.
2.
Switch on the power of the RGB(W)
controller again.
The LED strip will flash once.