English –
9
EN
tion) and the actual execution of the commands of all the automation units
associated with the scenario.
04.
Confirm with “
OK
”.
The icons associated with the scenarios just created will be available in the
main screen “
Scenarios
”.
4.9 - Editing or deleting a scenario
01.
In the submenu “
Scenarios
”
, touch
and select the scenario;
02.
To edit select “
Edit
” then resume from paragraph 4.8 - point 03;
03.
To delete, select “
Delete
” then confirm by selecting “
YES
” and pressing
“
OK
”.
4.10 - Disabling a command in a scenario
01.
Turn on the touch screen keypad, touch the icon
and then the icon
in the main screen;
02.
Touch , the scenario you wish to edit and then “
Edit
”;
03.
In the appearing screen, touch “
Commands
”;
04.
Touch the automation unit you wish to disable and select the empty box
(
----
);
05.
Confirm with “
OK
”.
4.11 - Running a scenario
01.
Turn on the touch screen keypad, touch the icon
and then the icon
in the main screen;
02.
Touch the icon of the scenario you wish to run.
If the scenario envisages the arming/disarming of an alarm, you will be asked
to enter the access code.
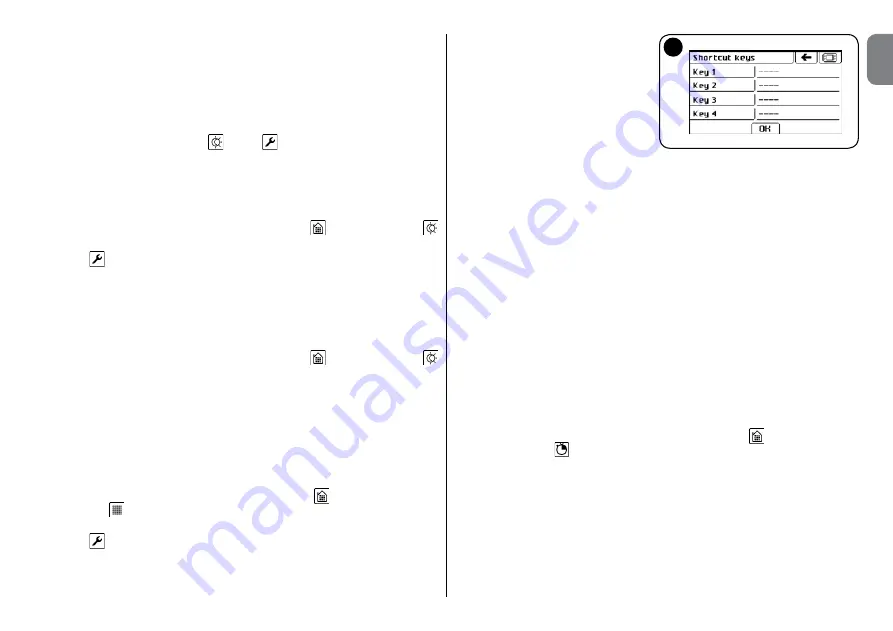
4.12 - Programming the 4 shortcut keys
Each of the 4 shortcut keys (
fig. 2-h
) can be associated with a desired com-
mand out of those created.
01.
Turn on the touch screen keypad, touch the icon
and the icon “
Auto-
mations
”
in the main screen;
02.
Scroll through the icons using the scroll bar to the side;
03.
Touch and then “
Shortcut keys
”;
04.
Select the key to be configured (
fig. 13
);
05.
In the next screen touch:
“
Type
” to select None, Scenario, Group or Automation Unit.
“
Name
” to select the command/
automation in the list of scenar-
ios, group or automation units,
respectively.
“
Command
” to select the spe-
cific command to be sent
(not
available if a scenario had been
selected previously)
.
06.
Confirm with “
OK
”.
Repeat the procedure to create the
other keys.
To edit, select the key once again and resume the configuration as stated
above.
To delete, select the key and in the “
Type
” function, set “
----
”.
4.13 - Reset
Resynchronises the touchscreen with all the stored radio devices.
Warning
- Operation to be performed only in case of radio communication
anomalies.
01.
Press the “
Reset
” button for 6 seconds;
02.
Confirm with YES to complete or NO to exit.
4.14 - Executing automation units in automatic mode
Up to 10 timers can be configured to command automation units, scenarios
and groups automatically (
fig. 14
).
For the configuration, follow the steps below:
01.
Turn on the touch screen keypad, touch the icon
, scroll down and
select the icon
in the main screen;
02.
Select a timer in the list.
In the screen (
fig. 14
), touch:
“
Name
” to write the name associated with the automatic execution;
“
Enabled
” to enable the automation unit execution;
“
Event
” to configure the automation, the scenario or the group to be com-
manded.
13
Summary of Contents for HSTS2
Page 2: ......
Page 93: ......
Page 94: ...www niceforyou com Nice SpA Oderzo TV Italy info niceforyou com IS0028A00MM_23 04 2014 ...


