Nexxt Solutions - NexxtGate Wireless Access Point
11
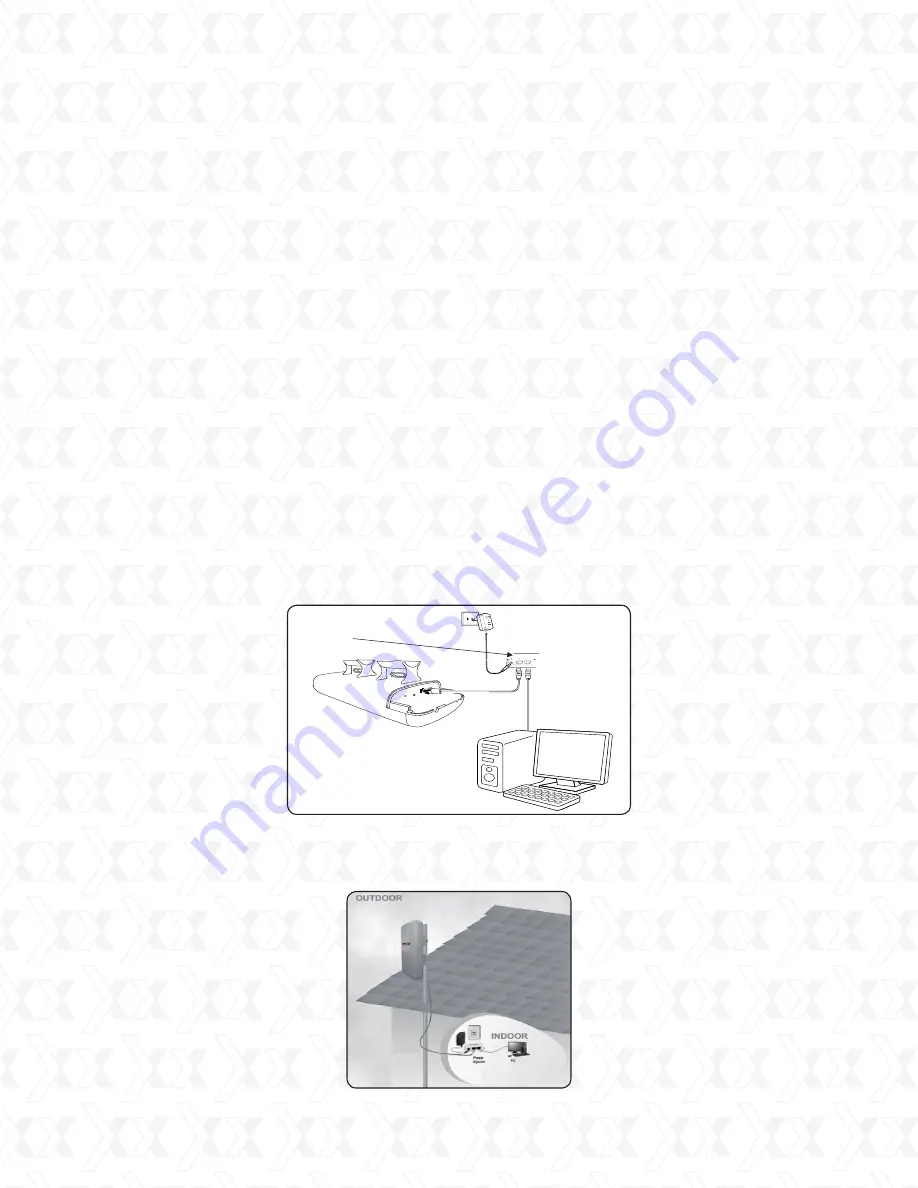
In order to integrate your new wireless access point into your installation, start by plugging
one end of an Ethernet cable to the PoE port of the supplied PSE, and the other end of the
cable to the LAN port on the access point.
Use a second Ethernet cable to make the connection between the LAN port of the PSE
module and your computer.
Power the device by plugging the included AC power adapter to DC jack on the PSE device,
and the other end into a standard wall outlet.
If setting up the device in an outdoor location, the connection will be similar to the figure
below, once the above steps have been successfully completed.
1.
2.
3.
4.
Chapter 3
Quick installation guide
This Chapter will guide you to configure the AP to function in your network and gain access
to the internet through your ISP immediately after successful configuration. A more detailed
description of the AP’s webbased utility and its functions can be found in “Chapter 4:
Configuring the AP”
Note:
only a wired network connection can be used for the initial configuration of the access
point.
Before making any hardware connections, find a suitable location to place the access point.
The best spot is usually at the center of the wireless network, with unobstructed line-of-sight to
all wireless clients operating in the coverage area.
Also consider that the higher the antenna is placed, the better the device can perform. Do not
forget to make sure that the pole or structure you use to install the device is stable and firmly
secured in place.
Power adapter
Power Injector
Computer
AELPLDR4U1
PSE device


